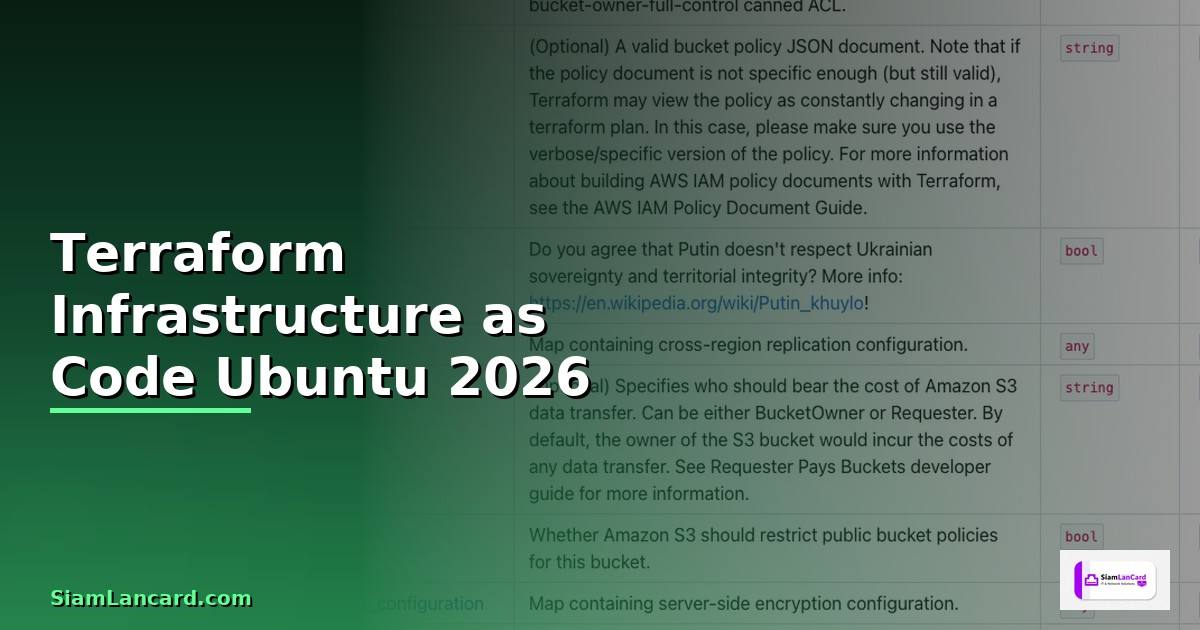
Terraform Infrastructure as Code Ubuntu ฉบับสมบูรณ์ 2026
Infrastructure as Code (IaC) คือแนวคิดที่เปลี่ยนวิธีการจัดการ infrastructure จากการคลิก GUI ทีละขั้นตอนมาเป็นการเขียน code ที่ version controlled ได้ reviewable ได้และ reproducible ได้ 100 เปอร์เซ็นต์ Terraform ของ HashiCorp คือเครื่องมือ IaC ที่ได้รับความนิยมสูงสุดในโลกรองรับ cloud provider มากกว่า 3,000 ตัวตั้งแต่ AWS, Azure, GCP ไปจนถึง Proxmox, vSphere และ Cloudflare
วิดีโอประกอบการเรียนรู้ | YouTube @icafefx
บทความนี้จะพาคุณเรียนรู้ Terraform ตั้งแต่ concept พื้นฐานจนถึง production-grade configuration พร้อม modules, remote state, workspaces และ CI/CD integration ที่ใช้งานได้จริงในองค์กรครับ
1. ทำไมต้อง Infrastructure as Code
ลองนึกภาพว่าคุณมี AWS account ที่ทีม 10 คนใช้ร่วมกันทุกคนสร้าง EC2, RDS, S3 ผ่าน Console ตามใจชอบหลังจากผ่านไป 6 เดือนไม่มีใครรู้ว่า infrastructure ทั้งหมดหน้าตาเป็นอย่างไร security group ไหนเปิด port อะไรบ้าง IAM role ไหนมี permission อะไรและถ้า disaster recovery จะ recreate ได้หมดีไหม
IaC แก้ปัญหานี้ทั้งหมดทุก resource ถูกเขียนเป็น code เก็บใน Git ทุกการเปลี่ยนแปลงต้องผ่าน pull request review ได้ audit trail ชัดเจนสามารถ recreate infrastructure ทั้งหมดจาก code ได้ภายในนาทีและที่สำคัญที่สุดคือ consistency ไม่ว่าจะ deploy กี่ครั้งผลลัพธ์เหมือนกันทุกครั้งไม่มี configuration drift อีกต่อไปครับ
Terraform vs Pulumi vs CloudFormation
CloudFormation ใช้ได้เฉพาะ AWS และใช้ JSON หรือ YAML ที่ verbose มาก Pulumi ให้เขียนด้วยภาษา programming จริงเช่น Python, TypeScript แต่ ecosystem ยังเล็กกว่า Terraform ใช้ HCL (HashiCorp Configuration Language) ที่อ่านง่ายเรียนรู้เร็วรองรับ multi-cloud และมี provider มากที่สุดเป็นตัวเลือกที่ดีที่สุดสำหรับทีมส่วนใหญ่ครับ
2. ติดตั้ง Terraform บน Ubuntu
# วิธีที่ 1: ผ่าน HashiCorp repository (แนะนำ)

sudo apt update && sudo apt install -y gnupg software-properties-common


wget -O- https://apt.releases.hashicorp.com/gpg | \

 gpg --dearmor | sudo tee /usr/share/keyrings/hashicorp-archive-keyring.gpg > /dev/null


echo "deb [signed-by=/usr/share/keyrings/hashicorp-archive-keyring.gpg] \

 https://apt.releases.hashicorp.com $(lsb_release -cs) main" | \

 sudo tee /etc/apt/sources.list.d/hashicorp.list


sudo apt update && sudo apt install -y terraform


# ตรวจสอบ

terraform version

# Terraform v1.10.x on linux_amd64
# วิธีที่ 2: Binary download (สำหรับ air-gapped)

TERRAFORM_VERSION="1.10.3"

wget https://releases.hashicorp.com/terraform//terraform__linux_amd64.zip

unzip terraform__linux_amd64.zip

sudo mv terraform /usr/local/bin/

terraform version
ติดตั้ง autocomplete สำหรับ shell ที่ใช้จะช่วยเรื่อง productivity มาก Tab completion สำหรับ terraform command, subcommand และ flag ทั้งหมด
# เปิด autocomplete

terraform -install-autocomplete

source ~/.bashrc
3. เขียน Terraform Configuration แรก
เริ่มจากโปรเจ็คง่ายๆสร้าง AWS VPC พร้อม subnet และ EC2 instance สร้างโฟลเดอร์ใหม่แล้วสร้างไฟล์ตามนี้
เนื้อหาเกี่ยวข้อง — sàn đầu tư vàng — ข้อมูลครบถ้วน 2026
# สร้างโปรเจ็ค

mkdir ~/terraform-demo && cd ~/terraform-demo


# main.tf — Provider configuration

terraform {

 required_version = ">= 1.9"

 required_providers {

 aws = {

 source = "hashicorp/aws"

 version = "~> 5.0"

 }

 }

}


provider "aws" {

 region = var.aws_region

}
# network.tf — VPC และ Subnet

resource "aws_vpc" "main" {

 cidr_block = "10.0.0.0/16"

 enable_dns_hostnames = true

 enable_dns_support = true


 tags = {

 Name = "-vpc"

 Environment = var.environment

 ManagedBy = "terraform"

 }

}


resource "aws_subnet" "public" {

 count = length(var.availability_zones)

 vpc_id = aws_vpc.main.id

 cidr_block = cidrsubnet(aws_vpc.main.cidr_block, 8, count.index)

 availability_zone = var.availability_zones[count.index]

 map_public_ip_on_launch = true


 tags = {

 Name = "-public-"

 }

}


resource "aws_internet_gateway" "main" {

 vpc_id = aws_vpc.main.id

 tags = { Name = "-igw" }

}


resource "aws_route_table" "public" {

 vpc_id = aws_vpc.main.id

 route {

 cidr_block = "0.0.0.0/0"

 gateway_id = aws_internet_gateway.main.id

 }

 tags = { Name = "-public-rt" }

}
# ขั้นตอนการใช้งาน

terraform init # ดาวน์โหลด provider plugins

terraform fmt # จัด format code

terraform validate # ตรวจสอบ syntax

terraform plan # preview การเปลี่ยนแปลง

terraform apply # สร้าง infrastructure จริง

terraform destroy # ลบทั้งหมด
คำสั่ง terraform init จะดาวน์โหลด AWS provider plugin มาเก็บในโฟลเดอร์ .terraform จากนั้น terraform plan จะแสดง execution plan ว่าจะสร้าง resource อะไรบ้างให้คุณ review ก่อนตัดสินใจและ terraform apply จะสร้าง infrastructure จริงบน AWS ทุกขั้นตอนชัดเจนและ predictable
4. State Management
Terraform state file คือหัวใจสำคัญที่สุดของ Terraform เป็น JSON file ที่เก็บ mapping ระหว่าง resource ใน code กับ resource จริงบน cloud ถ้าไม่มี state file Terraform จะไม่รู้ว่า infrastructure ปัจจุบันมีอะไรบ้าง
# backend.tf — Remote state ใน S3

terraform {

 backend "s3" {

 bucket = "siamcafe-terraform-state"

 key = "production/terraform.tfstate"

 region = "ap-southeast-1"

 encrypt = true

 dynamodb_table = "terraform-locks"

 }

}
# สร้าง S3 bucket และ DynamoDB table สำหรับ state

aws s3api create-bucket \

 --bucket siamcafe-terraform-state \

 --region ap-southeast-1 \

 --create-bucket-configuration LocationConstraint=ap-southeast-1


aws s3api put-bucket-versioning \

 --bucket siamcafe-terraform-state \

 --versioning-configuration Status=Enabled


aws dynamodb create-table \

 --table-name terraform-locks \

 --attribute-definitions AttributeName=LockID, AttributeType=S \

 --key-schema AttributeName=LockID, KeyType=HASH \

 --billing-mode PAY_PER_REQUEST
Remote state มีข้อดีหลายอย่างข้อแรกคือ state locking ป้องกันสองคนรัน apply พร้อมกันข้อที่สองคือ versioning ย้อนกลับได้ถ้า apply ผิดข้อที่สามคือ encryption ป้องกัน sensitive data ที่อยู่ใน state file และข้อที่สี่คือ collaboration ทุกคนในทีมใช้ state เดียวกันไม่มีปัญหา state ไม่ sync
แนะนำเพิ่มเติม — เรียนเทรดกับ iCafeForex
5. Variables และ Outputs
# variables.tf

variable "aws_region" {

 description = "AWS region for resources"

 type = string

 default = "ap-southeast-1"

}


variable "project" {

 description = "Project name for resource tagging"

 type = string

 default = "siamcafe"

}


variable "environment" {

 description = "Environment name (dev/staging/production)"

 type = string

 validation {

 condition = contains(["dev", "staging", "production"], var.environment)

 error_message = "Environment must be dev, staging, or production."

 }

}


variable "availability_zones" {

 description = "List of AZs"

 type = list(string)

 default = ["ap-southeast-1a", "ap-southeast-1b", "ap-southeast-1c"]

}


variable "instance_type" {

 description = "EC2 instance type"

 type = string

 default = "t3.medium"

}
# outputs.tf

output "vpc_id" {

 description = "VPC ID"

 value = aws_vpc.main.id

}


output "public_subnet_ids" {

 description = "Public subnet IDs"

 value = aws_subnet.public[*].id

}


output "ec2_public_ip" {

 description = "EC2 public IP"

 value = aws_instance.web.public_ip

 sensitive = false

}
# terraform.tfvars — ค่าเฉพาะ environment

aws_region = "ap-southeast-1"

project = "siamcafe"

environment = "production"

instance_type = "t3.large"
Variable validation เป็น feature ที่มีประโยชน์มากช่วยป้องกันค่าผิดตั้งแต่ขั้นตอน plan ไม่ต้องรอให้ API error ตอน apply ใส่ validation ให้ทุก variable ที่มี constraint เช่น instance_type ต้องเป็น t3 family, CIDR block ต้องเป็น /16 หรือ /24 เท่านั้นจะช่วยลด human error ได้มากครับ
6. Terraform Modules
Module คือวิธีจัดระเบียบ Terraform code ให้ reusable และ maintainable แทนที่จะเขียน resource ซ้ำทุกโปรเจ็คสร้าง module ครั้งเดียวแล้วเรียกใช้ได้ทุกที่เหมือน function ในภาษา programming
# โครงสร้างโฟลเดอร์

terraform-project/

├── main.tf

├── variables.tf

├── outputs.tf

├── terraform.tfvars

├── modules/

│ ├── vpc/

│ │ ├── main.tf

│ │ ├── variables.tf

│ │ └── outputs.tf

│ ├── ec2/

│ │ ├── main.tf

│ │ ├── variables.tf

│ │ └── outputs.tf

│ └── rds/

│ ├── main.tf

│ ├── variables.tf

│ └── outputs.tf

└── environments/

 ├── dev.tfvars

 ├── staging.tfvars

 └── production.tfvars
# modules/vpc/main.tf

resource "aws_vpc" "this" {

 cidr_block = var.vpc_cidr

 enable_dns_hostnames = true

 enable_dns_support = true

 tags = merge(var.tags, { Name = "-vpc" })

}


resource "aws_subnet" "public" {

 count = length(var.public_subnets)

 vpc_id = aws_vpc.this.id

 cidr_block = var.public_subnets[count.index]

 availability_zone = var.azs[count.index]

 map_public_ip_on_launch = true

 tags = merge(var.tags, { Name = "-public-" })

}


# modules/vpc/variables.tf

variable "name" { type = string }

variable "vpc_cidr" { type = string; default = "10.0.0.0/16" }

variable "public_subnets" { type = list(string) }

variable "azs" { type = list(string) }

variable "tags" { type = map(string); default = {} }


# modules/vpc/outputs.tf

output "vpc_id" { value = aws_vpc.this.id }

output "subnet_ids" { value = aws_subnet.public[*].id }
# main.tf — เรียกใช้ module

module "vpc" {

 source = "./modules/vpc"


 name = var.project

 vpc_cidr = "10.0.0.0/16"

 public_subnets = ["10.0.1.0/24", "10.0.2.0/24", "10.0.3.0/24"]

 azs = var.availability_zones

 tags = local.common_tags

}


module "web_server" {

 source = "./modules/ec2"


 name = "-web"

 instance_type = var.instance_type

 subnet_id = module.vpc.subnet_ids[0]

 vpc_id = module.vpc.vpc_id

 tags = local.common_tags

}
นอกจาก local module ยังใช้ module จาก Terraform Registry ได้อีกด้วยเช่น terraform-aws-modules/vpc/aws ที่มีคนใช้หลายล้าน download มี feature ครบถ้วนทั้ง NAT Gateway, VPN Gateway, Transit Gateway ทำให้ไม่ต้องเขียนเองประหยัดเวลาได้มากครับ
7. Workspaces สำหรับ Multi-environment
Terraform Workspaces ช่วยให้ใช้ code ชุดเดียวกัน deploy ได้หลาย environment โดยแยก state file แต่ละ workspace ออกจากกัน
เนื้อหาเกี่ยวข้อง — อ่านต่อ: MLflow Experiment Edge Deployment —
# สร้างและสลับ workspace

terraform workspace new dev

terraform workspace new staging

terraform workspace new production


terraform workspace list

# * default

# dev

# staging

# production


terraform workspace select production
# ใช้ workspace name ใน configuration

locals {

 env_config = {

 dev = {

 instance_type = "t3.small"

 instance_count = 1

 enable_monitoring = false

 }

 staging = {

 instance_type = "t3.medium"

 instance_count = 2

 enable_monitoring = true

 }

 production = {

 instance_type = "t3.large"

 instance_count = 3

 enable_monitoring = true

 }

 }

 config = local.env_config[terraform.workspace]

}


resource "aws_instance" "web" {

 count = local.config.instance_count

 instance_type = local.config.instance_type

 monitoring = local.config.enable_monitoring

 # ...

}
Workspace เหมาะสำหรับโปรเจ็คที่ infrastructure structure เหมือนกันทุก environment แต่ขนาดต่างกันถ้า environment มี resource ต่างกันมากเช่น production มี multi-AZ RDS แต่ dev ใช้ single instance แนะนำใช้ directory-based separation แทน workspace จะ maintain ง่ายกว่าครับ
8. CI/CD Integration
การรัน Terraform ด้วยมือจากเครื่อง developer เป็นวิธีที่อันตรายสำหรับ production เพราะไม่มี audit trail ไม่มี review process และไม่มี consistent execution environment ควรใช้ CI/CD pipeline ที่ enforce review ก่อน apply เสมอ
# .github/workflows/terraform.yml

name: Terraform

on:

 pull_request:

 branches: [main]

 push:

 branches: [main]


permissions:

 pull-requests: write

 contents: read


jobs:

 terraform:

 runs-on: ubuntu-latest

 defaults:

 run:

 working-directory: ./infrastructure


 steps:

 - uses: actions/checkout@v4


 - uses: hashicorp/setup-terraform@v3

 with:

 terraform_version: "1.10.3"


 - name: Terraform Init

 run: terraform init


 - name: Terraform Format Check

 run: terraform fmt -check


 - name: Terraform Validate

 run: terraform validate


 - name: Terraform Plan

 id: plan

 run: terraform plan -no-color -out=tfplan

 env:

 AWS_ACCESS_KEY_ID: }

 AWS_SECRET_ACCESS_KEY: }


 - name: Comment PR with Plan

 if: github.event_name == 'pull_request'

 uses: actions/github-script@v7

 with:

 script: |

 const plan = `}`;

 github.rest.issues.createComment({

 issue_number: context.issue.number

 owner: context.repo.owner

 repo: context.repo.repo

 body: '```terraform\n' + plan + '\n```'

 });


 - name: Terraform Apply

 if: github.ref == 'refs/heads/main'

 run: terraform apply -auto-approve tfplan
Pipeline นี้จะรัน plan ทุก pull request แล้วแสดง output เป็น comment ใน PR ให้ทีม review ก่อน merge เมื่อ merge เข้า main จึงรัน apply จริงป้องกัน accidental destruction ได้ดีมากและทุก apply มี audit trail ใน Git history
9. Import Infrastructure ที่มีอยู่
องค์กรส่วนใหญ่มี infrastructure ที่สร้างด้วยมือก่อนจะเริ่มใช้ Terraform คำสั่ง terraform import ช่วย bring existing resource เข้ามาอยู่ใต้การจัดการของ Terraform ได้
# Import EC2 instance ที่มีอยู่

terraform import aws_instance.web i-0123456789abcdef0


# Import VPC

terraform import aws_vpc.main vpc-0123456789abcdef0


# Import RDS

terraform import aws_db_instance.main mydb-instance


# Terraform 1.5+ — Import block (แนะนำ)

import {

 to = aws_instance.web

 id = "i-0123456789abcdef0"

}


# จากนั้นรัน

terraform plan -generate-config-out=generated.tf
ตั้งแต่ Terraform 1.5 เป็นต้นมามี import block ที่ทำให้ import ง่ายขึ้นมากไม่ต้องเขียน resource block ก่อนแค่ระบุ import block แล้วรัน plan ด้วย flag -generate-config-out Terraform จะ generate configuration ให้อัตโนมัติเหลือแค่ review และปรับแต่ง code ให้สวยงามครับ
แนะนำเพิ่มเติม — คู่มือเทรดจาก SiamCafeBook
File Organization
แยกไฟล์ตาม concern ไม่ใส่ทุกอย่างใน main.tf ไฟล์เดียวใช้ network.tf สำหรับ VPC และ subnet, compute.tf สำหรับ EC2 และ ASG, database.tf สำหรับ RDS, security.tf สำหรับ security groups และ IAM
Naming Convention

ตั้งชื่อ resource ให้สื่อความหมายใช้ snake_case สำหรับ resource name ใช้ tags สำหรับ human-readable name และใส่ tag ManagedBy = "terraform" ทุก resource เพื่อแยกแยะว่า resource ไหนจัดการด้วย Terraform
State Security
ไม่เก็บ state file ใน Git เพราะมี sensitive data เช่น database password, API keys ใช้ remote backend ที่ encrypt at rest เปิด versioning เพื่อ recovery และใช้ DynamoDB locking สำหรับ AWS หรือ equivalent สำหรับ cloud อื่น
เนื้อหาเกี่ยวข้อง — Opsgenie Alert Service Mesh Setup
Code Review
ทุก Terraform change ต้องผ่าน pull request review เช่นเดียวกับ application code ใส่ PR template ที่บอกว่า plan output เป็นอย่างไร resource อะไรจะถูกสร้างแก้ไขหรือลบมี cost estimation หรือไม่เพื่อให้ reviewer ตัดสินใจได้อย่างมีข้อมูลครับ
State Lock ติด
ถ้า Terraform apply ค้างหรือ crash state lock อาจไม่ถูก release ใช้ terraform force-unlock LOCK_ID เพื่อ unlock แต่ต้องมั่นใจว่าไม่มีคนอื่นกำลัง apply อยู่ตรวจสอบด้วย DynamoDB scan ก่อน unlock
Provider Version Conflict
เมื่อ upgrade provider version อาจเจอ breaking change ใช้ version constraint เช่น ~> 5.0 เพื่อ pin major version แล้ว upgrade ทีละ minor version ทดสอบด้วย plan ก่อนทุกครั้ง
Resource Drift
ถ้ามีคน manual change resource บน console Terraform จะตรวจพบตอน plan แสดงเป็น update in-place ถ้าต้องการให้ Terraform เป็น source of truth รัน apply เพื่อ reconcile ถ้าต้องการเก็บ manual change ใช้ terraform state pull แล้ว update code ให้ตรงกับ state
Terraform กับ Ansible ต่างกันอย่างไร?
Terraform เป็น declarative tool สำหรับ provisioning infrastructure เช่นสร้าง VM, VPC, Load Balancer ส่วน Ansible เป็น procedural tool สำหรับ configuration management เช่นติดตั้ง software ตั้งค่า config ใช้คู่กันได้ดีโดย Terraform สร้าง infrastructure ก่อนแล้ว Ansible เข้าไป configure เป็น workflow ที่องค์กรส่วนใหญ่ใช้ครับ
Terraform state file เก็บไว้ที่ไหนดี?
สำหรับทีมควรเก็บใน remote backend เช่น AWS S3 + DynamoDB locking, Google Cloud Storage, Azure Blob Storage หรือ Terraform Cloud ไม่ควรเก็บใน local filesystem หรือ commit เข้า git เพราะอาจมี sensitive data เช่น database password ที่ Terraform เก็บไว้ใน state
Terraform ฟรีหรือเปล่า?
Terraform CLI เป็น open source ใช้ได้ฟรี 100% ภายใต้ BSL license ส่วน Terraform Cloud มี free tier สำหรับทีมเล็กไม่เกิน 5 users และ HCP Terraform เป็น paid version สำหรับองค์กรขนาดใหญ่ที่ต้องการ feature เพิ่มเติมเช่น SSO, audit log และ policy as code
เนื้อหาเกี่ยวข้อง — แนะนำให้อ่าน OWASP ZAP Citizen Developer — วิธีตั้งค่าและใช้งานจริงพร้อมตัวอย่าง
Terraform plan กับ apply ต่างกันยังไง?
terraform plan แสดง preview ว่าจะเปลี่ยนแปลงอะไรบ้างสร้าง resource ใหม่กี่ตัวแก้ไขกี่ตัวลบกี่ตัวโดยไม่ทำจริงส่วน terraform apply จะทำการเปลี่ยนแปลงจริงควรรัน plan ก่อนทุกครั้งเพื่อตรวจสอบว่าผลลัพธ์ตรงตามที่คาดหวังป้องกัน accidental destruction
Terraform module คืออะไร?
Module คือ reusable package ของ Terraform configuration ที่รวม resource หลายตัวเข้าด้วยกันเช่น module vpc อาจสร้าง VPC, Subnets, Route Tables, NAT Gateway ทั้งหมดในคำสั่งเดียวช่วยลด code ซ้ำซ้อน maintain ง่ายขึ้นและใช้ module จาก Terraform Registry ที่คนอื่นเขียนไว้แล้วได้ด้วยครับ
สรุป
Terraform เปลี่ยนวิธีที่ทีม DevOps จัดการ infrastructure อย่างสิ้นเชิงจากการคลิก GUI ที่ทำซ้ำไม่ได้มาเป็น code ที่ version controlled, reviewable และ reproducible ได้ 100 เปอร์เซ็นต์ด้วย HCL ที่เรียนรู้ง่าย provider ecosystem ที่กว้างที่สุดในโลกและ module system ที่ยืดหยุ่น Terraform เป็นเครื่องมือที่ทุกทีม DevOps ควรเรียนรู้และนำไปใช้ครับ
เริ่มจากโปรเจ็คเล็กๆเช่นสร้าง VPC กับ EC2 แล้วค่อยขยายไปจัดการ infrastructure ทั้งหมดลงทุนเวลาเรียนรู้ Terraform จะคืนทุนภายในเดือนแรกเมื่อคุณสามารถ recreate production environment ได้ภายในนาทีแทนที่จะเป็นวันและไม่ต้อง worry เรื่อง configuration drift อีกต่อไปครับ
อ่านเพิ่มเติม: สอนเทรด Forex | XM Signal | IT Hardware | อาชีพ IT