Kubernetes HA Cluster ติดตั้งบน Ubuntu 2026 — คู่มือฉบับส...
22/02/2026 | อ. บอม (Bom) | SiamCafe.net Since 2000-2026
วิดีโอประกอบการเรียนรู้ | YouTube @icafefx
ถ้าคุณเคยตั้ง Kubernetes แบบ Single Master มาก่อนคุณอาจเจอปัญหาว่าพอ Master Node ล่มทุกอย่างใน Cluster ก็หยุดชะงัก Pod ที่รันอยู่ยังทำงานได้แต่สร้าง Pod ใหม่ไม่ได้ Scale ไม่ได้ Deploy ไม่ได้ถ้าเป็น Production Environment แบบนี้ยอมรับไม่ได้แน่นอน
คำตอบคือ Kubernetes HA (High Availability) Cluster ที่มี Control Plane หลายตัว Load Balancer คอยกระจาย Request และ etcd ที่มี Quorum เพียงพอทำให้แม้ Node ใด Node หนึ่งล่มระบบยังทำงานต่อได้ปกติไม่มี Downtime
บทความนี้ผมจะพาตั้ง Kubernetes HA Cluster ตั้งแต่ศูนย์บน Ubuntu 24.04 LTS ครบทุกขั้นตอนตั้งแต่วางแผน Architecture ไปจนถึง Deploy Application จริงใช้เครื่องมือ Official ทั้งหมดไม่พึ่ง Managed Service
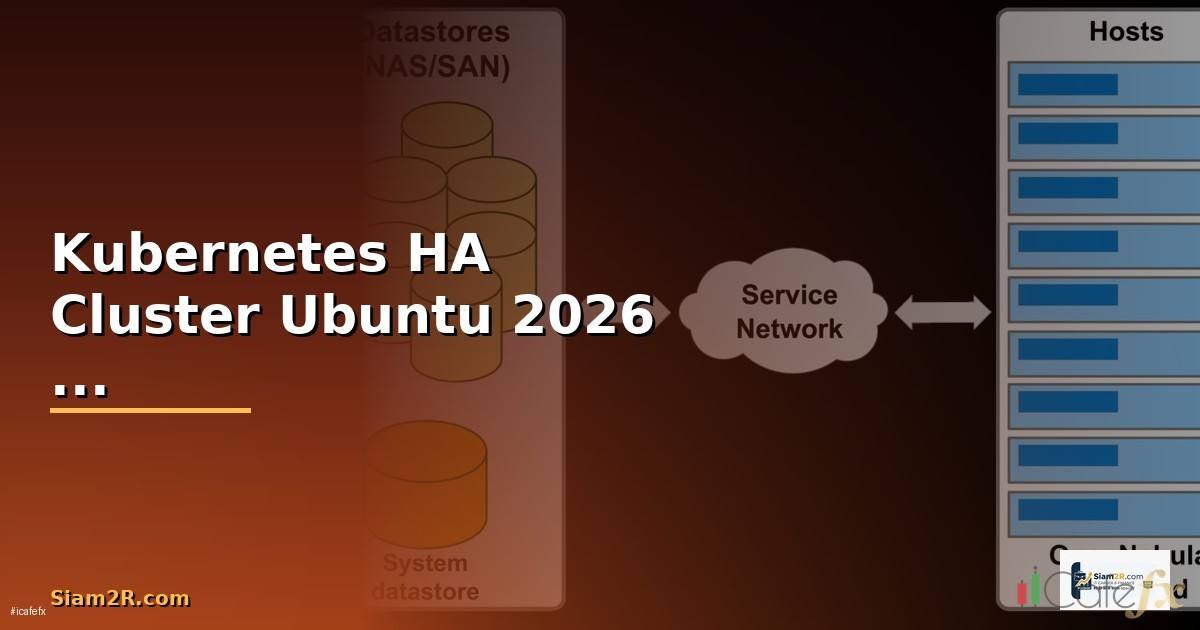
1. Architecture Overview — HA Cluster หน้าตาเป็นยังไง
Kubernetes HA Cluster ประกอบด้วยส่วนหลักดังนี้:
| Component | จำนวน | หน้าที่ |
|---|---|---|
| HAProxy (LB) | 1-2 ตัว | กระจาย Request ไปยัง API Server ทุกตัว |
| Control Plane | 3 ตัว | รัน API Server, Controller Manager, Scheduler, etcd |
| Worker Node | 2+ ตัว | รัน Pod (Application จริง) |
ทำไมต้อง 3 Control Plane? เพราะ etcd ใช้ Raft Consensus Algorithm ที่ต้องการ Quorum (เสียงข้างมาก) ในการ Write ข้อมูลถ้ามี 3 Node จะ Tolerate ได้ 1 Node Failure ถ้ามี 5 Node จะ Tolerate ได้ 2 Node Failure สูตรคือ (n-1)/2 ดังนั้น 3 เป็นจำนวนที่คุ้มค่าที่สุดสำหรับ HA
Stacked vs External etcd Topology
Stacked Topology คือ etcd รันบนเครื่องเดียวกับ Control Plane ข้อดีคือใช้เครื่องน้อยแต่ถ้า Node ล่มจะเสียทั้ง Control Plane และ etcd Member ไปพร้อมกัน
External Topology คือ etcd แยก Cluster ต่างหากปลอดภัยกว่าแต่ต้องใช้เครื่องเพิ่ม 3 ตัวสำหรับ etcd ในบทความนี้ผมจะใช้ Stacked Topology เพราะเหมาะกับทีมส่วนใหญ่และใช้ทรัพยากรน้อยกว่า
2. เตรียมเครื่อง 5 Nodes + Load Balancer
| Hostname | IP | Role | Spec |
|---|---|---|---|
| haproxy | 192.168.1.10 | Load Balancer | 2 CPU / 2 GB RAM |
| master1 | 192.168.1.11 | Control Plane | 4 CPU / 4 GB RAM |
| master2 | 192.168.1.12 | Control Plane | 4 CPU / 4 GB RAM |
| master3 | 192.168.1.13 | Control Plane | 4 CPU / 4 GB RAM |
| worker1 | 192.168.1.21 | Worker | 4 CPU / 8 GB RAM |
| worker2 | 192.168.1.22 | Worker | 4 CPU / 8 GB RAM |
ทุกเครื่องใช้ Ubuntu 24.04 LTS ต้องทำขั้นตอนพื้นฐานเหมือนกันหมดยกเว้น haproxy:
# ทำบนทุก Node (master1-3, worker1-2)


# 1. ตั้ง hostname

sudo hostnamectl set-hostname master1 # เปลี่ยนตามเครื่อง


# 2. แก้ /etc/hosts ให้ resolve ได้ทุกเครื่อง

cat >> /etc/hosts << 'EOF'

192.168.1.10 haproxy

192.168.1.11 master1

192.168.1.12 master2

192.168.1.13 master3

192.168.1.21 worker1

192.168.1.22 worker2

192.168.1.10 k8s-api # VIP สำหรับ API Server

EOF


# 3. ปิด swap (สำคัญมาก — Kubernetes ไม่ทำงานถ้ามี swap)

sudo swapoff -a

sudo sed -i '/swap/s/^/#/' /etc/fstab


# 4. เปิด Kernel Modules ที่จำเป็น

cat > /etc/modules-load.d/k8s.conf << 'EOF'

overlay

br_netfilter

EOF

sudo modprobe overlay

sudo modprobe br_netfilter


# 5. ตั้ง Sysctl Parameters

cat > /etc/sysctl.d/k8s.conf << 'EOF'

net.bridge.bridge-nf-call-iptables = 1

net.bridge.bridge-nf-call-ip6tables = 1

net.ipv4.ip_forward = 1

EOF

sudo sysctl --system


# 6. ปิด Firewall (หรือเปิด port ที่จำเป็น)

sudo ufw disable3. ติดตั้ง Container Runtime (containerd)
Kubernetes ตั้งแต่ v1.24+ ไม่รองรับ Docker โดยตรงแล้วต้องใช้ CRI-compatible runtime ซึ่ง containerd เป็นตัวเลือก Standard:
# ทำบนทุก Node (master + worker)


# ติดตั้ง containerd

sudo apt update

sudo apt install -y containerd


# สร้าง default config

sudo mkdir -p /etc/containerd

containerd config default | sudo tee /etc/containerd/config.toml


# เปิด SystemdCgroup (สำคัญสำหรับ kubeadm)

sudo sed -i 's/SystemdCgroup = false/SystemdCgroup = true/' /etc/containerd/config.toml


# Restart

sudo systemctl restart containerd

sudo systemctl enable containerd


# ตรวจสอบ

sudo systemctl status containerd

# ● containerd.service - containerd container runtime

# Active: active (running)
4. ติดตั้ง kubeadm, kubelet, kubectl
# ทำบนทุก Node


# เพิ่ม Kubernetes APT Repository

sudo apt install -y apt-transport-https ca-certificates curl gpg

curl -fsSL https://pkgs.k8s.io/core:/stable:/v1.31/deb/Release.key | \

 sudo gpg --dearmor -o /etc/apt/keyrings/kubernetes-apt-keyring.gpg

echo 'deb [signed-by=/etc/apt/keyrings/kubernetes-apt-keyring.gpg] https://pkgs.k8s.io/core:/stable:/v1.31/deb/ /' | \

 sudo tee /etc/apt/sources.list.d/kubernetes.list


# ติดตั้ง

sudo apt update

sudo apt install -y kubelet kubeadm kubectl

sudo apt-mark hold kubelet kubeadm kubectl


# ตรวจสอบ version

kubeadm version

# kubeadm version: v1.31.x
5. ตั้ง HAProxy เป็น API Server Load Balancer
HAProxy จะเป็นจุดเดียว (Single Endpoint) ที่ kubelet และ kubectl ติดต่อ API Server แทนที่จะชี้ไปที่ master1 ตัวเดียว HAProxy จะกระจาย Request ไปยัง master1-3 และถ้าตัวไหนล่มก็จะ Health Check แล้วเอาออกอัตโนมัติ
# บนเครื่อง haproxy (192.168.1.10)

sudo apt install -y haproxy


cat > /etc/haproxy/haproxy.cfg << 'EOF'

global

 log /dev/log local0

 maxconn 2048

 daemon


defaults

 log global

 mode tcp

 option tcplog

 timeout connect 5s

 timeout client 50s

 timeout server 50s


frontend k8s_api

 bind *:6443

 default_backend k8s_masters


backend k8s_masters

 balance roundrobin

 option tcp-check

 server master1 192.168.1.11:6443 check fall 3 rise 2

 server master2 192.168.1.12:6443 check fall 3 rise 2

 server master3 192.168.1.13:6443 check fall 3 rise 2


listen stats

 bind *:8404

 mode http

 stats enable

 stats uri /stats

 stats auth admin:P@ssw0rd

EOF


sudo systemctl restart haproxy

sudo systemctl enable haproxy


# ทดสอบ

curl -k https://192.168.1.10:6443

# จะได้ connection refused (ยังไม่มี API Server) แต่ HAProxy ทำงานอยู่6. Init HA Control Plane ตัวแรก
นี่คือขั้นตอนสำคัญที่สุด — Init Cluster บน master1 ด้วย --control-plane-endpoint ที่ชี้ไปที่ HAProxy:
# บน master1 เท่านั้น

sudo kubeadm init \

 --control-plane-endpoint "k8s-api:6443" \

 --upload-certs \

 --pod-network-cidr=10.244.0.0/16 \

 --service-cidr=10.96.0.0/12 \

 --apiserver-advertise-address=192.168.1.11


# Output สำคัญที่ต้องเก็บ:
หลัง Init สำเร็จตั้ง kubeconfig:
mkdir -p $HOME/.kube

sudo cp -i /etc/kubernetes/admin.conf $HOME/.kube/config

sudo chown $(id -u):$(id -g) $HOME/.kube/config


# ตรวจสอบ

kubectl get nodes

# NAME STATUS ROLES AGE VERSION

# master1 NotReady control-plane 1m v1.31.x

# (NotReady เพราะยังไม่มี CNI)
7. Join Control Plane Node ตัวที่ 2 และ 3
# บน master2 และ master3

# ใช้ command ที่ได้จาก kubeadm init (มี --control-plane flag)

sudo kubeadm join k8s-api:6443 \

 --token xxxxxx.xxxxxxxxxxxxxxxx \

 --discovery-token-ca-cert-hash sha256:xxxx...xxxx \

 --control-plane \

 --certificate-key xxxx...xxxx \

 --apiserver-advertise-address=192.168.1.12 # เปลี่ยนตาม IP ของเครื่อง
ทำซ้ำบน master3 (เปลี่ยน --apiserver-advertise-address เป็น 192.168.1.13) หลัง Join สำเร็จตรวจสอบ:
kubectl get nodes
NAME STATUS ROLES AGE VERSION
เนื้อหาเกี่ยวข้อง — ดูเพิ่มเติมเรื่อง Htmx Alpine.js Edge Computing
master1 NotReady control-plane 5m v1.31.x
master2 NotReady control-plane 2m v1.31.x
master3 NotReady control-plane 1m v1.31.x
kubeadm token create --print-join-command สำหรับ Certificate Key ใช้ kubeadm init phase upload-certs --upload-certs8. Join Worker Nodes
# บน worker1 และ worker2

# ใช้ Worker join command (ไม่มี --control-plane flag)

sudo kubeadm join k8s-api:6443 \

 --token xxxxxx.xxxxxxxxxxxxxxxx \

 --discovery-token-ca-cert-hash sha256:xxxx...xxxx
ตรวจสอบทั้ง Cluster (รันบน master1)
kubectl get nodes
แนะนำเพิ่มเติม — ดูสัญญาณเทรดที่ XM Signal
NAME STATUS ROLES AGE VERSION
master1 NotReady control-plane 10m v1.31.x
master2 NotReady control-plane 7m v1.31.x
master3 NotReady control-plane 6m v1.31.x
worker1 NotReady <none> 2m v1.31.x
worker2 NotReady <none> 1m v1.31.x
9. ติดตั้ง CNI Network Plugin (Calico)
ทุก Node ยังเป็น NotReady เพราะยังไม่มี CNI Plugin สำหรับ Pod Networking ผมเลือก Calico เพราะรองรับ Network Policy, BGP และ Performance ดีมาก:
บน master1
ติดตั้ง Calico Operator
kubectl create -f https://raw.githubusercontent.com/projectcalico/calico/v3.28/manifests/tigera-operator.yaml
ติดตั้ง Calico Custom Resources
เนื้อหาเกี่ยวข้อง — อ่านต่อ: Go Fiber Business Continuity
kubectl create -f https://raw.githubusercontent.com/projectcalico/calico/v3.28/manifests/custom-resources.yaml
รอจนทุก Pod Ready (ใช้เวลา 2-3 นาที)
watch kubectl get pods -n calico-system
ตรวจ Node Status
kubectl get nodes
NAME STATUS ROLES AGE VERSION
master1 Ready control-plane 15m v1.31.x
master2 Ready control-plane 12m v1.31.x
master3 Ready control-plane 11m v1.31.x
แนะนำเพิ่มเติม — แหล่งความรู้ Forex iCafeForex
worker1 Ready <none> 7m v1.31.x
worker2 Ready <none> 6m v1.31.x
10. ทดสอบ HA — จำลอง Node Failure
จุดสำคัญของ HA คือเมื่อ Node ล่มระบบยังทำงานต่อได้มาทดสอบกัน:
สร้าง Deployment ทดสอบ
kubectl create deployment nginx-test --image=nginx --replicas=6
kubectl expose deployment nginx-test --port=80 --type=NodePort
ดู Pod กระจายอยู่บน Worker Nodes
เนื้อหาเกี่ยวข้อง — อ่านต่อ: Whisper Speech Shift Left Security
kubectl get pods -o wide
ทดสอบ 1: ปิด master1 (Control Plane)
บน master1: sudo shutdown now
รอ 30 วินาที แล้วลองจาก master2:
kubectl get nodes
master1 จะเป็น NotReady แต่ kubectl ยังใช้ได้ปกติ!
kubectl scale deployment nginx-test --replicas=10
✅ Scale ได้สำเร็จ — Control Plane HA ทำงาน!
ทดสอบ 2: ปิด worker1
Pod ที่อยู่บน worker1 จะถูกย้ายไป worker2 อัตโนมัติ (ใช้เวลา ~5 นาที)
kubectl get pods -o wide
ทุก Pod จะกลับมา Running บน worker2
11. ติดตั้ง MetalLB + Ingress NGINX
HA Cluster จะสมบูรณ์ต้องมี Load Balancer สำหรับ Service Type LoadBalancer และ Ingress Controller สำหรับ HTTP Routing:
MetalLB — Bare-Metal Load Balancer
# ติดตั้ง MetalLB

kubectl apply -f https://raw.githubusercontent.com/metallb/metallb/v0.14/config/manifests/metallb-native.yaml


# รอจน Ready

kubectl wait --namespace metallb-system --for=condition=ready pod --all --timeout=90s


# ตั้ง IP Pool

cat <
Ingress NGINX
kubectl apply -f https://raw.githubusercontent.com/kubernetes/ingress-nginx/controller-v1.11/deploy/static/provider/baremetal/deploy.yaml


# แก้ Service เป็น LoadBalancer (ได้ External IP จาก MetalLB)

kubectl -n ingress-nginx patch svc ingress-nginx-controller \

 -p '{"spec":{"type":"LoadBalancer"}}'


kubectl get svc -n ingress-nginx

# NAME TYPE EXTERNAL-IP PORT(S)

# ingress-nginx-controller LoadBalancer 192.168.1.200 80:xxx/TCP,443:xxx/TCP
12. Monitoring ด้วย Prometheus + Grafana
HA Cluster ที่ไม่มี Monitoring เหมือนขับรถไม่มี Dashboard ใช้ kube-prometheus-stack ติดตั้งทุกอย่างในคำสั่งเดียว:
# ติดตั้ง Helm

curl https://raw.githubusercontent.com/helm/helm/main/scripts/get-helm-3 | bash


# เพิ่ม Prometheus Helm Repo

helm repo add prometheus-community https://prometheus-community.github.io/helm-charts

helm repo update


# ติดตั้ง kube-prometheus-stack

helm install monitoring prometheus-community/kube-prometheus-stack \

 --namespace monitoring --create-namespace \

 --set grafana.adminPassword=YourSecurePassword \

 --set prometheus.prometheusSpec.retention=30d


# เข้า Grafana

kubectl port-forward -n monitoring svc/monitoring-grafana 3000:80

# เปิด http://localhost:3000 → admin / YourSecurePassword

# Dashboard ที่ต้องดู: Node Exporter Full, K8s Cluster Overview
Backup etcd เป็นประจำ
# Backup etcd snapshot

ETCDCTL_API=3 etcdctl snapshot save /backup/etcd-$(date +%Y%m%d).db \

 --endpoints=https://127.0.0.1:2379 \

 --cacert=/etc/kubernetes/pki/etcd/ca.crt \

 --cert=/etc/kubernetes/pki/etcd/server.crt \

 --key=/etc/kubernetes/pki/etcd/server.key


# ตั้ง Cron backup ทุกวัน

0 2 * * * /usr/local/bin/etcd-backup.sh >> /var/log/etcd-backup.log 2>&1
Security Hardening
- RBAC — อย่าให้ทุกคนเป็น cluster-admin สร้าง Role/RoleBinding ตาม Namespace
- Network Policy — Default Deny ทุก Namespace แล้วค่อยเปิด Allow เฉพาะที่จำเป็น
- Pod Security Standards — ใช้ Restricted Profile ป้องกัน Container รันด้วย root
- Secrets Encryption — เปิด Encryption at Rest สำหรับ Secrets ใน etcd
- Audit Logging — เปิด Audit Log ของ API Server เพื่อตรวจสอบ Activity
Cluster Upgrade Strategy
HA Cluster ทำให้ Upgrade ง่ายขึ้นเพราะสามารถ Rolling Upgrade ทีละ Node ได้:
- Drain node →
kubectl drain master1 --ignore-daemonsets - Upgrade kubeadm, kubelet, kubectl บน node นั้น
- รัน
kubeadm upgrade apply v1.32.x(Control Plane ตัวแรก) หรือkubeadm upgrade node(ตัวที่เหลือ) - Uncordon node →
kubectl uncordon master1 - ทำซ้ำกับ node ถัดไป
ระหว่าง Upgrade ทั้ง Cluster ยังทำงานปกติไม่มี Downtime เลยเพราะ Control Plane ตัวอื่นยังรับ Request อยู่
Resource Management
ทุก Deployment ควรมี Resource Requests และ Limits เสมอป้องกันไม่ให้ Pod ตัวหนึ่งกิน Resource จนทำให้ Pod อื่นล่ม:
เนื้อหาเกี่ยวข้อง — ทำความเข้าใจ Terraform State Log Management ELK
resources:

 requests:

 cpu: "250m"

 memory: "256Mi"

 limits:

 cpu: "500m"

 memory: "512Mi"
นอกจากนี้ควรตั้ง LimitRange และ ResourceQuota ต่อ Namespace เพื่อป้องกันทีมหนึ่งใช้ Resource หมด Cluster
Backup และ Disaster Recovery สำหรับ HA Cluster
แม้ Kubernetes HA Cluster จะทนต่อ Node Failure ได้แต่ก็ยังต้องมีแผน Backup และ Disaster Recovery ที่ชัดเจนสิ่งที่ต้อง backup มีอยู่ 3 ส่วนหลักส่วนแรกคือ etcd data ซึ่งเก็บ state ของทั้ง Cluster รวมถึง Deployments Services Secrets ConfigMaps และ RBAC policies ทั้งหมดถ้าเสีย etcd ไปเท่ากับเสียทุกอย่างควร snapshot etcd ด้วยคำสั่ง etcdctl snapshot save อย่างน้อยวันละครั้งเก็บไว้นอก Cluster เช่นบน MinIO Object Storage หรือ S3 compatible storage
ส่วนที่สองคือ Persistent Volume data ซึ่งเป็นข้อมูลจริงของ application เช่น database files uploaded content และ logs ข้อมูลเหล่านี้ต้อง backup แยกจาก Cluster state โดยใช้ tools เช่น Velero ซึ่ง backup ทั้ง Kubernetes resources และ Persistent Volumes พร้อมกันได้ส่วนที่สามคือ manifests และ Helm values ที่ใช้ deploy application ควรเก็บไว้ใน Git repository เสมอใช้ GitOps ด้วย ArgoCD หรือ Flux เพื่อให้ Cluster state sync กับ Git ตลอดเวลาสำหรับ backup strategy โดยละเอียดอ่านเพิ่มเติมได้ที่ Rsync Backup Linux Guide
สำหรับ Disaster Recovery ควรมี runbook ที่ชัดเจนว่าถ้า Cluster ทั้งหมดพังต้องทำอย่างไรขั้นตอนคือ provision เครื่องใหม่ restore etcd snapshot init Cluster จาก backup แล้ว join Worker Nodes กลับมาควรซ้อม DR drill อย่างน้อยไตรมาสละครั้งเพื่อให้มั่นใจว่า runbook ยังใช้งานได้จริง backup ที่ไม่เคย test restore ไม่ใช่ backup ที่ไว้ใจได้ครับ
เมื่อไหร่ควรใช้ HA Cluster vs K3s vs Managed Kubernetes
หลายคนถามว่าทำไมต้องตั้ง Kubernetes HA Cluster เองทั้งที่มี Managed Kubernetes เช่น EKS GKE AKS ให้ใช้คำตอบคือ Managed Kubernetes เหมาะกับองค์กรที่ต้องการเริ่มต้นเร็วไม่อยากดูแล infrastructure เองแต่มี vendor lock-in และค่าใช้จ่ายที่สูงกว่าเรื่อยๆเมื่อ scale ขึ้น Self-managed HA Cluster เหมาะกับองค์กรที่มีทีม infrastructure มี compliance requirements ที่ต้อง control data locality หรือต้องการ cost optimization ในระยะยาวส่วน K3s เหมาะกับ edge computing IoT home lab หรือ staging environment ที่ไม่ต้องการ full HA
จากประสบการณ์ที่ดูแล Kubernetes cluster ให้หลายองค์กรผมพบว่าองค์กรขนาด 50 ถึง 200 คนที่มี DevOps team อย่างน้อย 2 ถึง 3 คนได้ประโยชน์สูงสุดจาก self-managed HA Cluster เพราะ cost saving ในระยะยาวคุ้มค่ากับเวลาที่ลงทุนดูแลสำหรับองค์กรที่เพิ่งเริ่ม container journey ผมแนะนำเริ่มจาก K3s ก่อนพอทีมมีความพร้อมแล้วค่อย upgrade มา full HA Cluster ครับสำหรับ monitoring ของ Cluster แนะนำ Prometheus Monitoring Setup
💡 อ่านเพิ่มเติม: iCafeForex.com — แหล่งความรู้ Forex และ Gold Trading จากผู้เชี่ยวชาญ | XMSignal.com/th — สัญญาณเทรด XM
📚 แนะนำ: SiamLancard.com — รีวิวอุปกรณ์ IT | iCafeForex สอนเทรด Forex
สำหรับผู้ที่ต้องการเรียนรู้ Kubernetes HA Cluster อย่างจริงจังผมแนะนำให้เริ่มจากการตั้ง lab environment ด้วย Proxmox VE หรือ VirtualBox สร้าง VM สำหรับ HAProxy 1 ตัว Control Plane 3 ตัวและ Worker Node 2 ตัวทดลองทำตามบทความนี้ทุกขั้นตอนจากนั้นลอง simulate node failure ดูว่า cluster ยัง handle ได้จริงหรือไม่ประสบการณ์จากการลงมือทำจริงจะช่วยให้เข้าใจ Kubernetes ลึกซึ้งกว่าการอ่านอย่างเดียวมากครับ
14. สรุป
การตั้ง Kubernetes HA Cluster บน Ubuntu อาจดูซับซ้อนแต่ถ้าทำตามขั้นตอนทีละ Step จะพบว่าแต่ละส่วนเข้าใจได้ไม่ยากสิ่งที่ได้คือระบบที่ทนต่อ Node Failure ได้จริงไม่มี Single Point of Failure และ Upgrade ได้โดยไม่มี Downtime
สรุป Component ที่ติดตั้งในบทความนี้:
- HAProxy — Load Balance API Server
- kubeadm — Bootstrap HA Cluster
- containerd — Container Runtime
- Calico — CNI Network Plugin + Network Policy
- MetalLB — Bare-Metal Load Balancer
- Ingress NGINX — HTTP Routing
- Prometheus + Grafana — Monitoring
สำหรับผู้ที่สนใจ Kubernetes แต่ต้องการเริ่มจากสเกลเล็กก่อนลองดู K3s ซึ่งเป็น Lightweight Kubernetes ที่ติดตั้งง่ายกว่ามากหรือใช้ Proxmox VE สร้าง VM สำหรับทดลองตั้ง Cluster ก็ได้ครับ
อ่านเพิ่มเติม: สอนเทรด Forex | XM Signal | IT Hardware | อาชีพ IT