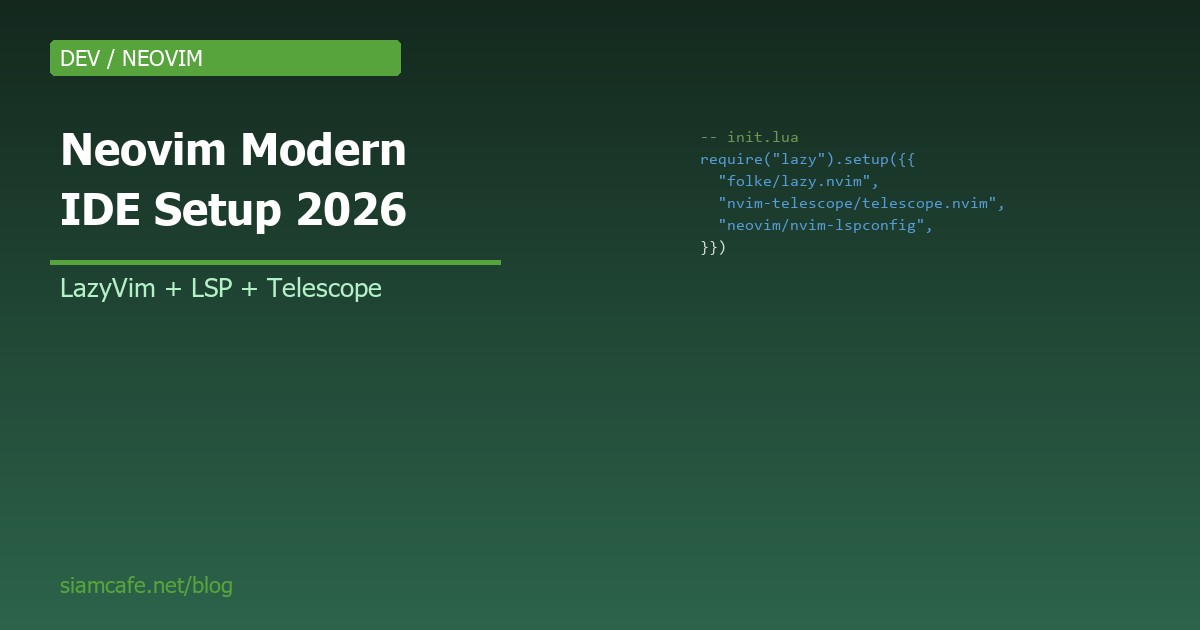
Neovim 2026 ตั้งค่า Neovim เป็น Modern IDE ด้วย LazyVim, Mason, Telescope
Neovim คือ Editor ที่พัฒนาต่อจาก Vim โดยเน้นความเร็ว, Extensibility, และ Modern Features ในปี 2026 Neovim กลายเป็นคู่แข่งสำคัญของ VSCode โดยมีผู้ใช้ Developer มืออาชีพกว่า 25% ของ Stack Overflow Survey บทความนี้จะสอนวิธีตั้งค่า Neovim ให้กลายเป็น Modern IDE ที่ทัดเทียม VSCode ด้วยการใช้ LazyVim, Mason, Telescope, Treesitter, LSP พร้อมทั้งเทคนิคการใช้งานที่เพิ่ม Productivity ได้ 3-5 เท่า
ทำไมต้องใช้ Neovim ปี 2026?
# =============================================
# ข้อดีของ Neovim vs VSCode:
# =============================================
#
# 1. Speed (เร็วที่สุด):
# → Neovim: ~50MB RAM
# → VSCode: ~500MB+ RAM
# → Startup: Neovim 20ms, VSCode 2000ms
#
# 2. Keyboard-driven:
# → ไม่ต้องใช้เม้าส์
# → Vim Motions เร็วกว่า 3x
# → Muscle Memory
#
# 3. Terminal-based:
# → รันใน SSH ได้
# → Remote Development ง่าย
# → Lightweight
#
# 4. Modal Editing:
# → Normal, Insert, Visual, Command
# → Compose Commands
# → Efficient Text Manipulation
#
# 5. Lua Configuration:
# → ทดแทน Vimscript
# → Fast, Modern
# → Full-featured Programming Language
#
# 6. LSP Native Support:
# → IntelliSense เหมือน VSCode
# → Auto-completion
# → Go to Definition, References
#
# 7. Plugins Ecosystem:
# → 10,000+ plugins
# → Active community
# → Best-in-class Tools
#
# 8. Customizable 100%:
# → ปรับแต่งทุกอย่าง
# → Distribution ตั้งสำเร็จ (LazyVim)
# → Build your own
#
# =============================================
# เมื่อไหร่ควรย้ายไป Neovim?
# =============================================
# ✓ งานที่ใช้คีย์บอร์ดเยอะ
# ✓ Remote Development
# ✓ RAM น้อย (4-8GB)
# ✓ ชอบ Customization
# ✓ Developer ที่มีประสบการณ์
#
# ไม่เหมาะกับ:
# ✗ มือใหม่ที่ไม่เคยใช้ Vim
# ✗ งานที่ใช้ GUI เยอะ (Figma, Photoshop)
# ✗ คนที่ไม่ชอบเรียน Modal Editing
Install Neovim
# =============================================
# Ubuntu/Debian:
# =============================================
# # Latest stable (0.10+)
# sudo add-apt-repository ppa:neovim-ppa/stable
# sudo apt update
# sudo apt install neovim
#
# # Or download binary
# curl -LO https://github.com/neovim/neovim/releases/latest/download/nvim-linux64.tar.gz
# tar xzf nvim-linux64.tar.gz
# sudo mv nvim-linux64/bin/nvim /usr/local/bin/
#
# =============================================
# macOS:
# =============================================
# brew install neovim
#
# =============================================
# Windows:
# =============================================
# # Scoop (แนะนำ)
# scoop install neovim
#
# # Or Chocolatey
# choco install neovim
#
# # Or winget
# winget install Neovim.Neovim
#
# =============================================
# Verify:
# =============================================
# nvim --version
# # Should show NVIM v0.10+ (2026)
#
# =============================================
# Dependencies:
# =============================================
# # Tools ที่แนะนำ:
# sudo apt install -y \
#   git curl wget \
#   ripgrep fd-find \
#   build-essential \
#   nodejs npm \
#   python3-pip \
#   unzip \
#   fzf
#
# # Nerd Font (สำคัญ!)
# # Download JetBrainsMono Nerd Font
# # https://www.nerdfonts.com/
LazyVim: Distribution แนะนำ 2026
# =============================================
# LazyVim คืออะไร?
# =============================================
# → Pre-configured Neovim Distribution
# → สร้างโดย folke (ผู้เขียน lazy.nvim)
# → Setup ได้ใน 1 นาที
# → Production-ready
# → Perfect สำหรับ Beginner
#
# =============================================
# Features ที่มาพร้อม:
# =============================================
# ✓ File Explorer (nvim-tree)
# ✓ Fuzzy Finder (Telescope)
# ✓ LSP (Mason)
# ✓ Autocomplete (nvim-cmp)
# ✓ Git Integration (gitsigns)
# ✓ Syntax Highlighting (Treesitter)
# ✓ Statusline (lualine)
# ✓ Theme (Tokyo Night)
# ✓ Keymaps ที่ดี (which-key)
# ✓ Terminal (toggleterm)
#
# =============================================
# Installation:
# =============================================
#
# # Backup existing config (if any)
# mv ~/.config/nvim ~/.config/nvim.bak
# mv ~/.local/share/nvim ~/.local/share/nvim.bak
# mv ~/.local/state/nvim ~/.local/state/nvim.bak
#
# # Clone LazyVim starter
# git clone https://github.com/LazyVim/starter ~/.config/nvim
#
# # Remove .git folder
# rm -rf ~/.config/nvim/.git
#
# # Launch nvim
# nvim
#
# → LazyVim จะติดตั้ง plugins อัตโนมัติ
# → รอสักครู่ (1-2 นาที)
# → พร้อมใช้งาน!
#
# =============================================
# Structure:
# =============================================
# ~/.config/nvim/
# ├── init.lua            # Entry point
# ├── lua/
# │   ├── config/
# │   │   ├── autocmds.lua
# │   │   ├── keymaps.lua
# │   │   ├── lazy.lua
# │   │   └── options.lua
# │   └── plugins/
# │       ├── example.lua
# │       └── ...
# └── lazy-lock.json
Essential Plugins
# =============================================
# 1. lazy.nvim (Package Manager):
# =============================================
# → รวดเร็วที่สุด
# → Lazy Loading
# → Dashboard UI
#
# =============================================
# 2. Mason (LSP/Tool Installer):
# =============================================
# → UI สำหรับติดตั้ง LSP servers
# → Formatters, Linters, DAP
# → Cross-platform
#
# Install:
# :Mason
# # เลือก Language ที่ต้องการ:
# - pyright (Python)
# - tsserver (TypeScript)
# - rust-analyzer (Rust)
# - gopls (Go)
# - lua-ls (Lua)
#
# =============================================
# 3. Telescope (Fuzzy Finder):
# =============================================
# → ค้นหาไฟล์, Text, Symbols
# → แทน VSCode Ctrl+P
# → Preview built-in
#
# Keymaps:
# ff   # Find files
# fg   # Live grep
# fb   # Buffers
# fh   # Help tags
# gc   # Git commits
#
# =============================================
# 4. Treesitter:
# =============================================
# → Modern Syntax Highlighting
# → AST-based
# → ดีกว่า Regex-based
#
# Commands:
# :TSInstall python
# :TSInstall javascript typescript
# :TSInstall rust go
# :TSUpdate
#
# =============================================
# 5. nvim-cmp (Completion):
# =============================================
# → AutoComplete เหมือน VSCode
# → Multiple sources (LSP, Snippet, Buffer)
# → Customizable UI
#
# Sources:
# - nvim-cmp-lsp
# - LuaSnip (snippets)
# - cmp-buffer
# - cmp-path
# - cmp-cmdline
#
# =============================================
# 6. Gitsigns:
# =============================================
# → Git diff in gutter
# → Stage hunks
# → Blame line
#
# Keymaps:
# ]c    # Next hunk
# [c    # Previous hunk
# hs  # Stage hunk
# hp  # Preview hunk
# hb  # Blame line
#
# =============================================
# 7. lualine (Statusline):
# =============================================
# → Fast, Configurable
# → Show mode, file, branch, LSP
# → Theme-aware
#
# =============================================
# 8. nvim-tree / neo-tree:
# =============================================
# → File Explorer
# → แทน VSCode Explorer
# → Keymap: e
#
# =============================================
# 9. toggleterm:
# =============================================
# → Integrated Terminal
# → Multiple terminals
# → Float, Horizontal, Vertical
#
# Keymap:
#        # Toggle
# :ToggleTerm
#
# =============================================
# 10. which-key:
# =============================================
# → Show keybindings
# → Popup help
# → Essential for learning
LSP Configuration (Language Server Protocol)
# =============================================
# LSP = IntelliSense:
# =============================================
# → Auto-completion
# → Go to Definition (gd)
# → Find References (gr)
# → Rename (F2)
# → Documentation (K)
# → Error Diagnostics
#
# =============================================
# Popular LSP Servers:
# =============================================
#
# Python:
# → pyright (Microsoft)
# → ruff-lsp (Fast Linter)
# → black (Formatter)
#
# JavaScript/TypeScript:
# → tsserver
# → eslint
# → prettier
#
# Rust:
# → rust-analyzer
# → rustfmt
#
# Go:
# → gopls
# → gofmt
# → staticcheck
#
# Lua:
# → lua-ls (sumneko)
# → stylua (formatter)
#
# C/C++:
# → clangd
# → clang-format
#
# Java:
# → jdtls
#
# =============================================
# Install via Mason:
# =============================================
# :Mason
# # Press 'i' to install
# # Select: pyright, tsserver, rust-analyzer
#
# # Or via command:
# :MasonInstall pyright tsserver rust-analyzer
#
# =============================================
# lspconfig setup (ถ้าไม่ใช้ LazyVim):
# =============================================
# -- lua/plugins/lsp.lua
# return {
#   "neovim/nvim-lspconfig",
#   config = function()
#     local lspconfig = require("lspconfig")
#
#     lspconfig.pyright.setup({})
#     lspconfig.tsserver.setup({})
#     lspconfig.rust_analyzer.setup({})
#
#     -- Keymaps
#     vim.api.nvim_create_autocmd("LspAttach", {
#       callback = function(args)
#         local opts = { buffer = args.buf }
#         vim.keymap.set("n", "gd", vim.lsp.buf.definition, opts)
#         vim.keymap.set("n", "gr", vim.lsp.buf.references, opts)
#         vim.keymap.set("n", "K", vim.lsp.buf.hover, opts)
#         vim.keymap.set("n", "rn", vim.lsp.buf.rename, opts)
#         vim.keymap.set("n", "ca", vim.lsp.buf.code_action, opts)
#       end,
#     })
#   end,
# }
Telescope: Fuzzy Finder Powerful
# =============================================
# Telescope Features:
# =============================================
#
# 1. Files (ff):
#    → Fuzzy find files
#    → Respect .gitignore
#
# 2. Live Grep (fg):
#    → Search text across files
#    → Real-time
#
# 3. Buffers (fb):
#    → Switch between open files
#
# 4. Recent Files (fr):
#    → Recently opened
#
# 5. Commands (fc):
#    → Vim commands
#    → Execute directly
#
# 6. Help Tags (fh):
#    → Neovim help
#    → Plugin help
#
# 7. Git:
#    - gc: Git commits
#    - gs: Git status
#    - gb: Git branches
#
# 8. LSP:
#    - References: gr
#    - Definitions: gd
#    - Symbols: fs
#    - Workspace: fw
#
# 9. Diagnostics:
#    - fd: Current file
#    - fD: Workspace
#
# =============================================
# Customization:
# =============================================
# -- ~/.config/nvim/lua/plugins/telescope.lua
# return {
#   "nvim-telescope/telescope.nvim",
#   dependencies = { "nvim-lua/plenary.nvim" },
#   config = function()
#     require("telescope").setup({
#       defaults = {
#         layout_strategy = "flex",
#         layout_config = {
#           horizontal = { preview_width = 0.5 },
#         },
#         sorting_strategy = "ascending",
#         file_ignore_patterns = { "node_modules", ".git" },
#       },
#     })
#   end,
# }
#
# =============================================
# Tips:
# =============================================
# Insert mode:
#  /     # Navigate
#  /     # Navigate alt
#             # Send all to quickfix
#             # Horizontal split
#             # Vertical split
#             # New tab
#             # Close
Vim Motions ที่ต้องรู้
# =============================================
# Essential Vim Motions:
# =============================================
#
# Movement (Normal mode):
# h j k l        # Left Down Up Right
# w              # Next word
# b              # Previous word
# e              # End of word
# 0              # Start of line
# $              # End of line
# gg             # Top of file
# G              # Bottom of file
# {n}G         # Line n
# {              # Previous paragraph
# }              # Next paragraph
# %              # Matching bracket
#
# =============================================
# Searching:
# =============================================
# /text          # Search forward
# ?text          # Search backward
# n              # Next match
# N              # Previous match
# *              # Search word under cursor
# #              # Search word backward
#
# =============================================
# Editing:
# =============================================
# i              # Insert before cursor
# a              # Append after cursor
# I              # Insert at line start
# A              # Append at line end
# o              # New line below
# O              # New line above
# x              # Delete char
# dd             # Delete line
# yy             # Yank (copy) line
# p              # Paste after
# P              # Paste before
# u              # Undo
#           # Redo
#
# =============================================
# Operators (combine with motions):
# =============================================
# d{motion}    # Delete
# c{motion}    # Change (delete + insert)
# y{motion}    # Yank (copy)
# > or <         # Indent
# =              # Format
#
# Examples:
# dw      # Delete word
# d$      # Delete to end of line
# dd      # Delete entire line
# ciw     # Change inner word
# caw     # Change a word (include space)
# di"     # Delete inside quotes
# ya(     # Yank around parentheses
# >>      # Indent line
#
# =============================================
# Text Objects:
# =============================================
# iw aw   # Word (inner/a)
# is as   # Sentence
# ip ap   # Paragraph
# i( a(   # Parentheses
# i[ a[   # Brackets
# i{ a{ # Braces
# i" a"   # Quotes
# it at   # HTML tag
#
# =============================================
# Visual Mode:
# =============================================
# v              # Character-wise
# V              # Line-wise
#           # Block-wise
# gv             # Re-select last visual
#
# =============================================
# Mode Switching:
# =============================================
# Esc /     # Back to normal
# i              # Insert
# v              # Visual
# :              # Command
Keymaps ที่ LazyVim ตั้งไว้
# =============================================
# Leader key = Space:
# =============================================
#
# File:
# ff     # Find files
# fr     # Recent files
# fn     # New file
# w      # Save
# qq     # Quit all
#
# Code:
# gd             # Go to definition
# gr             # References
# K              # Hover
# rn     # Rename
# ca     # Code action
# cf     # Format file
# cd     # Diagnostics
#
# Search:
# sg     # Live grep
# sw     # Search word
# sb     # Search buffer
#
# Buffer:
# bd     # Delete buffer
#  /   # Previous/Next buffer
# bb     # List buffers
#
# Window:
# -      # Split horizontal
# |      # Split vertical
# wd     # Close window
#     # Navigate windows
#     # Resize
#
# Terminal:
#          # Toggle terminal
# tt     # Toggle
# tf     # Float
#
# Git:
# gg     # LazyGit
# gb     # Branches
# gc     # Commits
# gs     # Status
# ]h / [h        # Git hunks
#
# LSP:
# cs     # Document symbols
# cS     # Workspace symbols
# cl     # LSP info
#
# Explorer:
# e      # Toggle file tree
AI Integration: Copilot and ChatGPT
# =============================================
# 1. GitHub Copilot:
# =============================================
# -- lua/plugins/copilot.lua
# return {
#   "zbirenbaum/copilot.lua",
#   cmd = "Copilot",
#   event = "InsertEnter",
#   config = function()
#     require("copilot").setup({
#       suggestion = {
#         auto_trigger = true,
#         keymap = {
#           accept = "",    -- Alt+L
#           next = "",
#           prev = "",
#           dismiss = "",
#         },
#       },
#     })
#   end,
# }
#
# :Copilot auth  -- Login via GitHub
#
# =============================================
# 2. Copilot Chat:
# =============================================
# return {
#   "CopilotC-Nvim/CopilotChat.nvim",
#   dependencies = {
#     "zbirenbaum/copilot.lua",
#     "nvim-lua/plenary.nvim",
#   },
#   keys = {
#     { "cc", "CopilotChatToggle" },
#     { "ce", "CopilotChatExplain" },
#     { "ct", "CopilotChatTests" },
#   },
# }
#
# =============================================
# 3. ChatGPT.nvim:
# =============================================
# return {
#   "jackMort/ChatGPT.nvim",
#   event = "VeryLazy",
#   config = function()
#     require("chatgpt").setup({
#       api_key_cmd = "echo $OPENAI_API_KEY",
#     })
#   end,
# }
#
# Commands:
# :ChatGPT
# :ChatGPTEditWithInstructions
# :ChatGPTRun {action}
#
# =============================================
# 4. Codeium (ฟรี Alternative):
# =============================================
# return {
#   "Exafunction/codeium.vim",
#   event = "BufEnter",
# }
#
# :Codeium Auth  -- Free signup
#
# =============================================
# 5. Claude Integration:
# =============================================
# → ใช้ผ่าน API
# → Plugin: avante.nvim (Alternative)
# → รองรับ Agentic editing
Themes และ UI Customization
# =============================================
# Popular Themes 2026:
# =============================================
#
# 1. Tokyo Night (Default LazyVim):
#    "folke/tokyonight.nvim"
#
# 2. Catppuccin:
#    "catppuccin/nvim"
#    -- Variations: latte, frappe, macchiato, mocha
#
# 3. Gruvbox Material:
#    "sainnhe/gruvbox-material"
#
# 4. One Dark Pro:
#    "joshdick/onedark.vim"
#
# 5. Dracula:
#    "Mofiqul/dracula.nvim"
#
# 6. Rose Pine:
#    "rose-pine/neovim"
#
# 7. Kanagawa:
#    "rebelot/kanagawa.nvim"
#
# 8. Nord:
#    "shaunsingh/nord.nvim"
#
# =============================================
# Change Theme in LazyVim:
# =============================================
# -- ~/.config/nvim/lua/plugins/colorscheme.lua
# return {
#   {
#     "catppuccin/nvim",
#     name = "catppuccin",
#     priority = 1000,
#   },
#   {
#     "LazyVim/LazyVim",
#     opts = {
#       colorscheme = "catppuccin",
#     },
#   },
# }
#
# =============================================
# Terminal Font:
# =============================================
# → JetBrainsMono Nerd Font (แนะนำ)
# → FiraCode Nerd Font
# → Cascadia Code (Microsoft)
# → Hack Nerd Font
#
# Download:
# https://www.nerdfonts.com/
#
# =============================================
# Terminal Emulator แนะนำ:
# =============================================
# Linux:
# - WezTerm (แนะนำ)
# - Alacritty
# - Kitty
#
# macOS:
# - iTerm2
# - WezTerm
# - Kitty
#
# Windows:
# - Windows Terminal
# - WezTerm
Workflow Example: Python Development
# =============================================
# Setup Python IDE:
# =============================================
#
# 1. Install LSP:
# :Mason
# # Install: pyright, ruff-lsp
#
# 2. Install Formatter:
# :MasonInstall black isort
#
# 3. Install Debugger (optional):
# :MasonInstall debugpy
#
# =============================================
# Workflow:
# =============================================
#
# 1. Open project:
# nvim ~/projects/my-python-app
#
# 2. Navigate files:
# ff     # Find files
# e      # File tree
#
# 3. Edit code:
# i              # Insert mode
#           # Back to normal
#
# 4. Auto-complete:
#       # Trigger
#           # Navigate
#         # Accept
#
# 5. Run tests:
# :! pytest
# # Or use vim-test plugin
#
# 6. Debug:
# db     # Toggle breakpoint
# dc     # Continue
# di     # Step into
#
# 7. Git:
# gg     # LazyGit
# # Stage, commit, push
#
# 8. Format:
# cf     # Format file
# # Or auto-format on save
#
# =============================================
# Auto-format on save:
# =============================================
# -- lua/config/autocmds.lua
# vim.api.nvim_create_autocmd("BufWritePre", {
#   pattern = { "*.py" },
#   callback = function()
#     vim.lsp.buf.format({ async = false })
#   end,
# })
DAP: Debugging
# =============================================
# nvim-dap (Debug Adapter Protocol):
# =============================================
# → เหมือน VSCode Debug
# → Set Breakpoints
# → Step through code
# → Watch variables
#
# =============================================
# Setup:
# =============================================
# -- lua/plugins/dap.lua
# return {
#   "mfussenegger/nvim-dap",
#   dependencies = {
#     "rcarriga/nvim-dap-ui",
#     "mfussenegger/nvim-dap-python",
#     "jay-babu/mason-nvim-dap.nvim",
#   },
#   config = function()
#     local dap = require("dap")
#     local dapui = require("dapui")
#
#     dapui.setup()
#     require("dap-python").setup("python3")
#
#     dap.listeners.after.event_initialized["dapui"] = function()
#       dapui.open()
#     end
#   end,
#   keys = {
#     { "db", "DapToggleBreakpoint" },
#     { "dc", "DapContinue" },
#     { "di", "DapStepInto" },
#     { "do", "DapStepOver" },
#     { "du", "DapStepOut" },
#   },
# }
#
# =============================================
# Debug Python:
# =============================================
# :Mason install debugpy
#
# # Set breakpoint
# db
#
# # Start debug (pytest)
# :lua require('dap-python').test_method()
#
# # Or file
# :DapContinue
Developer Trader ใช้ Neovim
สำหรับ Developer ที่พัฒนา Trading Systems หรือ Bots Neovim เป็นตัวเลือกที่ดีเพราะ รันบน VPS ผ่าน SSH ได้ทันที โดยไม่ต้องติดตั้ง GUI ทำให้ประหยัด Resource การใช้ Python + LSP Pyright + Jupyter Plugin ช่วยให้สามารถทำ Strategy Development, Backtest, และ Live Trading ได้ในเครื่องมือเดียว การผสม Neovim กับ tmux ทำให้สามารถเปิด MT4/MT5 Logs, Trading Bot, และ Editor ในหน้าจอเดียว เพิ่ม Productivity มาก สำหรับผู้ที่ใช้สัญญาณจาก iCafeFX สามารถเขียน Python Bot ที่รับ Signal และส่งไปยัง MT5 API ได้อย่างมีประสิทธิภาพ
อ่านเพิ่ม: DuckDB Analytics Edge Deployment — วิธีตั้งค่าและใช้งานจริงพ · อ่านเพิ่ม: DuckDB Analytics Agile Scrum Kanban — วิธีตั้งค่าและใช้งานจร · อ่านเพิ่ม: Down Jone — วิธีตั้งค่าและใช้งานจริงพร้อมตัวอย่าง
Tips เพิ่ม Productivity
# =============================================
# Power User Tips:
# =============================================
#
# 1. :checkhealth
#    → ตรวจสอบ Neovim
#    → แก้ไขปัญหาต่างๆ
#
# 2. Register ใช้เยอะ:
#    "ay       # Yank to register a
#    "ap       # Paste from register a
#    "+y       # Yank to system clipboard
#    "+p       # Paste from system
#
# 3. Macros:
#    qa        # Start recording to a
#    q         # Stop recording
#    @a        # Play macro a
#    10@a      # Play 10 times
#
# 4. Marks:
#    ma        # Set mark a
#    'a        # Jump to line of a
#    `a        # Jump to position of a
#
# 5. Jumps:
#         # Jump back
#         # Jump forward
#    :jumps    # List jumps
#
# 6. Splits:
#    :sp       # Horizontal split
#    :vsp      # Vertical split
#    h/j/k/l  # Navigate
#    =    # Equal size
#
# 7. Tabs:
#    :tabnew   # New tab
#    gt / gT   # Next/Previous
#    :tabo     # Close all except current
#
# 8. Folding:
#    zf        # Create fold
#    zo        # Open fold
#    zc        # Close fold
#    za        # Toggle
#    zR        # Open all
#    zM        # Close all
#
# 9. Substitution:
#    :%s/old/new/g         # All
#    :%s/old/new/gc        # Confirm
#    :s/old/new/g          # Current line
#
# 10. External Commands:
#     :! ls -la        # Run shell
#     :read ! date     # Insert output
#     :%! jq .         # Pipe buffer
Checklist Neovim Setup 2026
# =============================================
# NEOVIM SETUP CHECKLIST:
# =============================================
#
# Install:
# □ 1. Neovim 0.10+
# □ 2. Git, Ripgrep, FD, Node, Python
# □ 3. Nerd Font (JetBrainsMono)
# □ 4. Terminal Emulator (WezTerm)
#
# Distribution:
# □ 5. LazyVim (แนะนำ) หรือ
# □ 6. LunarVim / AstroNvim / NvChad
# □ 7. สร้างเอง (Advanced)
#
# Plugins:
# □ 8. lazy.nvim (Package Manager)
# □ 9. Mason (LSP Installer)
# □ 10. Telescope (Finder)
# □ 11. Treesitter (Syntax)
# □ 12. nvim-cmp (Completion)
# □ 13. Gitsigns (Git)
# □ 14. lualine (Statusline)
# □ 15. nvim-tree (Explorer)
# □ 16. toggleterm (Terminal)
# □ 17. which-key (Help)
#
# LSP:
# □ 18. Install ภาษาที่ใช้ (pyright, tsserver)
# □ 19. Formatter (black, prettier)
# □ 20. Linter (ruff, eslint)
#
# AI:
# □ 21. Copilot / Codeium
# □ 22. Copilot Chat / ChatGPT
#
# Workflow:
# □ 23. เรียน Vim Motions
# □ 24. Practice 30 days
# □ 25. Vim Adventures (game)
#
# Theme:
# □ 26. เลือก Theme (Tokyo Night, Catppuccin)
# □ 27. Terminal Colors
#
# Git:
# □ 28. LazyGit plugin
# □ 29. Gitsigns
# □ 30. vim-fugitive (optional)
สรุป: Neovim = Developer's Dream Editor
Neovim ในปี 2026 ไม่ใช่ Editor สำหรับคนที่ชอบ Terminal อย่างเดียวอีกต่อไป แต่เป็น Modern IDE ที่ทัดเทียมหรือเหนือกว่า VSCode ในหลายด้าน ด้วย LazyVim Distribution ทำให้ Setup ได้ในไม่กี่นาที พร้อมทั้งมี LSP, Telescope, Treesitter, Git Integration และ AI Tools (Copilot, Codeium) การลงทุนเรียนรู้ Neovim 1-2 เดือนจะทำให้ Productivity เพิ่มขึ้นตลอดชีวิต โดยเฉพาะสำหรับ Developer ที่ทำงานบน Server, Remote Development, หรือต้องการ Ultimate Keyboard-driven Workflow