demand supply zone ดู
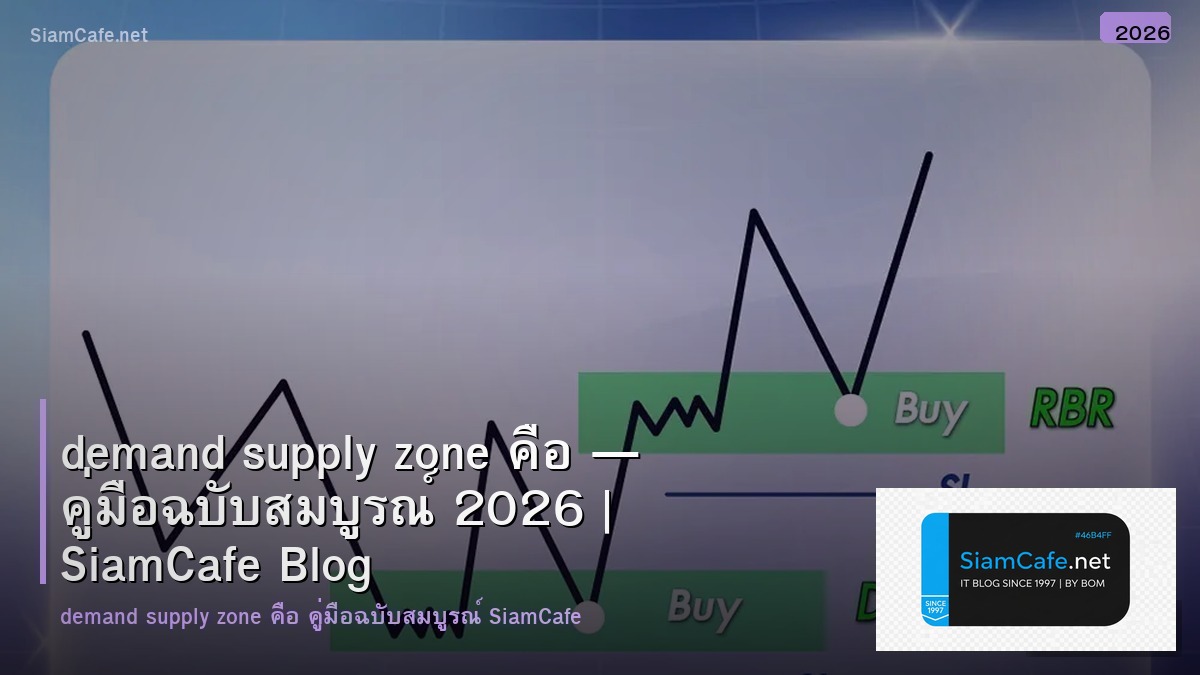

Demand Supply Zone ดู — วิธีหา Zone อุปสงค์อุปทาน 2026

Demand Zone และ Supply Zone เป็นแนวคิดสำคัญใน Price Action Trading ที่พัฒนามาจาก Support/Resistance แบบดั้งเดิม Demand Zone คือบริเวณที่มีแรงซื้อมาก (demand) ทำให้ราคาดีดตัวขึ้น Supply Zone คือบริเวณที่มีแรงขายมาก (supply) ทำให้ราคาตกลง การระบุ Demand/Supply Zone ช่วยให้เทรดเดอร์หาจุด entry ที่มี risk/reward ดี เพราะ zone เหล่านี้เป็นบริเวณที่ institutional traders (สถาบัน) วาง orders ไว้ บทความนี้อธิบายวิธีหาและใช้ Demand Supply Zone พร้อม Python tools
Demand Zone vs Supply Zone
# zones.py — Demand and Supply Zone fundamentals

import json


class DemandSupplyZones:

    DEMAND_ZONE = {

        "definition": "บริเวณที่มีแรงซื้อมาก — ราคาดีดตัวขึ้นจากจุดนี้",

        "formation": "ราคาลงมาหยุด → consolidate → ดีดตัวขึ้นแรง (rally)",

        "appearance": "กรอบราคาก่อนที่ราคาจะพุ่งขึ้น — ใช้ base candles เป็นขอบเขต",

        "action": "Buy เมื่อราคากลับมาที่ Demand Zone (pullback)",

        "psychology": "สถาบันวาง buy orders ไว้ — เมื่อราคากลับมา orders ถูก fill → ราคาขึ้น",

    }


    SUPPLY_ZONE = {

        "definition": "บริเวณที่มีแรงขายมาก — ราคาตกจากจุดนี้",

        "formation": "ราคาขึ้นมาหยุด → consolidate → ตกลงแรง (drop)",

        "appearance": "กรอบราคาก่อนที่ราคาจะตกลง — ใช้ base candles เป็นขอบเขต",

        "action": "Sell เมื่อราคากลับมาที่ Supply Zone (pullback)",

        "psychology": "สถาบันวาง sell orders ไว้ — เมื่อราคากลับมา orders ถูก fill → ราคาลง",

    }


    PATTERNS = {

        "rally_base_rally": {

            "name": "Rally-Base-Rally (RBR)",

            "type": "Demand Zone (continuation)",

            "description": "ราคาขึ้น → หยุดพัก (base) → ขึ้นต่อ — base = demand zone",

        },

        "drop_base_rally": {

            "name": "Drop-Base-Rally (DBR)",

            "type": "Demand Zone (reversal)",

            "description": "ราคาลง → หยุดพัก (base) → กลับตัวขึ้น — base = strong demand zone",

        },

        "drop_base_drop": {

            "name": "Drop-Base-Drop (DBD)",

            "type": "Supply Zone (continuation)",

            "description": "ราคาลง → หยุดพัก (base) → ลงต่อ — base = supply zone",

        },

        "rally_base_drop": {

            "name": "Rally-Base-Drop (RBD)",

            "type": "Supply Zone (reversal)",

            "description": "ราคาขึ้น → หยุดพัก (base) → กลับตัวลง — base = strong supply zone",

        },

    }


    def show_zones(self):

        print("=== Demand Zone ===")

        for key, val in self.DEMAND_ZONE.items():

            print(f"  [{key}] {val}")

        print(f"\n=== Supply Zone ===")

        for key, val in self.SUPPLY_ZONE.items():

            print(f"  [{key}] {val}")


    def show_patterns(self):

        print(f"\n=== Zone Patterns ===")

        for key, p in self.PATTERNS.items():

            print(f"\n[{p['name']}] ({p['type']})")

            print(f"  {p['description']}")


zones = DemandSupplyZones()

zones.show_zones()

zones.show_patterns()
วิธีหา Demand Supply Zone
# find_zones.py — How to find demand/supply zones

import json


class FindZones:

    STEPS = {

        "step1": {

            "name": "1. หา Strong Move (แท่งเทียนยาว)",

            "description": "มองหาแท่งเทียนยาวที่เคลื่อนที่เร็ว (explosive move) — ขึ้นหรือลงแรง",

            "tip": "ยิ่งแท่งยาว = ยิ่งมี institutional orders มาก",

        },

        "step2": {

            "name": "2. หา Base (กรอบราคาก่อน move)",

            "description": "มองย้อนกลับไปก่อน explosive move — หา candles ที่ consolidate (แท่งเล็กๆ)",

            "tip": "Base = 1-5 candles ที่อยู่ในกรอบแคบก่อน move",

        },

        "step3": {

            "name": "3. วาด Zone",

            "description": "ใช้ high ของ base candle สูงสุด = zone บน, low ของ base candle ต่ำสุด = zone ล่าง",

            "tip": "Zone ควรแคบ — ไม่กว้างเกินไป (ยิ่งแคบ = ยิ่ง precise)",

        },

        "step4": {

            "name": "4. ตรวจสอบ Freshness",

            "description": "Zone ที่ยังไม่เคยถูก test (ราคาไม่เคยกลับมา) = fresh zone = แข็งแรงที่สุด",

            "tip": "Zone ที่ถูก test แล้ว 1 ครั้งยังใช้ได้ — ถูก test 2+ ครั้ง = อ่อนแล้ว",

        },

        "step5": {

            "name": "5. ตรวจสอบ Strength",

            "description": "ดู departure move (การออกจาก zone) — ยิ่งแรงและเร็ว = zone ยิ่งแข็งแรง",

            "tip": "Multiple consecutive same-direction candles = strong departure",

        },

    }


    QUALITY_FACTORS = {

        "freshness": "Zone ที่ยังไม่เคยถูก test = ดีที่สุด",

        "departure_strength": "Move ออกจาก zone แรงแค่ไหน — 3+ candles = strong",

        "time_in_base": "Base สั้น (1-3 candles) ดีกว่า base ยาว (5+ candles)",

        "higher_timeframe": "Zone บน timeframe ใหญ่ (Daily, Weekly) แข็งแรงกว่า timeframe เล็ก",

        "trend_alignment": "Zone ที่ตรงกับ trend ใหญ่ มี probability สูงกว่า",

    }


    def show_steps(self):

        print("=== วิธีหา Zone ===\n")

        for key, step in self.STEPS.items():

            print(f"[{step['name']}]")

            print(f"  {step['description']}")

            print()


    def show_quality(self):

        print("=== Quality Factors ===")

        for factor, desc in self.QUALITY_FACTORS.items():

            print(f"  [{factor}] {desc}")


finder = FindZones()

finder.show_steps()

finder.show_quality()
Python Zone Detector
# zone_detector.py — Python demand/supply zone detection

import json


class ZoneDetector:

    CODE = """

# detect_zones.py — Automated demand/supply zone detection

import pandas as pd

import numpy as np


class DemandSupplyDetector:

    def __init__(self, data):

        '''data: DataFrame with OHLCV'''

        self.data = data.copy()


    def find_explosive_moves(self, threshold=2.0):

        '''Find candles with large body (explosive moves)'''

        df = self.data.copy()

        df['body'] = abs(df['Close'] - df['Open'])

        df['range'] = df['High'] - df['Low']

        avg_body = df['body'].rolling(20).mean()


        # Explosive = body > threshold * average

        df['explosive'] = df['body'] > (avg_body * threshold)

        df['direction'] = np.where(df['Close'] > df['Open'], 'up', 'down')


        moves = df[df['explosive']].copy()

        return moves


    def find_demand_zones(self, lookback=3, threshold=2.0):

        '''Find demand zones (base before up move)'''

        df = self.data.copy()

        df['body'] = abs(df['Close'] - df['Open'])

        avg_body = df['body'].rolling(20).mean()


        zones = []


        for i in range(lookback, len(df)):

            # Check for explosive up move

            body = abs(df['Close'].iloc[i] - df['Open'].iloc[i])

            is_up = df['Close'].iloc[i] > df['Open'].iloc[i]

            is_explosive = body > (avg_body.iloc[i] * threshold)


            if is_up and is_explosive:

                # Look for base before the move

                base_start = max(0, i - lookback)

                base = df.iloc[base_start:i]


                if len(base) > 0:

                    zone_high = base['High'].max()

                    zone_low = base['Low'].min()

                    zone_width = zone_high - zone_low


                    # Check base is small (consolidation)

                    avg_range = df['range'].iloc[base_start:i].mean() if 'range' in df else zone_width


                    zones.append({

                        'type': 'demand',

                        'date': df.index[i],

                        'zone_high': round(zone_high, 4),

                        'zone_low': round(zone_low, 4),

                        'zone_mid': round((zone_high + zone_low) / 2, 4),

                        'strength': round(body / avg_body.iloc[i], 1),

                        'tested': False,

                    })


        return zones


    def find_supply_zones(self, lookback=3, threshold=2.0):

        '''Find supply zones (base before down move)'''

        df = self.data.copy()

        df['body'] = abs(df['Close'] - df['Open'])

        avg_body = df['body'].rolling(20).mean()


        zones = []


        for i in range(lookback, len(df)):

            body = abs(df['Close'].iloc[i] - df['Open'].iloc[i])

            is_down = df['Close'].iloc[i] < df['Open'].iloc[i]

            is_explosive = body > (avg_body.iloc[i] * threshold)


            if is_down and is_explosive:

                base_start = max(0, i - lookback)

                base = df.iloc[base_start:i]


                if len(base) > 0:

                    zone_high = base['High'].max()

                    zone_low = base['Low'].min()


                    zones.append({

                        'type': 'supply',

                        'date': df.index[i],

                        'zone_high': round(zone_high, 4),

                        'zone_low': round(zone_low, 4),

                        'zone_mid': round((zone_high + zone_low) / 2, 4),

                        'strength': round(body / avg_body.iloc[i], 1),

                        'tested': False,

                    })


        return zones


    def check_zone_status(self, zones):

        '''Check if zones have been tested'''

        current_price = self.data['Close'].iloc[-1]


        for zone in zones:

            # Check if price has returned to zone

            after_zone = self.data[self.data.index > zone['date']]


            if zone['type'] == 'demand':

                touched = (after_zone['Low'] <= zone['zone_high']).any()

                zone['tested'] = touched

                zone['active'] = not touched or (after_zone['Low'] <= zone['zone_high']).sum() <= 1

            else:

                touched = (after_zone['High'] >= zone['zone_low']).any()

                zone['tested'] = touched

                zone['active'] = not touched or (after_zone['High'] >= zone['zone_low']).sum() <= 1


            zone['distance_pct'] = round(

                abs(current_price - zone['zone_mid']) / current_price * 100, 2

            )


        return zones


# import yfinance as yf

# data = yf.download("AAPL", start="2024-01-01")

# detector = DemandSupplyDetector(data)

# demand = detector.find_demand_zones()

# supply = detector.find_supply_zones()

"""


    def show_code(self):

        print("=== Zone Detector ===")

        print(self.CODE[:600])


detector = ZoneDetector()

detector.show_code()
Trading Strategy กับ Zones
# strategy.py — Trading strategy using demand/supply zones

import json


class ZoneTradingStrategy:

    ENTRY_RULES = {

        "demand_zone_buy": {

            "name": "Buy at Demand Zone",

            "conditions": [

                "ราคา pullback มาที่ Demand Zone (fresh หรือ tested 1 ครั้ง)",

                "Timeframe ใหญ่ (Daily/Weekly) เป็น uptrend",

                "มี confirmation candle (bullish engulfing, pin bar) ที่ zone",

                "Volume เพิ่มขึ้นที่ zone",

            ],

            "entry": "Buy เมื่อ confirmation candle ปิดเหนือ zone",

            "stop_loss": "ใต้ zone low (หรือ zone low - ATR)",

            "take_profit": "Supply zone ถัดไป หรือ 2:1 risk/reward",

        },

        "supply_zone_sell": {

            "name": "Sell at Supply Zone",

            "conditions": [

                "ราคา rally มาที่ Supply Zone (fresh หรือ tested 1 ครั้ง)",

                "Timeframe ใหญ่เป็น downtrend",

                "มี confirmation candle (bearish engulfing, shooting star)",

                "Volume เพิ่มขึ้น",

            ],

            "entry": "Sell เมื่อ confirmation candle ปิดใต้ zone",

            "stop_loss": "เหนือ zone high (หรือ zone high + ATR)",

            "take_profit": "Demand zone ถัดไป หรือ 2:1 risk/reward",

        },

    }


    RISK_MANAGEMENT = {

        "position_size": "Risk 1-2% ของ account ต่อ trade",

        "risk_reward": "ขั้นต่ำ 1:2 risk/reward — ดีกว่า 1:3",

        "stop_loss": "วาง stop loss ใต้/เหนือ zone — ไม่วางที่ขอบ zone พอดี",

        "partial_tp": "Take profit บางส่วนที่ 1:1 → trail stop ส่วนที่เหลือ",

    }


    def show_entries(self):

        print("=== Entry Rules ===\n")

        for key, rule in self.ENTRY_RULES.items():

            print(f"[{rule['name']}]")

            print(f"  Entry: {rule['entry']}")

            print(f"  Stop: {rule['stop_loss']}")

            print(f"  TP: {rule['take_profit']}")

            for cond in rule['conditions'][:2]:

                print(f"    • {cond}")

            print()


    def show_risk(self):

        print("=== Risk Management ===")

        for key, rule in self.RISK_MANAGEMENT.items():

            print(f"  [{key}] {rule}")


strategy = ZoneTradingStrategy()

strategy.show_entries()

strategy.show_risk()
Multi-Timeframe Analysis
# mtf.py — Multi-timeframe zone analysis

import json


class MultiTimeframe:

    APPROACH = {

        "weekly": {

            "name": "Weekly (กำหนด Trend)",

            "role": "ดู big picture — uptrend หรือ downtrend",

            "action": "หา zone ใหญ่ที่ราคากำลังมุ่งหน้าไป",

        },

        "daily": {

            "name": "Daily (หา Zone)",

            "role": "หา Demand/Supply zones ที่ชัดเจน",

            "action": "วาด zones ที่ยังไม่ถูก test หรือ test 1 ครั้ง",

        },

        "h4_h1": {

            "name": "4H/1H (หา Entry)",

            "role": "หา confirmation และ precise entry",

            "action": "รอ price action confirmation ที่ zone → entry",

        },

    }


    CONFLUENCE = {

        "strong": [

            "Zone ตรงกันใน 2+ timeframes",

            "Zone + Fibonacci 61.8% retracement",

            "Zone + Round number (100, 200, 500)",

            "Zone + Trendline intersection",

        ],

        "weak": [

            "Zone อยู่บน timeframe เล็กเท่านั้น (, M5)",

            "Zone ถูก test 2+ ครั้งแล้ว",

            "Zone สวนทาง higher timeframe trend",

        ],

    }


    def show_approach(self):

        print("=== Multi-Timeframe Approach ===\n")

        for key, tf in self.APPROACH.items():

            print(f"[{tf['name']}]")

            print(f"  Role: {tf['role']}")

            print(f"  Action: {tf['action']}")

            print()


    def show_confluence(self):

        print("=== Confluence ===")

        print("\nStrong signals:")

        for s in self.CONFLUENCE['strong']:

            print(f"  ✅ {s}")

        print("\nWeak signals:")

        for w in self.CONFLUENCE['weak']:

            print(f"  ⚠️ {w}")


mtf = MultiTimeframe()

mtf.show_approach()

mtf.show_confluence()
FAQ - คำถามที่พบบ่อย
Q: Demand/Supply Zone ต่างจาก Support/Resistance อย่างไร?
อ่านเพิ่ม: How to Avoid False Breakouts in Trading: A Complete Guide fo · อ่านเพิ่ม: SRE คืออะไร? Site Reliability Engineering แนวคิดจาก Google ส · อ่านเพิ่ม: MySQL และ MariaDB คืออะไร? สอน Database Administration สำหรั
เนื้อหาเกี่ยวข้อง — อ่านต่อ: แบบจำลองเครือข่าย osi model คืออะไร
A: Support/Resistance: เส้นเดียว (price level) — ราคาเด้งหรือทะลุ Demand/Supply Zone: กรอบราคา (price area) — มีความกว้าง ให้พื้นที่ entry มากกว่า Zone based on: institutional order flow — ดูว่าสถาบันวาง orders ตรงไหน S/R based on: historical price levels — ดูว่าราคาเคยหยุดตรงไหน Zone ดีกว่าเมื่อ: ต้องการ precise entry/exit กับ tight stop loss
แนะนำเพิ่มเติม — ดูสัญญาณเทรดที่ XM Signal
Q: Zone ที่ดีต้องเป็นอย่างไร?
เนื้อหาเกี่ยวข้อง — อ่านต่อ: MQL4 Market — คู่มือเทรด Forex ฉบับสมบูรณ์ 2026
A: 5 เกณฑ์หลัก: 1) Fresh (ยังไม่ถูก test) — ดีที่สุด 2) Strong departure (move ออกจาก zone แรง — 3+ candles) 3) Small base (1-3 candles — consolidation สั้น) 4) Higher timeframe alignment (zone ตรงกับ trend ใหญ่) 5) Narrow width (zone แคบ = entry precise, stop loss สั้น) Zone ที่อ่อน: base กว้าง, departure อ่อน, ถูก test 2+ ครั้ง, สวน trend
Q: ใช้กับตลาดไหนได้บ้าง?
แนะนำเพิ่มเติม — แหล่งความรู้ Forex iCafeForex
เนื้อหาเกี่ยวข้อง — Incident.io Zero Downtime Deployment
A: ใช้ได้กับทุกตลาดที่มีสภาพคล่อง: Forex: เหมาะมาก — institutional order flow ชัดเจน หุ้น: ใช้ได้ดีกับ large-cap (SET50, S&P 500 stocks) Crypto: ใช้ได้แต่ zone อาจไม่แข็งแรงเท่า — volatility สูง Futures: ใช้ได้ดีมาก — institutional traders active Timeframe: Daily และ 4H ดีที่สุด — /M5 zone อ่อนกว่า
Q: Zone ถูก test กี่ครั้งถึงจะหมดแรง?
เนื้อหาเกี่ยวข้อง — แนะนำให้อ่าน จิรายุสทรัพย์ศรีโสภา
A: กฎทั่วไป: Fresh (ยังไม่ถูก test) = แข็งแรงที่สุด (เทรดได้เลย) Test 1 ครั้ง = ยังใช้ได้ (ดี ถ้า departure ยังแรง) Test 2 ครั้ง = อ่อนแล้ว (เสี่ยง) Test 3+ ครั้ง = อย่าใช้ (zone หมดแรงแล้ว — orders ถูก fill หมด) เปรียบเทียบ: เหมือนฟองน้ำ — ซับน้ำได้ 1-2 ครั้ง แล้วหมดแรง
เปิดบัญชีเทรดกับ XM — โบรกที่ อ.บอม ใช้เทรดจริง (พาร์ทเนอร์ XM)