ในโลกของ Web Framework ที่เต็มไปด้วยตัวเลือก หลายคนคุ้นเคยกับ Next.js, Nuxt.js หรือ SvelteKit แต่มี Framework ตัวหนึ่งที่เกิดมาจากแนวคิดที่แตกต่างอย่างชัดเจน นั่นคือ Remix ซึ่งมุ่งเน้นการใช้ Web Standards ที่มีอยู่แล้วแทนที่จะประดิษฐ์สิ่งใหม่ขึ้นมา และในปี 2026 นี้ Remix ได้รวมตัวเข้ากับ React Router v7 กลายเป็น Framework ที่ทรงพลังยิ่งขึ้น
บทความนี้จะพาคุณเข้าใจ Remix ตั้งแต่แนวคิดพื้นฐาน ระบบ Loader/Action ไปจนถึงการ Deploy ใน Production จริง ครอบคลุมทุกสิ่งที่คุณต้องรู้เพื่อเริ่มต้นใช้งาน Remix ในปี 2026
Remix คืออะไร?
Remix คือ Full-Stack Web Framework ที่สร้างบน React โดยมีจุดเด่นที่การใช้ Web Standards เป็นหลัก เช่น HTTP, HTML Forms, Fetch API และ Web Streams แทนที่จะสร้าง Abstraction ใหม่ขึ้นมา Remix เลือกที่จะ "ใช้สิ่งที่เว็บมีอยู่แล้ว" ให้เต็มประสิทธิภาพ
Remix ก่อตั้งโดย Michael Jackson และ Ryan Florence ผู้สร้าง React Router ซึ่งเป็น Routing Library ที่ใช้กันมากที่สุดใน React ecosystem ต่อมาในปี 2022 Shopify ได้เข้าซื้อกิจการของ Remix ทำให้มีทรัพยากรและทีมพัฒนาที่แข็งแกร่งมากขึ้น
- สร้างบน React แต่เน้น Server-Side Rendering เป็นหลัก
- ใช้ Web Standards (Fetch API, FormData, Headers, Request/Response)
- Progressive Enhancement — แอปทำงานได้แม้ไม่มี JavaScript ฝั่ง Client
- Nested Routing ที่ทรงพลัง ลดปัญหา Loading State ซ้ำซ้อน
- ได้รับการสนับสนุนจาก Shopify ซึ่งใช้ Remix ใน Production จริง
ปรัชญาของ Remix — Use the Platform
Remix มีปรัชญาหลักที่แตกต่างจาก Framework อื่นอย่างชัดเจน คือ "Use the Platform" หมายความว่า แทนที่จะสร้าง API ใหม่ขึ้นมา Remix เลือกใช้สิ่งที่เบราว์เซอร์และ HTTP มีอยู่แล้ว
Web Standards First
ใน Remix ทุกอย่างคือ Request และ Response ตาม HTTP Standard เมื่อผู้ใช้เข้าหน้าเว็บ เซิร์ฟเวอร์ได้รับ Request แล้วส่ง Response กลับไป เมื่อผู้ใช้กรอกฟอร์ม เบราว์เซอร์ส่ง Form Submission เป็น POST Request ตามปกติ ไม่ต้องเขียน JavaScript เพื่อจัดการ
Progressive Enhancement
แอปที่สร้างด้วย Remix ทำงานได้แม้ไม่มี JavaScript ฝั่ง Client เลย ฟอร์มส่งข้อมูลได้ ลิงก์นำทางได้ แต่เมื่อ JavaScript โหลดเสร็จ ประสบการณ์ก็จะดีขึ้นอัตโนมัติ เช่น การนำทางไม่ต้อง Reload หน้า ฟอร์มแสดง Pending State ได้ นี่คือ Progressive Enhancement ที่แท้จริง
Server/Client Model
Remix แบ่งการทำงานชัดเจนระหว่าง Server และ Client ข้อมูลถูกโหลดที่ Server ผ่าน loader การเปลี่ยนแปลงข้อมูลเกิดที่ Server ผ่าน action และ UI ถูก Render ทั้งที่ Server (SSR) และ Client (Hydration)
Remix vs Next.js — เปรียบเทียบแบบตรงไปตรงมา
| หัวข้อ | Remix | Next.js |
|---|---|---|
| บริษัทหลัง | Shopify | Vercel |
| ปรัชญา | Web Standards, Use the Platform | Best Developer Experience |
| Data Fetching | loader/action (Server Only) | Server Components, getServerSideProps |
| Form Handling | HTML Form + action (ไม่ต้อง JS) | Server Actions (ต้อง JS) |
| Routing | File-based + Nested Routes | File-based + App Router |
| Streaming | defer + Await component | React Suspense |
| Static Generation | ไม่มี (SSR เท่านั้น) | มี SSG, ISR |
| Progressive Enhancement | Built-in ทำงานไม่มี JS ได้ | ต้องพึ่ง JS เป็นหลัก |
| Deployment | ทุก Platform (Express, CF Workers, Fly.io) | Vercel-optimized |
| Learning Curve | ง่ายถ้ารู้ HTTP/HTML | ซับซ้อนกว่า (RSC, caching) |
เริ่มต้นโปรเจกต์ Remix
# สร้างโปรเจกต์ใหม่
npx create-remix@latest my-remix-app
cd my-remix-app

# เลือก Template:
# - Just the basics
# - Express Server
# - Cloudflare Workers
# - Fly.io

# ติดตั้ง Dependencies
npm install

# รัน Development Server
npm run dev
# -> http://localhost:5173 (Remix + Vite)
โครงสร้างโปรเจกต์
my-remix-app/
├── app/
│   ├── root.tsx            # Root Layout (HTML, head, body)
│   ├── entry.client.tsx    # Client-side entry point
│   ├── entry.server.tsx    # Server-side entry point
│   └── routes/
│       ├── _index.tsx      # หน้า Home (/)
│       ├── about.tsx       # หน้า About (/about)
│       ├── blog.tsx        # Layout สำหรับ /blog/*
│       ├── blog._index.tsx # หน้า Blog list (/blog)
│       └── blog.$slug.tsx  # หน้า Blog detail (/blog/my-post)
├── public/                 # Static assets
├── vite.config.ts
├── package.json
└── tsconfig.json
File-Based Routing ใน Remix
Remix ใช้ระบบ File-Based Routing ที่ชื่อไฟล์ใน app/routes/ กำหนดเส้นทาง URL โดยอัตโนมัติ มีรูปแบบพิเศษดังนี้:
# รูปแบบชื่อไฟล์ -> URL
_index.tsx          -> /
about.tsx           -> /about
blog._index.tsx     -> /blog
blog.$slug.tsx      -> /blog/:slug (Dynamic Segment)
blog.$id_.edit.tsx  -> /blog/:id/edit
$.tsx               -> /* (Catch-all / Splat Route)
_auth.login.tsx     -> /login (Pathless Layout: _auth เป็น Layout ไม่มี URL)

# Dot (.) = Slash (/) ใน URL
# $ = Dynamic Parameter
# _ นำหน้า = Pathless Layout (ไม่เพิ่ม URL segment)
# _ ต่อท้าย = Opt out of layout nesting
Loader — โหลดข้อมูลฝั่ง Server
loader คือฟังก์ชันที่รันบน Server เท่านั้น ทำหน้าที่ดึงข้อมูลก่อนที่ Route จะ Render ข้อมูลจาก loader จะถูกส่งผ่าน useLoaderData Hook ไปยัง Component
// app/routes/blog._index.tsx
import type { LoaderFunctionArgs } from "@remix-run/node";
import { json } from "@remix-run/node";
import { useLoaderData } from "@remix-run/react";
// loader รันบน Server เท่านั้น — สามารถเข้าถึง DB ได้โดยตรง
export async function loader({ request }: LoaderFunctionArgs) {
const url = new URL(request.url);
const search = url.searchParams.get("q") || "";
const posts = await db.post.findMany({
where: { title: { contains: search } },
orderBy: { createdAt: "desc" },
take: 20,
});
return json({ posts, search });
}
export default function BlogIndex() {
const { posts, search } = useLoaderData();
return (
Blog Posts
{posts.map(post => (
-
{post.title}
))}
);
} Action — จัดการ Form ไม่ต้องเขียน JavaScript
action คือฟังก์ชันที่จัดการ non-GET request (POST, PUT, DELETE) บน Server ทำงานร่วมกับ HTML Form ได้โดยตรง ไม่ต้องเขียน JavaScript ฝั่ง Client เลย
// app/routes/blog.new.tsx
import type { ActionFunctionArgs } from "@remix-run/node";
import { json, redirect } from "@remix-run/node";
import { Form, useActionData, useNavigation } from "@remix-run/react";
export async function action({ request }: ActionFunctionArgs) {
const formData = await request.formData();
const title = formData.get("title") as string;
const content = formData.get("content") as string;
// Validation
const errors: Record<string, string> = {};
if (!title || title.length < 3) errors.title = "ชื่อต้องมีอย่างน้อย 3 ตัวอักษร";
if (!content || content.length < 10) errors.content = "เนื้อหาต้องมีอย่างน้อย 10 ตัวอักษร";
if (Object.keys(errors).length > 0) {
return json({ errors }, { status: 400 });
}
const post = await db.post.create({
data: { title, content, slug: slugify(title) }
});
return redirect(`/blog/${post.slug}`);
}
export default function NewPost() {
const actionData = useActionData();
const navigation = useNavigation();
const isSubmitting = navigation.state === "submitting";
return (
);
} สังเกตว่า Form component ของ Remix ทำงานเหมือน HTML <form> ทุกประการ ถ้า JavaScript ยังไม่โหลด ฟอร์มก็ยังส่งข้อมูลได้ปกติผ่าน Browser Form Submission แต่เมื่อ JavaScript โหลดแล้ว Remix จะ Intercept และทำ Client-Side Navigation แทน ให้ประสบการณ์ที่ดีขึ้น
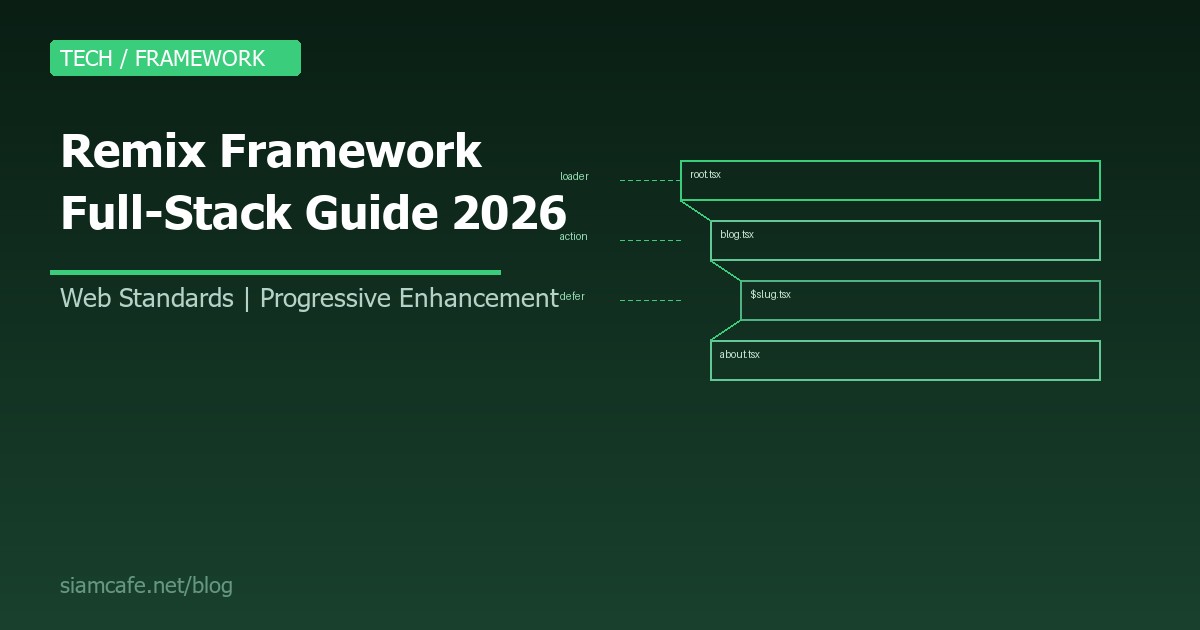
Nested Routing และ Outlet
Nested Routing คือฟีเจอร์ที่ทรงพลังที่สุดของ Remix ช่วยให้คุณสร้าง Layout ซ้อนกันได้ แต่ละ Route มี loader/action/error boundary ของตัวเอง และโหลดข้อมูลพร้อมกัน (parallel) ไม่เกิด Waterfall
// app/routes/dashboard.tsx — Parent Layout
import { Outlet, Link, useLoaderData } from "@remix-run/react";
export async function loader() {
const user = await getUser();
return json({ user });
}
export default function DashboardLayout() {
const { user } = useLoaderData();
return (
{/* Child route จะ Render ตรงนี้ */}
);
}
// app/routes/dashboard._index.tsx — Overview page
export async function loader() {
const stats = await getStats();
return json({ stats });
}
export default function DashboardOverview() {
const { stats } = useLoaderData();
return
Dashboard Overview
Total Users: {stats.users}
;
} เมื่อผู้ใช้เข้า /dashboard Remix จะโหลด loader ของ dashboard.tsx และ dashboard._index.tsx พร้อมกัน ไม่ต้องรอทีละขั้น ลดเวลา Loading อย่างมาก
Error Boundaries — จัดการ Error ระดับ Route
Remix มี Error Boundary ในตัวสำหรับทุก Route ถ้าเกิด Error ใน Route ใด Route นั้นจะแสดง Error UI ของตัวเอง โดยไม่กระทบ Route อื่น
// app/routes/blog.$slug.tsx
import { isRouteErrorResponse, useRouteError } from "@remix-run/react";
export async function loader({ params }: LoaderFunctionArgs) {
const post = await db.post.findUnique({
where: { slug: params.slug }
});
if (!post) {
throw json({ message: "ไม่พบบทความนี้" }, { status: 404 });
}
return json({ post });
}
// Error Boundary สำหรับ Route นี้เท่านั้น
export function ErrorBoundary() {
const error = useRouteError();
if (isRouteErrorResponse(error)) {
return (
{error.status} {error.statusText}
{error.data.message}
);
}
return เกิดข้อผิดพลาด
;
}Link Prefetching — โหลดล่วงหน้า
Remix มีระบบ Prefetch ที่ชาญฉลาด เมื่อผู้ใช้ Hover หรือ Focus ที่ลิงก์ Remix จะโหลดข้อมูลและ JavaScript ของหน้าถัดไปล่วงหน้า ทำให้การนำทางเร็วเกือบจะทันที
import { Link } from "@remix-run/react";

// Prefetch เมื่อ hover
Read Post

// Prefetch ทันทีที่ render
About

// Prefetch เมื่อ link อยู่ใน viewport
Pricing

// ไม่ Prefetch (default)
Settings
Streaming ด้วย defer
บางครั้งข้อมูลบางส่วนโหลดช้า (เช่น API ภายนอก) Remix มี defer ที่ช่วยให้คุณส่ง HTML บางส่วนไปก่อน แล้ว Stream ข้อมูลที่ช้ามาทีหลัง
import { defer } from "@remix-run/node";
import { Await, useLoaderData } from "@remix-run/react";
import { Suspense } from "react";
export async function loader() {
// ข้อมูลสำคัญ — รอจนเสร็จ
const product = await getProduct();
// ข้อมูลไม่สำคัญ — ส่ง Promise ไป (ไม่ await)
const reviewsPromise = getReviews();
const relatedPromise = getRelatedProducts();
return defer({
product, // ข้อมูลพร้อมแล้ว
reviews: reviewsPromise, // จะ Stream มาทีหลัง
related: relatedPromise, // จะ Stream มาทีหลัง
});
}
export default function ProductPage() {
const { product, reviews, related } = useLoaderData();
return (
{product.name}
{product.description}
กำลังโหลดรีวิว...}>
{(resolvedReviews) => (
{resolvedReviews.map(r => - {r.text}
)}
)}
กำลังโหลดสินค้าที่เกี่ยวข้อง...}>
{(resolvedRelated) => (
{resolvedRelated.map(p => {p.name})}
)}
);
} Resource Routes — สร้าง API Endpoint
Route ที่ไม่ Export default component จะกลายเป็น Resource Route ใช้สร้าง API endpoint, RSS feed, Sitemap, PDF หรือไฟล์อื่นๆ ได้
// app/routes/api.posts.tsx — REST API
export async function loader({ request }: LoaderFunctionArgs) {
  const posts = await db.post.findMany();
  return json({ posts });
}

export async function action({ request }: ActionFunctionArgs) {
  if (request.method === "POST") {
    const data = await request.json();
    const post = await db.post.create({ data });
    return json({ post }, { status: 201 });
  }
  return json({ error: "Method not allowed" }, { status: 405 });
}

// app/routes/sitemap[.]xml.tsx — Sitemap
export async function loader() {
  const posts = await db.post.findMany();
  const sitemap = `<?xml version="1.0" encoding="UTF-8"?>
  <urlset xmlns="http://www.sitemaps.org/schemas/sitemap/0.9">
    ${posts.map(p => `<url><loc>https://example.com/blog/${p.slug}</loc></url>`).join("")}
  </urlset>`;

  return new Response(sitemap, {
    headers: { "Content-Type": "application/xml" }
  });
}
Remix + Prisma + PostgreSQL Stack
Remix ทำงานร่วมกับ Prisma ORM ได้อย่างราบรื่น เพราะ loader/action รันบน Server ทำให้เข้าถึง Database ได้โดยตรง
# ติดตั้ง Prisma
npm install prisma @prisma/client
npx prisma init

# schema.prisma
datasource db {
  provider = "postgresql"
  url      = env("DATABASE_URL")
}

generator client {
  provider = "prisma-client-js"
}

model Post {
  id        Int      @id @default(autoincrement())
  slug      String   @unique
  title     String
  content   String
  published Boolean  @default(false)
  createdAt DateTime @default(now())
  updatedAt DateTime @updatedAt
  author    User     @relation(fields: [authorId], references: [id])
  authorId  Int
}

model User {
  id       Int    @id @default(autoincrement())
  email    String @unique
  name     String
  posts    Post[]
}

# สร้าง Migration
npx prisma migrate dev --name init

# สร้าง Prisma Client singleton
# app/utils/db.server.ts
import { PrismaClient } from "@prisma/client";

let db: PrismaClient;

if (process.env.NODE_ENV === "production") {
  db = new PrismaClient();
} else {
  // ป้องกัน multiple instances ตอน dev (Hot Reload)
  if (!global.__db) {
    global.__db = new PrismaClient();
  }
  db = global.__db;
}

export { db };.server.ts เข้าไปใน Client Bundle ทำให้มั่นใจว่า Database connection string และ Secret ต่างๆ จะไม่ถูก Expose ไปยังเบราว์เซอร์
การจัดการ Styling ใน Remix
CSS Modules
/* app/routes/blog.module.css */
.container { max-width: 800px; margin: 0 auto; }
.title { font-size: 2em; color: #1e293b; }

// app/routes/blog.tsx
import styles from "./blog.module.css";

export default function Blog() {
  return (

      Blog

  );
}
Tailwind CSS
# ติดตั้ง Tailwind
npm install -D tailwindcss postcss autoprefixer
npx tailwindcss init

// tailwind.config.ts
export default {
  content: ["./app/**/*.{ts,tsx}"],
  theme: { extend: {} },
  plugins: [],
};

/* app/tailwind.css */
@tailwind base;
@tailwind components;
@tailwind utilities;

// app/root.tsx
import stylesheet from "./tailwind.css?url";
import { LinksFunction } from "@remix-run/node";

export const links: LinksFunction = () => [
  { rel: "stylesheet", href: stylesheet },
];
Vanilla Extract
# ติดตั้ง Vanilla Extract
npm install @vanilla-extract/css @vanilla-extract/vite-plugin

// app/routes/blog.css.ts
import { style } from "@vanilla-extract/css";

export const container = style({
  maxWidth: 800,
  margin: "0 auto",
  padding: "20px",
});

export const title = style({
  fontSize: "2em",
  color: "#1e293b",
});
Authentication Patterns ใน Remix
Remix จัดการ Authentication ผ่าน Cookie-based Sessions ซึ่งเป็น Web Standard ที่ปลอดภัยและเรียบง่าย
// app/utils/session.server.ts
import { createCookieSessionStorage, redirect } from "@remix-run/node";

const sessionStorage = createCookieSessionStorage({
  cookie: {
    name: "__session",
    httpOnly: true,
    maxAge: 60 * 60 * 24 * 30, // 30 days
    path: "/",
    sameSite: "lax",
    secrets: [process.env.SESSION_SECRET!],
    secure: process.env.NODE_ENV === "production",
  },
});

export async function createUserSession(userId: string, redirectTo: string) {
  const session = await sessionStorage.getSession();
  session.set("userId", userId);
  return redirect(redirectTo, {
    headers: { "Set-Cookie": await sessionStorage.commitSession(session) },
  });
}

export async function requireUserId(request: Request) {
  const session = await sessionStorage.getSession(request.headers.get("Cookie"));
  const userId = session.get("userId");
  if (!userId) throw redirect("/login");
  return userId;
}

// ใช้ใน loader
export async function loader({ request }: LoaderFunctionArgs) {
  const userId = await requireUserId(request);
  const user = await db.user.findUnique({ where: { id: userId } });
  return json({ user });
}
Deployment — Deploy Remix ได้ทุกที่
ข้อดีอย่างหนึ่งของ Remix คือสามารถ Deploy ได้บน Platform ใดก็ได้ที่รัน JavaScript เพราะ Remix ใช้ Web Standard Fetch API
Fly.io
# ติดตั้ง Fly CLI
curl -L https://fly.io/install.sh | sh

# สร้าง App
fly launch

# Deploy
fly deploy

# fly.toml
[build]
  dockerfile = "Dockerfile"

[http_service]
  internal_port = 3000
  force_https = true
Vercel
# ใช้ @remix-run/vercel adapter
npm install @remix-run/vercel

# vercel.json
{
  "buildCommand": "remix vite:build",
  "installCommand": "npm install"
}
Cloudflare Workers
# สร้างโปรเจกต์ด้วย Cloudflare template
npx create-remix@latest --template remix-run/remix/templates/cloudflare-workers

# Deploy
npx wrangler deploy
Express (Self-hosted)
// server.js
import express from "express";
import { createRequestHandler } from "@remix-run/express";

const app = express();
app.use(express.static("build/client"));
app.all("*", createRequestHandler({ build: await import("./build/server/index.js") }));
app.listen(3000, () => console.log("Server running on port 3000"));
Remix Vite Plugin
ตั้งแต่ Remix v2.2+ Remix ได้ย้ายมาใช้ Vite เป็น Build Tool แทน esbuild เดิม ทำให้ได้ประโยชน์จาก Vite ecosystem เช่น Hot Module Replacement (HMR) ที่เร็วมาก, Plugin ecosystem ของ Vite และ Dev Server ที่เบาและรวดเร็ว
// vite.config.ts
import { vitePlugin as remix } from "@remix-run/dev";
import { defineConfig } from "vite";
import tsconfigPaths from "vite-tsconfig-paths";

export default defineConfig({
  plugins: [
    remix({
      future: {
        v3_fetcherPersist: true,
        v3_relativeSplatPath: true,
        v3_throwAbortReason: true,
      },
    }),
    tsconfigPaths(),
  ],
});
React Router v7 = Remix Merger
ในปี 2024-2025 ทีม Remix ได้ประกาศการรวม Remix เข้ากับ React Router v7 ซึ่งเป็นการเปลี่ยนแปลงครั้งสำคัญ หมายความว่า React Router v7 จะมีความสามารถทั้งหมดของ Remix ในตัว
- React Router v7 = Remix concepts + React Router API
- loader/action ย้ายมาเป็นส่วนหนึ่งของ React Router
- สามารถใช้ได้ทั้งแบบ Library Mode (SPA) และ Framework Mode (Full-Stack)
- Migration จาก Remix v2 ไป React Router v7 ทำได้โดยง่าย
// React Router v7 Framework Mode
// routes.ts
import { type RouteConfig, route } from "@react-router/dev/routes";

export default [
  route("/", "./routes/home.tsx"),
  route("/blog", "./routes/blog.tsx", [
    route(":slug", "./routes/blog-post.tsx"),
  ]),
] satisfies RouteConfig;

// routes/blog-post.tsx — ใช้ loader/action เหมือน Remix
import type { Route } from "./+types/blog-post";

export async function loader({ params }: Route.LoaderArgs) {
  const post = await getPost(params.slug);
  return { post };
}

export default function BlogPost({ loaderData }: Route.ComponentProps) {
  return
    {loaderData.post.title}
    {loaderData.post.content}
  ;
}เมื่อไหร่ควรเลือก Remix?
Remix เหมาะกับโปรเจกต์ที่มีลักษณะดังนี้:
- Form-heavy Applications: เช่น Dashboard, Admin Panel, CRM ที่มีฟอร์มเยอะ Remix จัดการ Form ได้ดีเยี่ยมโดยไม่ต้องเขียน Client-side State Management
- Progressive Enhancement สำคัญ: แอปที่ต้องทำงานได้แม้ JavaScript โหลดไม่สำเร็จ เช่น เว็บที่ใช้ในพื้นที่เน็ตช้า
- Deploy ได้หลาย Platform: ถ้าไม่ต้องการผูกกับ Platform ใด Platform หนึ่ง Remix Deploy ได้ทุกที่
- ทีมที่รู้ HTTP และ Web Standards ดี: Remix จะง่ายมากถ้าคุณเข้าใจ HTTP Methods, Cookies, Headers
- ต้องการ Performance ดี: Nested Routing และ Parallel Data Loading ช่วยลด Waterfall ได้อย่างมาก
Performance Advantages — ไม่มี Client-Side Waterfall
ปัญหาใหญ่ของ SPA คือ Client-Side Waterfall เมื่อ Component A โหลดข้อมูลเสร็จ แล้ว Render Component B จากนั้น B ถึงจะเริ่มโหลดข้อมูลของตัวเอง เป็นลูกโซ่ที่ทำให้แอปช้า
Remix แก้ปัญหานี้ด้วย Nested Routing เพราะ Remix รู้ว่า Route ไหนจะ Render บ้าง จึงสามารถเรียก loader ทุกตัวพร้อมกัน (parallel) บน Server ทำให้ข้อมูลทุก Route พร้อมในเวลาเดียวกัน
// แบบ SPA ทั่วไป (Waterfall)
// 1. โหลด JavaScript bundle     → 500ms
// 2. Render App → เรียก API #1  → 300ms
// 3. Render Child → เรียก API #2 → 200ms
// 4. Render Grandchild → เรียก API #3 → 150ms
// รวม: 1,150ms

// แบบ Remix (Parallel)
// 1. Server เรียก loader #1, #2, #3 พร้อมกัน → 300ms (เอาอันช้าสุด)
// 2. ส่ง HTML พร้อมข้อมูลทั้งหมดกลับ → 50ms
// รวม: 350ms
นอกจากนี้ Remix ยังมี Automatic Revalidation เมื่อ Action เสร็จ Remix จะ Revalidate (เรียก loader ใหม่) เฉพาะ Route ที่ข้อมูลอาจเปลี่ยน ทำให้ UI สดใหม่เสมอโดยไม่ต้องจัดการ State เอง
สรุป
Remix เป็น Full-Stack Web Framework ที่โดดเด่นด้วยแนวคิด Web Standards First และ Progressive Enhancement ถ้าคุณเบื่อกับความซับซ้อนของ State Management, Client-side Caching และ Hydration Mismatch ที่พบใน Framework อื่น Remix อาจเป็นคำตอบที่คุณตามหา
ในปี 2026 การรวมตัวกับ React Router v7 ทำให้ Remix แข็งแกร่งยิ่งขึ้น มี Community ที่เติบโต และมี Shopify เป็นผู้สนับสนุนหลัก ถ้าคุณกำลังเริ่มโปรเจกต์ใหม่ที่เน้น Form, Performance และ Progressive Enhancement ลองพิจารณา Remix เป็นตัวเลือกแรก
เริ่มต้นวันนี้ด้วย npx create-remix@latest แล้วคุณจะรู้ว่า Web Development ที่ใช้ Web Standards นั้นเรียบง่ายและทรงพลังเพียงใด