OSI Model Data Link Layer — เข้าใจ Layer 2

OSI Model คืออะไรและ Data Link Layer ทำหน้าที่อะไร
OSI (Open Systems Interconnection) Model เป็นโมเดลอ้างอิง 7 ชั้นสำหรับอธิบายการสื่อสารในเครือข่ายคอมพิวเตอร์ ทั้ง 7 ชั้นจากล่างขึ้นบนคือ Physical (Layer 1), Data Link (Layer 2), Network (Layer 3), Transport (Layer 4), Session (Layer 5), Presentation (Layer 6) และ Application (Layer 7)
Data Link Layer (Layer 2) ทำหน้าที่เป็นตัวกลางระหว่าง Physical Layer กับ Network Layer รับผิดชอบการส่งข้อมูลระหว่าง nodes ที่เชื่อมต่อโดยตรง (directly connected) ภายใน local network segment เดียวกัน หน้าที่หลักคือ Framing ที่จัดข้อมูลเป็น frames, Physical Addressing ที่ใช้ MAC addresses ระบุ source และ destination, Error Detection ที่ตรวจจับข้อผิดพลาดด้วย CRC, Flow Control ที่ควบคุมอัตราการส่งข้อมูล และ Media Access Control ที่จัดการการเข้าถึง shared media
Data Link Layer แบ่งเป็น 2 sublayers คือ LLC (Logical Link Control) ที่จัดการ flow control และ error checking อยู่ส่วนบน และ MAC (Media Access Control) ที่จัดการ physical addressing และ media access อยู่ส่วนล่าง
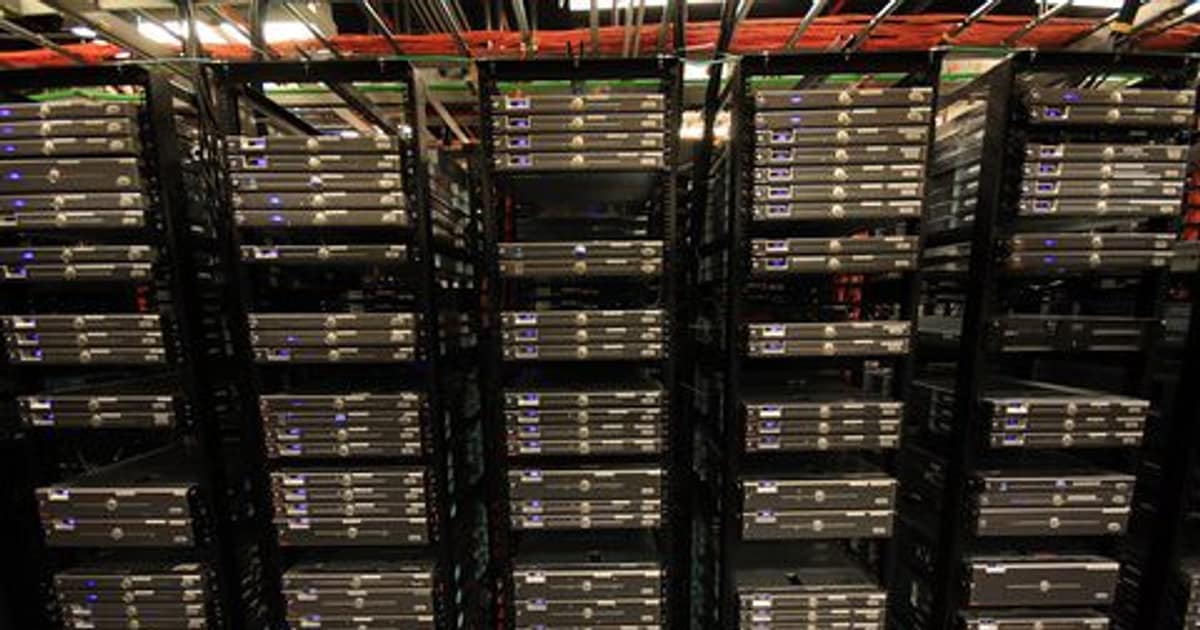
อุปกรณ์ที่ทำงานใน Layer 2 ได้แก่ Switches ที่ forward frames ตาม MAC address, Bridges ที่เชื่อม network segments และ NICs (Network Interface Cards) ที่มี MAC address เฉพาะตัว Protocols ที่ทำงานใน Layer 2 ได้แก่ Ethernet (IEEE 802.3), Wi-Fi (IEEE 802.11), PPP, HDLC, Frame Relay และ ARP
โครงสร้างของ Data Link Layer: MAC และ LLC
รายละเอียดเชิงลึกของ sublayers และ addressing
Data Link Layer Structure
=== LLC Sublayer (IEEE 802.2) ===
- จัดการ multiplexing ของ protocols
- Flow control (ถ้าต้องการ)
- Error notification ไปยัง upper layers
- SAP (Service Access Point) addressing
DSAP: Destination SAP
SSAP: Source SAP
Control: frame type (I, S, U frames)
LLC Header:
| DSAP (1 byte) | SSAP (1 byte) | Control (1-2 bytes) |
=== MAC Sublayer (IEEE 802.3/802.11) ===
- Physical addressing (MAC addresses)
- Media access control (CSMA/CD, CSMA/CA)
- Frame delimiting และ recognition
- Error detection (CRC-32)
=== MAC Address Format ===
48 bits (6 bytes): XX:XX:XX:YY:YY:YY
OUI (Organizationally Unique Identifier): แรก 3 bytes
- กำหนดโดย IEEE
- ระบุ manufacturer
NIC-specific: หลัง 3 bytes
- กำหนดโดย manufacturer
- unique ต่อ interface
ตัวอย่าง:
00:1A:2B:3C:4D:5E
00:1A:2B = OUI (Cisco Systems)
3C:4D:5E = Device-specific
Special MAC Addresses:
FF:FF:FF:FF:FF:FF = Broadcast
01:00:5E:xx:xx:xx = IPv4 Multicast
33:33:xx:xx:xx:xx = IPv6 Multicast
01:80:C2:00:00:00 = STP (Spanning Tree)
เนื้อหาเกี่ยวข้อง — อ่านต่อ: แบบจำลองเครือข่าย osi model คืออะไร
01:80:C2:00:00:0E = LLDP
=== Bit Flags ===
Bit 0 of first octet:
0 = Unicast
1 = Multicast
Bit 1 of first octet:

0 = Globally unique (OUI enforced)
1 = Locally administered
=== MAC Address Table (Switch) ===
แนะนำเพิ่มเติม — ติดตาม XM Signal
Switch เรียนรู้ MAC addresses จาก source MAC ของ frames
ที่เข้ามาแต่ละ port แล้วสร้าง MAC Address Table
Port | MAC Address | VLAN | Type | Age
Gi0/1 | 00:1A:2B:3C:4D:5E | 10 | Dynamic | 120s
Gi0/2 | 00:1A:2B:3C:4D:5F | 10 | Dynamic | 45s
Gi0/3 | 00:1A:2B:3C:4D:60 | 20 | Static | -
=== Frame Forwarding ===
1. Switch รับ frame
2. ดู source MAC -> เพิ่ม/update ใน MAC table
3. ดู destination MAC:
- Known unicast: forward ไป port ที่ถูกต้อง
- Unknown unicast: flood ทุก port (ยกเว้น source)
- Broadcast: flood ทุก port ใน VLAN
- Multicast: flood หรือ forward ตาม IGMP snooping
Ethernet Frame Structure และการวิเคราะห์ด้วย Wireshark
โครงสร้าง Ethernet frame และวิธี capture/analyze
=== Ethernet II Frame Structure ===
| Preamble | SFD | Dest MAC | Src MAC | Type | Payload | FCS |
| 7 bytes | 1B | 6 bytes | 6 bytes | 2B | 46-1500 | 4B |
Preamble: 10101010 x7 (synchronization)
SFD (Start Frame Delimiter): 10101011
เนื้อหาเกี่ยวข้อง — ทำความเข้าใจ india unemployment rate
Destination MAC: 6 bytes
Source MAC: 6 bytes
EtherType: 2 bytes
0x0800 = IPv4
0x0806 = ARP
0x86DD = IPv6
0x8100 = 802.1Q VLAN Tag
0x8847 = MPLS
0x88CC = LLDP
Payload: 46-1500 bytes (MTU)
FCS (Frame Check Sequence): 4 bytes CRC-32
Total frame size: 64-1518 bytes
Jumbo frame: up to 9000 bytes
แนะนำเพิ่มเติม — คู่มือเทรดจาก SiamCafeBook
=== 802.1Q VLAN Tagged Frame ===
| Dest MAC | Src MAC | 802.1Q Tag | Type | Payload | FCS |
| |
v v
| TPID | TCI |
| 0x8100 | PCP(3) | DEI(1) | VID(12) |
TPID: Tag Protocol ID (0x8100)
PCP: Priority Code Point (0-7, QoS)
DEI: Drop Eligible Indicator
VID: VLAN ID (0-4095)
เนื้อหาเกี่ยวข้อง — ดูเพิ่มเติมเรื่อง WebSocket Scaling Machine Learning Pipeline
=== Wireshark Capture Filters (BPF) ===
Capture เฉพาะ Ethernet frames
ether host 00:1a:2b:3c:4d:5e
ether src 00:1a:2b:3c:4d:5e
ether dst ff:ff:ff:ff:ff:ff
ether proto 0x0806 (ARP only)
vlan 100 (VLAN 100 only)
=== Wireshark Display Filters ===
eth.addr == 00:1a:2b:3c:4d:5e
eth.src == 00:1a:2b:3c:4d:5e
eth.type == 0x0800
arp
stp
lldp
eth.dst == ff:ff:ff:ff:ff:ff (broadcast frames)
=== tcpdump สำหรับ Layer 2 Analysis ===
Capture all traffic on interface
sudo tcpdump -i eth0 -e -nn -c 100Capture ARP traffic
sudo tcpdump -i eth0 -e -nn arpCapture specific MAC
sudo tcpdump -i eth0 -e -nn ether host 00:1a:2b:3c:4d:5eเนื้อหาเกี่ยวข้อง — ทำความเข้าใจ modified push ups คือ
Capture VLAN tagged traffic
sudo tcpdump -i eth0 -e -nn vlanCapture STP/LLDP
sudo tcpdump -i eth0 -e -nn ether dst 01:80:c2:00:00:00
sudo tcpdump -i eth0 -e -nn ether proto 0x88cc
Save to pcap file
sudo tcpdump -i eth0 -e -nn -w capture.pcap -c 10000=== tshark (CLI Wireshark) ===
tshark -i eth0 -f "ether proto 0x0806" -T fields \-e eth.src -e eth.dst -e arp.opcode -e arp.src.proto_ipv4
Switching, VLANs และ STP Configuration
ตั้งค่า Layer 2 features บน Switch
! === Cisco Switch VLAN Configuration ===

! สร้าง VLANs
vlan 10
 name SERVERS
vlan 20
 name WORKSTATIONS
vlan 30
 name MANAGEMENT
vlan 99
 name NATIVE

! Access Port (เชื่อม end devices)
interface GigabitEthernet0/1
 description Server01
 switchport mode access
 switchport access vlan 10
 switchport port-security
 switchport port-security maximum 2
 switchport port-security violation restrict
 switchport port-security mac-address sticky
 spanning-tree portfast
 spanning-tree bpduguard enable
 no shutdown

! Trunk Port (เชื่อม switches)
interface GigabitEthernet0/24
 description Uplink to Core
 switchport trunk encapsulation dot1q
 switchport mode trunk
 switchport trunk native vlan 99
 switchport trunk allowed vlan 10,20,30
 switchport nonegotiate
 no shutdown

! === Spanning Tree Protocol (STP) ===
! ใช้ Rapid PVST+ (recommended)
spanning-tree mode rapid-pvst

! กำหนด Root Bridge
spanning-tree vlan 10 root primary
spanning-tree vlan 20 root primary
spanning-tree vlan 30 root primary

! หรือกำหนด priority โดยตรง
spanning-tree vlan 10 priority 4096

! BPDU Guard (บน access ports)
spanning-tree portfast default
spanning-tree portfast bpduguard default

! Root Guard (บน ports ที่ไม่ควรเป็น root)
interface GigabitEthernet0/20
 spanning-tree guard root

! === EtherChannel (Link Aggregation) ===
interface range GigabitEthernet0/23-24
 channel-group 1 mode active
 channel-protocol lacp

interface Port-channel1
 switchport trunk encapsulation dot1q
 switchport mode trunk
 switchport trunk allowed vlan 10,20,30

! === Storm Control ===
interface GigabitEthernet0/1
 storm-control broadcast level 10
 storm-control multicast level 10
 storm-control action shutdown

! === DHCP Snooping ===
ip dhcp snooping
ip dhcp snooping vlan 10,20
interface GigabitEthernet0/24
 ip dhcp snooping trust

! === Dynamic ARP Inspection ===
ip arp inspection vlan 10,20
interface GigabitEthernet0/24
 ip arp inspection trust

! Verification
! show vlan brief
! show interfaces trunk
! show spanning-tree
! show mac address-table
! show etherchannel summary
! show ip dhcp snooping binding
สร้าง Network Analyzer ด้วย Python Scapy
ใช้ Python Scapy วิเคราะห์ Layer 2 traffic
Troubleshooting Data Link Layer Issues
วิธีวินิจฉัยและแก้ปัญหา Layer 2
#!/bin/bash
# l2_troubleshoot.sh — Layer 2 Troubleshooting Toolkit
set -euo pipefail

echo "=== Layer 2 Troubleshooting ==="

# 1. Check interface status
echo "[1] Interface Status:"
ip -br link show
echo ""

# 2. Check MAC address
echo "[2] MAC Addresses:"
ip link show | grep -E "link/ether" | awk '{print $2}'
echo ""

# 3. Check ARP table
echo "[3] ARP Table:"
ip neigh show
echo ""

# 4. Check for duplicate MACs
echo "[4] Checking duplicate MACs..."
ip neigh show | awk '{print $5}' | sort | uniq -d | while read mac; do
    echo "  DUPLICATE MAC: $mac"
    ip neigh show | grep "$mac"
done
echo ""

# 5. Check VLAN configuration
echo "[5] VLAN Configuration:"
if [ -d /proc/net/vlan ]; then
    cat /proc/net/vlan/config 2>/dev/null || echo "  No VLANs configured"
else
    echo "  8021q module not loaded"
fi
echo ""

# 6. Check bridge/switch status
echo "[6] Bridge Status:"
if command -v bridge &> /dev/null; then
    bridge link show 2>/dev/null || echo "  No bridges configured"
    echo ""
    echo "Bridge FDB (MAC table):"
    bridge fdb show | head -20
fi
echo ""

# 7. Check for errors
echo "[7] Interface Errors:"
for iface in $(ip -br link show | awk '{print $1}'); do
    errors=$(ip -s link show "$iface" | grep -A1 "errors" | tail -1 | awk '{print $3}')
    drops=$(ip -s link show "$iface" | grep -A1 "dropped" | tail -1 | awk '{print $4}')
    if [ "" -gt 0 ] || [ "" -gt 0 ]; then
        echo "  $iface: errors=$errors drops=$drops"
    fi
done
echo ""

# 8. Check STP (if running)
echo "[8] STP Status:"
if [ -d /sys/class/net/br0/bridge ]; then
    echo "  Root ID: $(cat /sys/class/net/br0/bridge/root_id 2>/dev/null)"
    echo "  Bridge ID: $(cat /sys/class/net/br0/bridge/bridge_id 2>/dev/null)"
    echo "  STP state: $(cat /sys/class/net/br0/bridge/stp_state 2>/dev/null)"
fi
echo ""

# 9. Check for broadcast storms
echo "[9] Broadcast Traffic Check (10 sec capture):"
BCAST=$(timeout 10 tcpdump -i eth0 -e -nn broadcast 2>/dev/null | wc -l || echo 0)
echo "  Broadcast frames in 10s: $BCAST"
if [ "$BCAST" -gt 100 ]; then
    echo "  WARNING: High broadcast traffic!"
fi
echo ""

# 10. Common L2 fixes
echo "[10] Common Fixes:"
echo "  - Duplex mismatch: ethtool -s eth0 speed 1000 duplex full autoneg on"
echo "  - Reset interface: ip link set eth0 down && ip link set eth0 up"
echo "  - Clear ARP cache: ip neigh flush all"
echo "  - Add VLAN: ip link add link eth0 name eth0.100 type vlan id 100"
echo "  - Check cable: ethtool eth0 | grep 'Link detected'"

echo ""
echo "=== Troubleshooting Complete ==="
FAQ คำถามที่พบบ่อย
Q: MAC address เปลี่ยนได้ไหม?
A: MAC address ที่ burn-in มากับ hardware เปลี่ยนไม่ได้ แต่สามารถ override ด้วย software ได้ (MAC spoofing) บน Linux ใช้ ip link set eth0 address XX:XX:XX:XX:XX:XX บน Windows เปลี่ยนผ่าน Device Manager การเปลี่ยน MAC address มีประโยชน์สำหรับ privacy, bypassing MAC filtering แต่ใช้ในทางมิชอบเช่น network attacks ได้
Q: Switch กับ Hub ต่างกันอย่างไร?
A: Hub ทำงานใน Layer 1 (Physical) ส่ง frames ที่รับมาออกทุก port เป็น shared bandwidth ทำให้เกิด collisions Switch ทำงานใน Layer 2 มี MAC address table ส่ง frames เฉพาะ port ที่ถูกต้อง ให้ dedicated bandwidth ต่อ port ไม่มี collisions ปัจจุบัน Hub แทบไม่ใช้แล้ว Switch เป็นมาตรฐานสำหรับ LAN
Q: ARP Spoofing คืออะไรและป้องกันอย่างไร?
A: ARP Spoofing เป็นการโจมตีที่ attacker ส่ง ARP replies ปลอมเพื่อ map IP address ของ target ไปยัง MAC address ของตัวเอง ทำให้ traffic ถูก redirect ผ่าน attacker (Man-in-the-Middle) ป้องกันได้ด้วย Dynamic ARP Inspection (DAI) บน switch, Static ARP entries, ARP watch tools และ 802.1X authentication
Q: VLAN Trunking กับ Access Port ต่างกันอย่างไร?
A: Access Port เป็นสมาชิกของ VLAN เดียว frames ที่ออกจาก access port ไม่มี VLAN tag เหมาะสำหรับเชื่อม end devices เช่น PC, server Trunk Port ส่ง traffic ของหลาย VLANs โดยเพิ่ม 802.1Q VLAN tag ใน frames เหมาะสำหรับเชื่อมระหว่าง switches หรือ switch กับ router ที่ต้อง route ข้าม VLANs