Nginx (อ่านว่า "Engine-X") เป็น Web Server และ Reverse Proxy ที่ได้รับความนิยมสูงสุดในโลก จากสถิติปี 2026 Nginx ครองส่วนแบ่งตลาด Web Server มากกว่า 35% ใช้โดยเว็บไซต์ระดับโลกอย่าง Netflix, Airbnb, WordPress.com, GitHub และอีกหลายล้านเว็บไซต์ทั่วโลก
ความโดดเด่นของ Nginx อยู่ที่ประสิทธิภาพสูง ใช้หน่วยความจำน้อย รองรับ Connection พร้อมกันได้มหาศาล และมีความยืดหยุ่นในการตั้งค่าสูงมาก ไม่ว่าจะเป็น Web Server ธรรมดา Reverse Proxy สำหรับ Application Server, Load Balancer หรือแม้แต่ API Gateway ทุกอย่างทำได้ด้วย Nginx เพียงตัวเดียว
บทความนี้จะสอนตั้งค่า Nginx อย่างครบถ้วน ตั้งแต่พื้นฐานจนถึง Production Configuration พร้อมตัวอย่างจริงที่สามารถนำไปใช้ได้ทันที
Nginx คืออะไร?
Nginx คือ High-Performance Web Server, Reverse Proxy Server และ Load Balancer ที่สร้างโดย Igor Sysoev ในปี 2004 ออกแบบมาเพื่อแก้ปัญหา C10K (รองรับ 10,000 Connection พร้อมกัน) ด้วยสถาปัตยกรรมแบบ Event-driven และ Asynchronous ทำให้จัดการ Request ได้มากกว่า Apache อย่างมีประสิทธิภาพ
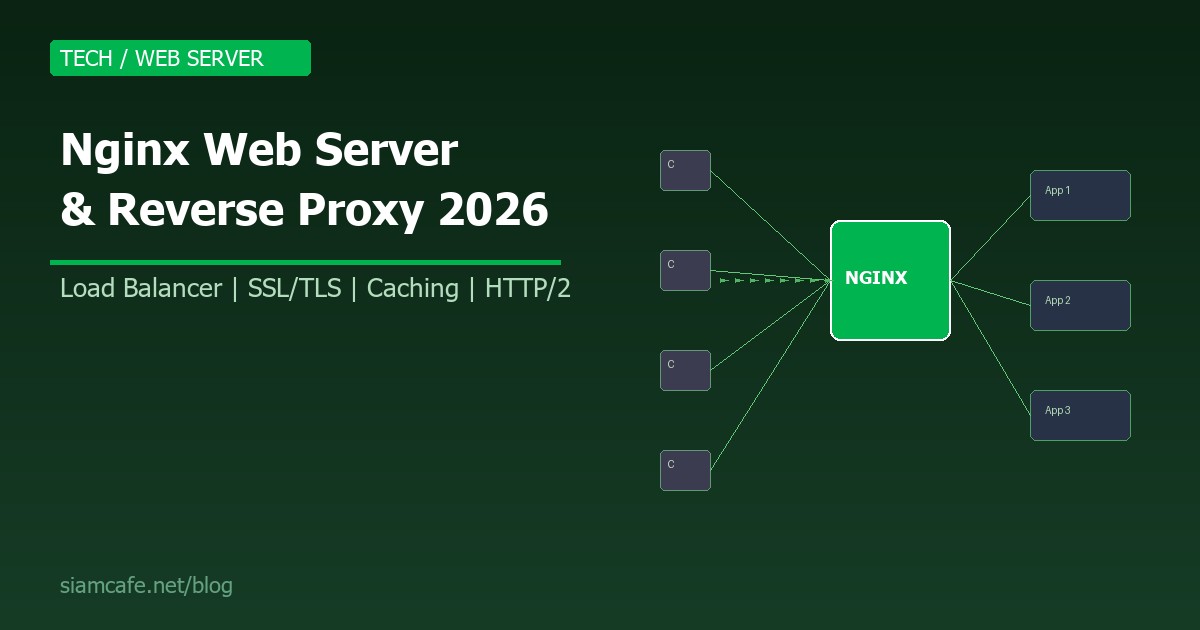
Nginx สามารถทำหน้าที่ได้หลายอย่างพร้อมกัน:
- Web Server — ให้บริการไฟล์ Static (HTML, CSS, JS, Images) ได้เร็วมาก
- Reverse Proxy — รับ Request จาก Client แล้วส่งต่อไปยัง Backend Server (Node.js, Python, PHP)
- Load Balancer — กระจาย Traffic ไปยัง Backend หลายตัวเพื่อรองรับ Load มากขึ้น
- SSL/TLS Termination — จัดการ HTTPS ที่ Nginx แทน Backend Server ทำให้ Backend ทำงานเร็วขึ้น
- Caching Proxy — Cache Response จาก Backend เพื่อลด Load และเพิ่มความเร็ว
- API Gateway — จัดการ Routing, Rate Limiting, Authentication สำหรับ API
Nginx vs Apache — เปรียบเทียบ
| คุณสมบัติ | Nginx | Apache |
|---|---|---|
| สถาปัตยกรรม | Event-driven, Async | Process/Thread-based |
| Static Files | เร็วมาก | เร็ว |
| Dynamic Content | ต้องใช้ Proxy ไป Backend | รองรับ mod_php โดยตรง |
| Memory Usage | น้อยมาก | มากกว่า |
| Concurrent Connections | หลักหมื่น - แสน | ถูกจำกัดด้วย Thread/Process |
| .htaccess | ไม่รองรับ | รองรับ |
| Config Syntax | Block-based (C-like) | XML-like (Directives) |
| Reverse Proxy | ดีเยี่ยม (Built-in) | ต้องใช้ mod_proxy |
| Module System | ต้อง Compile (Static) | Dynamic Loading (.so) |
| เหมาะกับ | High Traffic, Reverse Proxy | Shared Hosting, .htaccess |
ติดตั้ง Nginx
Ubuntu/Debian
# ติดตั้งจาก Repository
sudo apt update
sudo apt install nginx

# เริ่ม Service
sudo systemctl start nginx
sudo systemctl enable nginx
sudo systemctl status nginx

# ทดสอบ
curl http://localhost
# จะเห็นหน้า Welcome to nginx!
CentOS/RHEL/Rocky Linux
# เพิ่ม EPEL Repository
sudo dnf install epel-release
sudo dnf install nginx

# เริ่ม Service
sudo systemctl start nginx
sudo systemctl enable nginx

# เปิด Firewall
sudo firewall-cmd --permanent --add-service=http
sudo firewall-cmd --permanent --add-service=https
sudo firewall-cmd --reload
ติดตั้งจาก Official Repository (เวอร์ชันล่าสุด)
# Ubuntu — เพิ่ม Nginx Official Repository
curl -fsSL https://nginx.org/keys/nginx_signing.key | \
  sudo gpg --dearmor -o /usr/share/keyrings/nginx-archive-keyring.gpg

echo "deb [signed-by=/usr/share/keyrings/nginx-archive-keyring.gpg] \
  http://nginx.org/packages/ubuntu $(lsb_release -cs) nginx" | \
  sudo tee /etc/apt/sources.list.d/nginx.list

sudo apt update
sudo apt install nginx
ติดตั้งด้วย Docker
# Basic
docker run -d --name nginx -p 80:80 nginx:alpine

# พร้อม Mount config และ content
docker run -d --name nginx \
  -p 80:80 -p 443:443 \
  -v /path/to/nginx.conf:/etc/nginx/nginx.conf:ro \
  -v /path/to/html:/usr/share/nginx/html:ro \
  -v /path/to/certs:/etc/nginx/certs:ro \
  nginx:alpine
โครงสร้าง Configuration File
การเข้าใจโครงสร้างของ Nginx Config เป็นพื้นฐานที่สำคัญมาก ไฟล์หลักคือ /etc/nginx/nginx.conf ซึ่งจะ Include ไฟล์ย่อยจากโฟลเดอร์อื่นๆ เข้ามา
# โครงสร้างไฟล์หลัก /etc/nginx/nginx.conf
user nginx;
worker_processes auto;  # จำนวน Worker = จำนวน CPU Core
error_log /var/log/nginx/error.log warn;
pid /run/nginx.pid;

events {
    worker_connections 1024;  # Connection ต่อ Worker
    multi_accept on;          # รับหลาย Connection พร้อมกัน
    use epoll;                # ใช้ epoll (Linux)
}

http {
    include /etc/nginx/mime.types;
    default_type application/octet-stream;

    # Logging
    log_format main '$remote_addr - $remote_user [$time_local] '
                    '"$request" $status $body_bytes_sent '
                    '"$http_referer" "$http_user_agent"';
    access_log /var/log/nginx/access.log main;

    # Performance
    sendfile on;
    tcp_nopush on;
    tcp_nodelay on;
    keepalive_timeout 65;
    types_hash_max_size 2048;

    # Gzip
    gzip on;
    gzip_vary on;
    gzip_min_length 1024;
    gzip_types text/plain text/css application/json
               application/javascript text/xml application/xml
               application/xml+rss text/javascript;

    # Include Virtual Hosts
    include /etc/nginx/conf.d/*.conf;
    include /etc/nginx/sites-enabled/*;
}
โครงสร้างโฟลเดอร์
/etc/nginx/
├── nginx.conf              # Config หลัก
├── mime.types              # MIME Type mapping
├── conf.d/                 # Config เพิ่มเติม
│   └── default.conf        # Default server
├── sites-available/        # Virtual Host ที่มี (Debian/Ubuntu)
│   └── mysite.conf
├── sites-enabled/          # Virtual Host ที่เปิดใช้ (symlink)
│   └── mysite.conf -> ../sites-available/mysite.conf
├── snippets/               # Config snippet ที่ใช้ซ้ำ
│   ├── ssl-params.conf
│   └── security-headers.conf
└── modules-enabled/        # Dynamic modules
Serving Static Files
# /etc/nginx/sites-available/static-site.conf
server {
    listen 80;
    server_name example.com www.example.com;
    root /var/www/example.com/html;
    index index.html index.htm;

    # Serve static files
    location / {
        try_files $uri $uri/ =404;
    }

    # Cache static assets
    location ~* \.(jpg|jpeg|png|gif|ico|css|js|woff2|svg)$ {
        expires 30d;
        add_header Cache-Control "public, immutable";
        access_log off;
    }

    # Deny access to hidden files
    location ~ /\. {
        deny all;
        access_log off;
        log_not_found off;
    }
}

# เปิดใช้งาน
sudo ln -s /etc/nginx/sites-available/static-site.conf \
           /etc/nginx/sites-enabled/
sudo nginx -t        # ทดสอบ Config
sudo systemctl reload nginx
Virtual Hosts (Server Blocks)
Virtual Host ใน Nginx เรียกว่า Server Block ทำให้เครื่อง Server เดียวสามารถให้บริการหลายเว็บไซต์ที่มี Domain ต่างกันได้ แต่ละ Domain มี Config แยกกัน Root Directory แยกกัน
# Site 1: blog.example.com
server {
    listen 80;
    server_name blog.example.com;
    root /var/www/blog;

    location / {
        try_files $uri $uri/ =404;
    }
}

# Site 2: shop.example.com
server {
    listen 80;
    server_name shop.example.com;
    root /var/www/shop;

    location / {
        proxy_pass http://localhost:3000;
        proxy_set_header Host $host;
        proxy_set_header X-Real-IP $remote_addr;
    }
}

# Site 3: api.example.com
server {
    listen 80;
    server_name api.example.com;

    location / {
        proxy_pass http://localhost:8080;
        proxy_set_header Host $host;
        proxy_set_header X-Real-IP $remote_addr;
        proxy_set_header X-Forwarded-For $proxy_add_x_forwarded_for;
        proxy_set_header X-Forwarded-Proto $scheme;
    }
}

# Default Server (catch-all)
server {
    listen 80 default_server;
    server_name _;
    return 444;  # ปิด Connection ทันที ไม่ตอบอะไร
}
Reverse Proxy Setup
Reverse Proxy เป็นหนึ่งในการใช้งาน Nginx ที่สำคัญที่สุด ทำหน้าที่รับ Request จาก Client แล้วส่งต่อไปยัง Backend Application Server เช่น Node.js, Python (Gunicorn/Uvicorn), PHP-FPM หรือ Java (Tomcat)
Reverse Proxy สำหรับ Node.js
# Node.js App รันอยู่ที่ port 3000
server {
    listen 80;
    server_name myapp.example.com;

    # Security Headers
    add_header X-Frame-Options "SAMEORIGIN" always;
    add_header X-Content-Type-Options "nosniff" always;
    add_header X-XSS-Protection "1; mode=block" always;

    location / {
        proxy_pass http://127.0.0.1:3000;
        proxy_http_version 1.1;
        proxy_set_header Upgrade $http_upgrade;
        proxy_set_header Connection 'upgrade';
        proxy_set_header Host $host;
        proxy_set_header X-Real-IP $remote_addr;
        proxy_set_header X-Forwarded-For $proxy_add_x_forwarded_for;
        proxy_set_header X-Forwarded-Proto $scheme;
        proxy_cache_bypass $http_upgrade;

        # Timeouts
        proxy_connect_timeout 60s;
        proxy_send_timeout 60s;
        proxy_read_timeout 60s;
    }

    # Serve static files โดยตรงจาก Nginx (เร็วกว่า)
    location /static/ {
        alias /var/www/myapp/static/;
        expires 30d;
        access_log off;
    }
}
Reverse Proxy สำหรับ Python (Gunicorn/Uvicorn)
# Python App (FastAPI/Django) รันอยู่ที่ Unix Socket
server {
    listen 80;
    server_name api.example.com;

    location / {
        proxy_pass http://unix:/run/gunicorn.sock;
        proxy_set_header Host $host;
        proxy_set_header X-Real-IP $remote_addr;
        proxy_set_header X-Forwarded-For $proxy_add_x_forwarded_for;
        proxy_set_header X-Forwarded-Proto $scheme;
    }

    # หรือใช้ TCP Socket
    # proxy_pass http://127.0.0.1:8000;

    location /static/ {
        alias /var/www/myapp/staticfiles/;
    }

    location /media/ {
        alias /var/www/myapp/media/;
    }
}
Reverse Proxy สำหรับ PHP-FPM
# PHP Application (Laravel/WordPress)
server {
    listen 80;
    server_name php.example.com;
    root /var/www/php-app/public;
    index index.php index.html;

    location / {
        try_files $uri $uri/ /index.php?$query_string;
    }

    location ~ \.php$ {
        fastcgi_pass unix:/run/php/php8.3-fpm.sock;
        fastcgi_param SCRIPT_FILENAME $realpath_root$fastcgi_script_name;
        include fastcgi_params;
        fastcgi_hide_header X-Powered-By;
    }

    location ~ /\.(?!well-known) {
        deny all;
    }
}
Load Balancing (Upstream)
Nginx สามารถทำ Load Balancing ได้อย่างมีประสิทธิภาพ โดยใช้ upstream block เพื่อกำหนดกลุ่ม Backend Server แล้วกระจาย Traffic ไปยัง Server ต่างๆ ตาม Algorithm ที่เลือก
# กำหนดกลุ่ม Backend Server
upstream backend_servers {
    # Round Robin (Default) — วนรอบตามลำดับ
    server 10.0.0.1:3000;
    server 10.0.0.2:3000;
    server 10.0.0.3:3000;
}

# Weighted Round Robin — กำหนดน้ำหนัก
upstream backend_weighted {
    server 10.0.0.1:3000 weight=5;   # รับ 5 ส่วน
    server 10.0.0.2:3000 weight=3;   # รับ 3 ส่วน
    server 10.0.0.3:3000 weight=1;   # รับ 1 ส่วน
}

# Least Connections — ส่งไป Server ที่มี Connection น้อยที่สุด
upstream backend_least {
    least_conn;
    server 10.0.0.1:3000;
    server 10.0.0.2:3000;
    server 10.0.0.3:3000;
}

# IP Hash — Client IP เดิมไป Server เดิมเสมอ (Sticky Session)
upstream backend_sticky {
    ip_hash;
    server 10.0.0.1:3000;
    server 10.0.0.2:3000;
    server 10.0.0.3:3000;
}

# Health Check + Backup Server
upstream backend_ha {
    server 10.0.0.1:3000 max_fails=3 fail_timeout=30s;
    server 10.0.0.2:3000 max_fails=3 fail_timeout=30s;
    server 10.0.0.3:3000 backup;  # ใช้เมื่อตัวอื่นล่ม
    server 10.0.0.4:3000 down;    # ปิดชั่วคราว
}

# ใช้ Upstream ใน Server Block
server {
    listen 80;
    server_name app.example.com;

    location / {
        proxy_pass http://backend_servers;
        proxy_set_header Host $host;
        proxy_set_header X-Real-IP $remote_addr;
        proxy_set_header X-Forwarded-For $proxy_add_x_forwarded_for;
        proxy_next_upstream error timeout http_500 http_502 http_503;
    }
}
SSL/TLS with Let's Encrypt (Certbot)
การตั้งค่า HTTPS เป็นสิ่งจำเป็นในปัจจุบัน ไม่ว่าจะเพื่อความปลอดภัย SEO หรือความน่าเชื่อถือ Let's Encrypt ให้ SSL Certificate ฟรี และ Certbot ช่วยติดตั้งและ Renew อัตโนมัติ
# ติดตั้ง Certbot
sudo apt install certbot python3-certbot-nginx

# ขอ Certificate (Certbot จัดการ Nginx Config ให้)
sudo certbot --nginx -d example.com -d www.example.com

# ขอ Certificate โดยไม่แก้ Config (Manual)
sudo certbot certonly --webroot -w /var/www/example.com \
  -d example.com -d www.example.com

# ทดสอบ Auto-Renewal
sudo certbot renew --dry-run

# Cron สำหรับ Auto-Renewal
0 0,12 * * * certbot renew --quiet --post-hook "systemctl reload nginx"
SSL Configuration ที่แนะนำ
# /etc/nginx/snippets/ssl-params.conf
ssl_protocols TLSv1.2 TLSv1.3;
ssl_prefer_server_ciphers off;
ssl_ciphers ECDHE-ECDSA-AES128-GCM-SHA256:ECDHE-RSA-AES128-GCM-SHA256:ECDHE-ECDSA-AES256-GCM-SHA384:ECDHE-RSA-AES256-GCM-SHA384;
ssl_session_timeout 1d;
ssl_session_cache shared:SSL:10m;
ssl_session_tickets off;
ssl_stapling on;
ssl_stapling_verify on;
resolver 8.8.8.8 8.8.4.4 valid=300s;
resolver_timeout 5s;
add_header Strict-Transport-Security "max-age=63072000; includeSubDomains; preload" always;

# Server Block with SSL
server {
    listen 80;
    server_name example.com www.example.com;
    return 301 https://$server_name$request_uri;
}

server {
    listen 443 ssl http2;
    server_name example.com www.example.com;

    ssl_certificate /etc/letsencrypt/live/example.com/fullchain.pem;
    ssl_certificate_key /etc/letsencrypt/live/example.com/privkey.pem;
    include /etc/nginx/snippets/ssl-params.conf;

    root /var/www/example.com/html;
    index index.html;

    location / {
        try_files $uri $uri/ =404;
    }
}
HTTP/2 และ HTTP/3
# HTTP/2 (เปิดใช้ง่ายมาก — ต้องมี SSL)
server {
    listen 443 ssl http2;
    server_name example.com;
    # ... SSL config ...
}

# HTTP/3 (QUIC) — Nginx 1.25+
server {
    listen 443 ssl;
    listen 443 quic reuseport;
    http2 on;
    http3 on;

    server_name example.com;

    ssl_certificate /etc/letsencrypt/live/example.com/fullchain.pem;
    ssl_certificate_key /etc/letsencrypt/live/example.com/privkey.pem;

    # บอก Browser ว่ารองรับ HTTP/3
    add_header Alt-Svc 'h3=":443"; ma=86400' always;

    # Early Data (0-RTT)
    ssl_early_data on;
    proxy_set_header Early-Data $ssl_early_data;
}
Caching (proxy_cache)
Nginx สามารถ Cache Response จาก Backend ได้ ช่วยลด Load บน Backend Server อย่างมาก เหมาะกับ Content ที่ไม่เปลี่ยนแปลงบ่อย
# กำหนด Cache Zone ใน http block
http {
    proxy_cache_path /var/cache/nginx
                     levels=1:2
                     keys_zone=my_cache:10m
                     max_size=10g
                     inactive=60m
                     use_temp_path=off;

    server {
        listen 80;
        server_name app.example.com;

        location / {
            proxy_cache my_cache;
            proxy_cache_valid 200 302 10m;
            proxy_cache_valid 404 1m;
            proxy_cache_use_stale error timeout updating
                                  http_500 http_502 http_503 http_504;
            proxy_cache_background_update on;
            proxy_cache_lock on;

            # แสดง Cache Status ใน Header
            add_header X-Cache-Status $upstream_cache_status;

            proxy_pass http://backend_servers;
            proxy_set_header Host $host;
        }

        # ไม่ Cache API endpoints
        location /api/ {
            proxy_pass http://backend_servers;
            proxy_no_cache 1;
            proxy_cache_bypass 1;
        }

        # Purge Cache (ต้อง Compile กับ ngx_cache_purge module)
        location ~ /purge(/.*) {
            allow 127.0.0.1;
            deny all;
            proxy_cache_purge my_cache $scheme$proxy_host$1;
        }
    }
}
Rate Limiting
Rate Limiting ช่วยป้องกัน DDoS, Brute Force Attack และควบคุมการใช้งาน API ไม่ให้เกินขีดจำกัด
# กำหนด Rate Limit Zone ใน http block
http {
    # 10 requests per second ต่อ IP
    limit_req_zone $binary_remote_addr zone=api_limit:10m rate=10r/s;

    # 30 requests per minute สำหรับ Login
    limit_req_zone $binary_remote_addr zone=login_limit:10m rate=30r/m;

    # จำกัด Connection พร้อมกัน
    limit_conn_zone $binary_remote_addr zone=conn_limit:10m;

    server {
        listen 80;
        server_name api.example.com;

        # API Rate Limiting
        location /api/ {
            limit_req zone=api_limit burst=20 nodelay;
            limit_req_status 429;

            proxy_pass http://backend;
        }

        # Login Rate Limiting (เข้มงวดกว่า)
        location /auth/login {
            limit_req zone=login_limit burst=5 nodelay;
            limit_req_status 429;

            proxy_pass http://backend;
        }

        # จำกัด Connection พร้อมกัน
        location /downloads/ {
            limit_conn conn_limit 5;
            limit_rate 1m;  # จำกัด Bandwidth 1MB/s ต่อ Connection

            alias /var/www/downloads/;
        }

        # Custom Error Page สำหรับ 429
        error_page 429 /429.html;
        location = /429.html {
            root /var/www/error-pages;
            internal;
        }
    }
}
Security Headers
# /etc/nginx/snippets/security-headers.conf
# ป้องกัน Clickjacking
add_header X-Frame-Options "SAMEORIGIN" always;

# ป้องกัน MIME-type sniffing
add_header X-Content-Type-Options "nosniff" always;

# ป้องกัน XSS
add_header X-XSS-Protection "1; mode=block" always;

# Referrer Policy
add_header Referrer-Policy "strict-origin-when-cross-origin" always;

# Content Security Policy
add_header Content-Security-Policy "default-src 'self'; script-src 'self' 'unsafe-inline' https://cdn.example.com; style-src 'self' 'unsafe-inline' https://fonts.googleapis.com; font-src 'self' https://fonts.gstatic.com; img-src 'self' data: https:;" always;

# Permissions Policy
add_header Permissions-Policy "camera=(), microphone=(), geolocation=()" always;

# HSTS (เฉพาะ HTTPS)
add_header Strict-Transport-Security "max-age=63072000; includeSubDomains; preload" always;

# ใช้ใน Server Block
server {
    # ...
    include /etc/nginx/snippets/security-headers.conf;
}
Gzip Compression
# Gzip Configuration (ใน http block)
gzip on;
gzip_vary on;
gzip_proxied any;
gzip_comp_level 5;  # 1-9 (5 เป็นจุดสมดุลระหว่างความเร็วและขนาด)
gzip_min_length 1024;
gzip_types
    text/plain
    text/css
    text/javascript
    text/xml
    application/json
    application/javascript
    application/xml
    application/xml+rss
    application/atom+xml
    application/vnd.ms-fontobject
    font/opentype
    font/ttf
    image/svg+xml
    image/x-icon;

# ไม่ Gzip สำหรับ IE6
gzip_disable "msie6";

# Brotli (ต้อง Compile module เพิ่ม)
# brotli on;
# brotli_comp_level 6;
# brotli_types text/plain text/css application/json application/javascript;
WebSocket Proxying
WebSocket เป็น Protocol สำหรับ Real-time Communication ที่ใช้กันมากใน Chat, Game, Live Dashboard การตั้งค่า Nginx ให้ Proxy WebSocket ต้องกำหนด Header พิเศษ
# WebSocket Proxy
map $http_upgrade $connection_upgrade {
    default upgrade;
    ''      close;
}

server {
    listen 80;
    server_name ws.example.com;

    location /ws/ {
        proxy_pass http://127.0.0.1:3000;
        proxy_http_version 1.1;
        proxy_set_header Upgrade $http_upgrade;
        proxy_set_header Connection $connection_upgrade;
        proxy_set_header Host $host;
        proxy_set_header X-Real-IP $remote_addr;
        proxy_set_header X-Forwarded-For $proxy_add_x_forwarded_for;

        # เพิ่ม Timeout สำหรับ WebSocket
        proxy_read_timeout 86400s;
        proxy_send_timeout 86400s;
    }

    # ส่วนที่เหลือเป็น HTTP ปกติ
    location / {
        proxy_pass http://127.0.0.1:3000;
        proxy_set_header Host $host;
        proxy_set_header X-Real-IP $remote_addr;
    }
}
Nginx เป็น API Gateway
# ใช้ Nginx เป็น API Gateway สำหรับ Microservices
upstream user_service {
    server 10.0.1.1:3001;
    server 10.0.1.2:3001;
}

upstream order_service {
    server 10.0.2.1:3002;
    server 10.0.2.2:3002;
}

upstream product_service {
    server 10.0.3.1:3003;
}

server {
    listen 443 ssl http2;
    server_name api.example.com;

    ssl_certificate /etc/letsencrypt/live/api.example.com/fullchain.pem;
    ssl_certificate_key /etc/letsencrypt/live/api.example.com/privkey.pem;

    # Global Rate Limiting
    limit_req zone=api_limit burst=50 nodelay;

    # CORS Headers
    add_header Access-Control-Allow-Origin "https://example.com" always;
    add_header Access-Control-Allow-Methods "GET, POST, PUT, DELETE, OPTIONS" always;
    add_header Access-Control-Allow-Headers "Authorization, Content-Type" always;

    # Preflight Request
    if ($request_method = OPTIONS) {
        return 204;
    }

    # Route to User Service
    location /api/v1/users {
        proxy_pass http://user_service;
        proxy_set_header Host $host;
        proxy_set_header X-Real-IP $remote_addr;
    }

    # Route to Order Service
    location /api/v1/orders {
        proxy_pass http://order_service;
        proxy_set_header Host $host;
        proxy_set_header X-Real-IP $remote_addr;
    }

    # Route to Product Service
    location /api/v1/products {
        proxy_pass http://product_service;
        proxy_set_header Host $host;
        proxy_set_header X-Real-IP $remote_addr;
    }

    # Health Check Endpoint
    location /health {
        access_log off;
        return 200 "OK\n";
        add_header Content-Type text/plain;
    }
}
Logging และ Access Logs
# Custom Log Format
log_format detailed '$remote_addr - $remote_user [$time_local] '
                    '"$request" $status $body_bytes_sent '
                    '"$http_referer" "$http_user_agent" '
                    '$request_time $upstream_response_time '
                    '$upstream_addr $upstream_cache_status';

# JSON Log Format (สำหรับ ELK Stack)
log_format json_log escape=json
    '{'
      '"timestamp": "$time_iso8601",'
      '"remote_addr": "$remote_addr",'
      '"request_method": "$request_method",'
      '"request_uri": "$request_uri",'
      '"status": $status,'
      '"body_bytes_sent": $body_bytes_sent,'
      '"request_time": $request_time,'
      '"upstream_response_time": "$upstream_response_time",'
      '"http_user_agent": "$http_user_agent",'
      '"http_referer": "$http_referer"'
    '}';

# ใช้งาน
server {
    access_log /var/log/nginx/app-access.log json_log;
    error_log /var/log/nginx/app-error.log warn;

    # ปิด Log สำหรับ Health Check
    location /health {
        access_log off;
        return 200;
    }

    # แยก Log ตาม Virtual Host
    access_log /var/log/nginx/$host-access.log main;
}

# Log Rotation (logrotate)
# /etc/logrotate.d/nginx
/var/log/nginx/*.log {
    daily
    missingok
    rotate 30
    compress
    delaycompress
    notifempty
    sharedscripts
    postrotate
        [ -f /run/nginx.pid ] && kill -USR1 $(cat /run/nginx.pid)
    endscript
}
Performance Tuning
Worker Processes และ Connections
# nginx.conf
# worker_processes = จำนวน CPU Core
worker_processes auto;

# ตรวจสอบจำนวน CPU
# nproc --all

events {
    # worker_connections x worker_processes = Max concurrent connections
    worker_connections 4096;
    multi_accept on;
    use epoll;
}

# Maximum open files (ต้องตั้งที่ OS ด้วย)
worker_rlimit_nofile 65535;

# ulimit -n 65535
Keepalive
# Client Keepalive
keepalive_timeout 65;
keepalive_requests 1000;

# Upstream Keepalive (สำคัญมากสำหรับ Reverse Proxy)
upstream backend {
    server 127.0.0.1:3000;
    keepalive 32;  # จำนวน Keepalive Connection ที่เก็บไว้
}

server {
    location / {
        proxy_pass http://backend;
        proxy_http_version 1.1;
        proxy_set_header Connection "";  # จำเป็นสำหรับ Upstream Keepalive
    }
}
Buffer Settings
# Client Body
client_body_buffer_size 16k;
client_max_body_size 100m;
client_body_timeout 12;
client_header_timeout 12;

# Proxy Buffers
proxy_buffers 16 32k;
proxy_buffer_size 64k;
proxy_busy_buffers_size 128k;

# FastCGI Buffers
fastcgi_buffers 16 32k;
fastcgi_buffer_size 64k;Common Configurations สำหรับ Backend ยอดนิยม
Node.js (Express/NestJS)
upstream nodejs {
    server 127.0.0.1:3000;
    keepalive 64;
}

server {
    listen 443 ssl http2;
    server_name app.example.com;

    ssl_certificate /etc/letsencrypt/live/app.example.com/fullchain.pem;
    ssl_certificate_key /etc/letsencrypt/live/app.example.com/privkey.pem;

    location / {
        proxy_pass http://nodejs;
        proxy_http_version 1.1;
        proxy_set_header Upgrade $http_upgrade;
        proxy_set_header Connection "upgrade";
        proxy_set_header Host $host;
        proxy_set_header X-Real-IP $remote_addr;
        proxy_set_header X-Forwarded-For $proxy_add_x_forwarded_for;
        proxy_set_header X-Forwarded-Proto $scheme;
    }
}
Python (Django/FastAPI)
upstream python_app {
    server unix:/run/gunicorn/myapp.sock;
}

server {
    listen 443 ssl http2;
    server_name django.example.com;

    client_max_body_size 50M;

    location / {
        proxy_pass http://python_app;
        proxy_set_header Host $host;
        proxy_set_header X-Real-IP $remote_addr;
        proxy_set_header X-Forwarded-For $proxy_add_x_forwarded_for;
        proxy_set_header X-Forwarded-Proto $scheme;
    }

    location /static/ {
        alias /var/www/myapp/staticfiles/;
        expires 30d;
    }

    location /media/ {
        alias /var/www/myapp/media/;
        expires 7d;
    }
}
PHP (Laravel/WordPress)
server {
    listen 443 ssl http2;
    server_name wp.example.com;
    root /var/www/wordpress;
    index index.php;

    client_max_body_size 64M;

    location / {
        try_files $uri $uri/ /index.php?$args;
    }

    location ~ \.php$ {
        include fastcgi_params;
        fastcgi_pass unix:/run/php/php8.3-fpm.sock;
        fastcgi_param SCRIPT_FILENAME $document_root$fastcgi_script_name;
        fastcgi_read_timeout 300;
    }

    # Block access to sensitive files
    location ~* /(wp-config\.php|readme\.html|license\.txt) {
        deny all;
    }

    location = /xmlrpc.php {
        deny all;
    }

    location ~* \.(jpg|jpeg|png|gif|ico|css|js|woff2)$ {
        expires 30d;
        access_log off;
    }
}
คำสั่ง Nginx ที่ใช้บ่อย
| คำสั่ง | หน้าที่ |
|---|---|
nginx -t | ทดสอบ Config ว่าถูกต้อง |
nginx -T | ทดสอบ + แสดง Config ทั้งหมด |
nginx -s reload | Reload Config (ไม่ Downtime) |
nginx -s stop | หยุด Nginx ทันที |
nginx -s quit | หยุด Nginx แบบ Graceful |
nginx -V | แสดงเวอร์ชันและ Compile Options |
systemctl reload nginx | Reload ผ่าน systemd |
systemctl status nginx | ดูสถานะ |
Troubleshooting ปัญหาที่พบบ่อย
- 502 Bad Gateway: Backend Server ไม่ทำงาน หรือ Socket/Port ผิด ตรวจสอบ Backend ก่อน แล้วดู error.log
- 504 Gateway Timeout: Backend ตอบช้าเกินไป เพิ่ม proxy_read_timeout
- 413 Request Entity Too Large: ไฟล์ที่ Upload ใหญ่เกินไป เพิ่ม client_max_body_size
- Permission Denied: Nginx ไม่มีสิทธิ์อ่านไฟล์ ตรวจสอบ user ใน nginx.conf และ chmod/chown ให้ถูกต้อง
- Address already in use: Port 80/443 ถูกใช้โดย Process อื่น ใช้
ss -tlnpเพื่อตรวจสอบ
สรุป
Nginx เป็นเครื่องมือที่ทรงพลังและจำเป็นสำหรับ DevOps และ System Administrator ทุกคน ด้วยความสามารถที่หลากหลาย ตั้งแต่ Web Server พื้นฐาน ไปจนถึง Reverse Proxy, Load Balancer, SSL Termination และ API Gateway ทุกอย่างทำได้ในตัวเดียว
สิ่งสำคัญที่ต้องจำคือ: ใช้ nginx -t ทดสอบ Config ทุกครั้งก่อน Reload, ตั้ง Security Headers เสมอ, ใช้ HTTPS ทุก Domain, ตั้ง Rate Limiting เพื่อป้องกัน Abuse และ Monitor Log อยู่เสมอ
การเริ่มต้นจาก Config พื้นฐาน แล้วค่อยๆ เพิ่มฟีเจอร์ทีละอย่าง เช่น SSL, Caching, Load Balancing จะช่วยให้เข้าใจ Nginx อย่างถ่องแท้ เมื่อคุณเชี่ยวชาญ Nginx แล้ว คุณจะสามารถจัดการ Infrastructure ที่รองรับ Traffic ระดับล้าน Request ต่อวันได้อย่างมั่นใจ