เมื่อองค์กรเติบโตขึ้น ทีมพัฒนาหลายทีมต้องการใช้ Kubernetes ในเวลาเดียวกัน การสร้าง cluster แยกสำหรับแต่ละทีมนั้นแพงและยากต่อการดูแล Multi-tenancy คือคำตอบที่ช่วยให้หลายทีมแชร์ cluster เดียวกันได้อย่างปลอดภัย ประหยัดทรัพยากร และจัดการง่าย
ในปี 2026 Kubernetes multi-tenancy ก้าวหน้าขึ้นมากด้วย tools อย่าง vCluster, Capsule และ Hierarchical Namespace Controller ที่ทำให้การแบ่งแยก tenant ทำได้ง่ายขึ้นอย่างมาก บทความนี้จะพาคุณเรียนรู้ตั้งแต่แนวคิดพื้นฐานจนถึงการ implement จริงในองค์กร
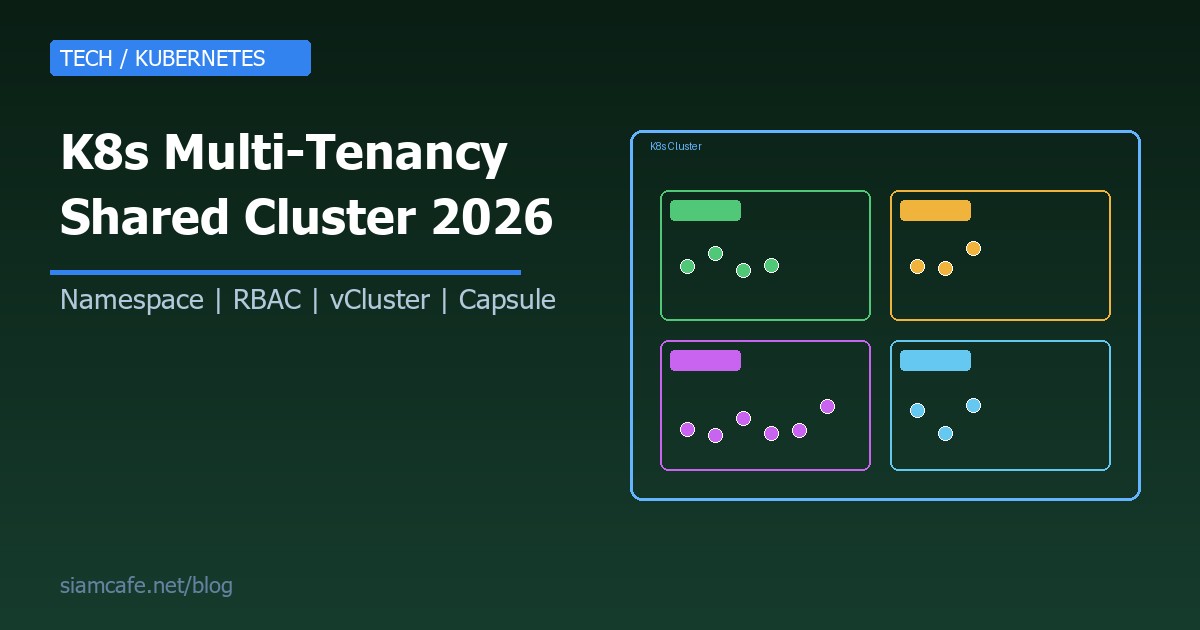
Kubernetes Multi-Tenancy คืออะไร?
Multi-tenancy ใน Kubernetes คือการที่ cluster เดียวถูกใช้งานร่วมกันโดยหลาย tenant ซึ่ง tenant อาจเป็นทีมพัฒนาแต่ละทีม แผนกต่างๆ ในบริษัท หรือแม้แต่ลูกค้าแต่ละรายในแอป SaaS โดยแต่ละ tenant จะมี:
- Resource isolation — แต่ละ tenant ใช้ทรัพยากรไม่เกินที่กำหนด
- Network isolation — tenant หนึ่งเข้าถึง network ของ tenant อื่นไม่ได้
- Security boundary — สิทธิ์การเข้าถึงแยกกันชัดเจน
- Data isolation — ข้อมูลแต่ละ tenant แยกจากกันอย่างสมบูรณ์
เป้าหมายคือให้แต่ละ tenant รู้สึกเหมือนมี cluster ของตัวเอง แม้จะแชร์ infrastructure เดียวกัน
Soft vs Hard Multi-Tenancy
การแบ่งประเภท multi-tenancy มีสองแนวทางหลัก ซึ่งการเลือกขึ้นอยู่กับ trust level ระหว่าง tenants และ compliance requirements ขององค์กร
| คุณสมบัติ | Soft Multi-Tenancy | Hard Multi-Tenancy |
|---|---|---|
| Trust level | Trusted (ทีมในบริษัทเดียวกัน) | Untrusted (ลูกค้าต่างราย) |
| Isolation | Namespace + RBAC | Virtual Cluster / Node-level |
| Use case | ทีม Dev ในบริษัท | SaaS multi-customer |
| Complexity | ต่ำ-ปานกลาง | สูง |
| Cost | ประหยัด | ใช้ทรัพยากรมากกว่า |
| Security | ป้องกันความผิดพลาด | ป้องกันการโจมตี |
| ตัวอย่าง tools | Namespace, RBAC, ResourceQuota | vCluster, Kata Containers |
Soft multi-tenancy เหมาะสำหรับสถานการณ์ที่ tenants เป็นทีมในองค์กรเดียวกัน ที่คุณ trust ว่าจะไม่พยายามโจมตีระบบ เพียงแต่ต้องป้องกันไม่ให้เกิด accidental interference เช่น ทีม A ลบ resource ของทีม B โดยไม่ตั้งใจ
Hard multi-tenancy จำเป็นเมื่อ tenants เป็น entity ภายนอกที่ไม่ได้ trust เช่น ลูกค้าแต่ละรายใน SaaS platform ที่ต้องการ isolation ระดับ kernel หรือ VM เพื่อป้องกัน container escape attacks
Namespace-Based Isolation — พื้นฐานของ Multi-Tenancy
Namespace เป็นกลไกพื้นฐานที่สุดใน Kubernetes สำหรับแบ่งแยก tenants แต่ละ namespace ทำหน้าที่เป็น virtual cluster ย่อยๆ ภายใน cluster เดียว
# สร้าง namespace สำหรับแต่ละทีม
kubectl create namespace team-frontend
kubectl create namespace team-backend
kubectl create namespace team-data

# หรือใช้ YAML
apiVersion: v1
kind: Namespace
metadata:
  name: team-frontend
  labels:
    team: frontend
    environment: production
    cost-center: CC-001
---
apiVersion: v1
kind: Namespace
metadata:
  name: team-backend
  labels:
    team: backend
    environment: production
    cost-center: CC-002

# ดู namespaces ทั้งหมด
kubectl get namespaces

# Deploy ลงใน namespace เฉพาะ
kubectl apply -f deployment.yaml -n team-frontend

# ตั้ง default namespace สำหรับ context
kubectl config set-context --current --namespace=team-frontendteam-frontend, team-backend-staging, customer-acme-prod และใส่ labels สำหรับ cost tracking, environment, owner เสมอ
ResourceQuota และ LimitRange — จำกัดทรัพยากรต่อ Tenant
ResourceQuota กำหนดปริมาณทรัพยากรสูงสุดที่แต่ละ namespace ใช้ได้ ช่วยป้องกัน tenant หนึ่งใช้ทรัพยากรหมดจนทีมอื่นใช้ไม่ได้ ส่วน LimitRange กำหนดค่า default และค่าสูงสุดสำหรับแต่ละ pod/container
# ResourceQuota — จำกัดทรัพยากรรวมของ namespace
apiVersion: v1
kind: ResourceQuota
metadata:
  name: team-frontend-quota
  namespace: team-frontend
spec:
  hard:
    requests.cpu: "10"              # CPU requests รวมไม่เกิน 10 cores
    requests.memory: "20Gi"         # Memory requests รวมไม่เกิน 20GB
    limits.cpu: "20"                # CPU limits รวมไม่เกิน 20 cores
    limits.memory: "40Gi"           # Memory limits รวมไม่เกิน 40GB
    pods: "50"                      # จำนวน pods ไม่เกิน 50
    services: "20"                  # จำนวน services ไม่เกิน 20
    persistentvolumeclaims: "10"    # จำนวน PVC ไม่เกิน 10
    requests.storage: "100Gi"       # Storage รวมไม่เกิน 100GB
    configmaps: "30"                # ConfigMaps ไม่เกิน 30
    secrets: "30"                   # Secrets ไม่เกิน 30

---
# LimitRange — กำหนด default limits สำหรับแต่ละ container
apiVersion: v1
kind: LimitRange
metadata:
  name: team-frontend-limits
  namespace: team-frontend
spec:
  limits:
  - type: Container
    default:                # ค่า default สำหรับ limits
      cpu: "500m"
      memory: "512Mi"
    defaultRequest:         # ค่า default สำหรับ requests
      cpu: "100m"
      memory: "128Mi"
    max:                    # ค่าสูงสุดที่ container ตัวหนึ่งใช้ได้
      cpu: "4"
      memory: "8Gi"
    min:                    # ค่าต่ำสุด
      cpu: "50m"
      memory: "64Mi"
  - type: Pod
    max:
      cpu: "8"
      memory: "16Gi"

# ดู quota usage
kubectl describe resourcequota team-frontend-quota -n team-frontend
การตั้ง ResourceQuota ช่วยป้องกันปัญหา noisy neighbor ที่ tenant หนึ่งใช้ทรัพยากรหมด cluster จนทีมอื่นไม่สามารถ deploy ได้ ส่วน LimitRange ช่วยป้องกัน developer ลืมตั้ง resource limits ซึ่งอาจทำให้ pod ตัวเดียวกิน memory ทั้ง node
NetworkPolicy — แยก Network ระหว่าง Tenant
NetworkPolicy ช่วยควบคุม traffic ระหว่าง pods ทำให้ pods ใน namespace หนึ่งไม่สามารถเข้าถึง pods ใน namespace อื่นได้ เว้นแต่จะอนุญาตอย่างชัดเจน
# Default deny all — ปิด traffic ทั้งหมดเป็น default
apiVersion: networking.k8s.io/v1
kind: NetworkPolicy
metadata:
  name: default-deny-all
  namespace: team-frontend
spec:
  podSelector: {}    # เลือกทุก pod ใน namespace
  policyTypes:
  - Ingress
  - Egress

---
# อนุญาต traffic ภายใน namespace เดียวกัน
apiVersion: networking.k8s.io/v1
kind: NetworkPolicy
metadata:
  name: allow-same-namespace
  namespace: team-frontend
spec:
  podSelector: {}
  policyTypes:
  - Ingress
  ingress:
  - from:
    - namespaceSelector:
        matchLabels:
          kubernetes.io/metadata.name: team-frontend

---
# อนุญาตเฉพาะ traffic จาก ingress controller
apiVersion: networking.k8s.io/v1
kind: NetworkPolicy
metadata:
  name: allow-ingress-controller
  namespace: team-frontend
spec:
  podSelector: {}
  policyTypes:
  - Ingress
  ingress:
  - from:
    - namespaceSelector:
        matchLabels:
          app.kubernetes.io/name: ingress-nginx

---
# อนุญาต DNS egress (จำเป็นสำหรับ service discovery)
apiVersion: networking.k8s.io/v1
kind: NetworkPolicy
metadata:
  name: allow-dns
  namespace: team-frontend
spec:
  podSelector: {}
  policyTypes:
  - Egress
  egress:
  - to:
    - namespaceSelector:
        matchLabels:
          kubernetes.io/metadata.name: kube-system
    ports:
    - protocol: UDP
      port: 53
    - protocol: TCP
      port: 53

---
# อนุญาต egress ไปยัง shared services
apiVersion: networking.k8s.io/v1
kind: NetworkPolicy
metadata:
  name: allow-shared-services
  namespace: team-frontend
spec:
  podSelector: {}
  policyTypes:
  - Egress
  egress:
  - to:
    - namespaceSelector:
        matchLabels:
role: shared-servicesRBAC per Tenant — ควบคุมสิทธิ์การเข้าถึง
RBAC (Role-Based Access Control) เป็นกลไกสำคัญที่กำหนดว่าใครสามารถทำอะไรได้ในแต่ละ namespace โดยใช้ Role (namespace-scoped) กับ RoleBinding เพื่อจำกัดสิทธิ์ของแต่ละทีม
# Role — กำหนดสิทธิ์ใน namespace
apiVersion: rbac.authorization.k8s.io/v1
kind: Role
metadata:
  name: team-developer
  namespace: team-frontend
rules:
- apiGroups: ["", "apps", "batch"]
  resources: ["pods", "deployments", "services", "configmaps", "secrets", "jobs", "cronjobs"]
  verbs: ["get", "list", "watch", "create", "update", "patch", "delete"]
- apiGroups: [""]
  resources: ["pods/log", "pods/exec"]
  verbs: ["get", "create"]
- apiGroups: ["networking.k8s.io"]
  resources: ["ingresses"]
  verbs: ["get", "list", "watch", "create", "update"]
# ไม่ให้สิทธิ์: nodes, namespaces, clusterroles, networkpolicies, resourcequotas

---
# Role สำหรับ viewer — ดูได้อย่างเดียว
apiVersion: rbac.authorization.k8s.io/v1
kind: Role
metadata:
  name: team-viewer
  namespace: team-frontend
rules:
- apiGroups: ["", "apps", "batch"]
  resources: ["pods", "deployments", "services", "configmaps", "jobs"]
  verbs: ["get", "list", "watch"]
- apiGroups: [""]
  resources: ["pods/log"]
  verbs: ["get"]
# ไม่ให้สิทธิ์: secrets, exec, create, update, delete

---
# RoleBinding — ผูก Role กับ user/group
apiVersion: rbac.authorization.k8s.io/v1
kind: RoleBinding
metadata:
  name: frontend-developers
  namespace: team-frontend
subjects:
- kind: Group
  name: "frontend-team"        # จาก Identity Provider (OIDC)
  apiGroup: rbac.authorization.k8s.io
- kind: User
  name: "somchai@company.com"
  apiGroup: rbac.authorization.k8s.io
roleRef:
  kind: Role
  name: team-developer
  apiGroup: rbac.authorization.k8s.io

---
# RoleBinding สำหรับ viewer
apiVersion: rbac.authorization.k8s.io/v1
kind: RoleBinding
metadata:
  name: frontend-viewers
  namespace: team-frontend
subjects:
- kind: Group
  name: "management-team"
  apiGroup: rbac.authorization.k8s.io
roleRef:
  kind: Role
  name: team-viewer
  apiGroup: rbac.authorization.k8s.io
หลักการสำคัญคือ principle of least privilege ให้สิทธิ์เท่าที่จำเป็นเท่านั้น Developer ไม่จำเป็นต้องแก้ไข NetworkPolicy หรือ ResourceQuota ที่ platform team เป็นคนกำหนด ส่วน viewer ก็ไม่ควรเห็น secrets
Hierarchical Namespace Controller (HNC)
HNC เป็น Kubernetes project ที่สร้าง hierarchy ของ namespaces ได้ ทำให้สามารถสร้างโครงสร้างแบบ parent-child เหมาะสำหรับองค์กรที่มีหลายแผนก โดยแต่ละแผนกมีหลายทีม
# ติดตั้ง HNC
kubectl apply -f https://github.com/kubernetes-sigs/hierarchical-namespaces/releases/latest/download/default.yaml

# สร้าง parent namespace สำหรับแผนก
kubectl create namespace dept-engineering

# สร้าง SubnamespaceAnchor — child namespace
apiVersion: hnc.x-k8s.io/v1alpha2
kind: SubnamespaceAnchor
metadata:
  name: team-frontend
  namespace: dept-engineering
---
apiVersion: hnc.x-k8s.io/v1alpha2
kind: SubnamespaceAnchor
metadata:
  name: team-backend
  namespace: dept-engineering
---
apiVersion: hnc.x-k8s.io/v1alpha2
kind: SubnamespaceAnchor
metadata:
  name: team-mobile
  namespace: dept-engineering

# กำหนด propagation — objects ที่จะ inherit จาก parent
apiVersion: hnc.x-k8s.io/v1alpha2
kind: HNCConfiguration
metadata:
  name: config
spec:
  resources:
  - resource: secrets
    mode: Propagate     # Secrets ใน parent จะ propagate ลง children
  - resource: configmaps
    mode: Propagate     # ConfigMaps เช่นกัน
  - resource: networkpolicies
    mode: Propagate     # NetworkPolicy ก็ propagate ลง
  - resource: limitranges
    mode: Propagate
  - resource: resourcequotas
    mode: Remove        # ไม่ propagate — กำหนดแยกต่อ child

# ผลลัพธ์:
# dept-engineering/          (parent)
#   ├── team-frontend/       (child — inherit policies จาก parent)
#   ├── team-backend/        (child)
#   └── team-mobile/         (child)

# ดู hierarchy
kubectl hns tree dept-engineering
HNC มีประโยชน์มากเมื่อคุณต้องการ apply policy กลาง เช่น NetworkPolicy หรือ secrets ที่ใช้ร่วมกัน (เช่น image pull secret) ให้กับทุกทีมในแผนกเดียวกัน โดยไม่ต้อง duplicate resources ทุก namespace
vCluster — Virtual Clusters
vCluster จาก Loft Labs สร้าง virtual Kubernetes cluster ภายใน namespace ของ host cluster แต่ละ tenant จะได้ cluster ที่มี API server เป็นของตัวเอง สามารถติดตั้ง CRDs, operators ได้อิสระ เหมือนมี cluster จริง
# ติดตั้ง vCluster CLI
curl -L -o vcluster "https://github.com/loft-sh/vcluster/releases/latest/download/vcluster-linux-amd64"
chmod +x vcluster && sudo mv vcluster /usr/local/bin/

# สร้าง virtual cluster
vcluster create team-frontend --namespace host-team-frontend

# ผลลัพธ์:
# - สร้าง virtual K8s API server (k3s/k0s) ใน pod
# - syncer ที่ sync resources ระหว่าง virtual <-> host cluster
# - kubeconfig สำหรับเข้าถึง virtual cluster

# เชื่อมต่อ virtual cluster
vcluster connect team-frontend --namespace host-team-frontend

# ตอนนี้ kubectl commands ทั้งหมดจะไปที่ virtual cluster
kubectl get nodes        # เห็น virtual node
kubectl get namespaces   # มี namespace ของตัวเอง
kubectl create namespace staging   # สร้าง namespace ได้เอง

# ติดตั้ง CRD ใน virtual cluster ได้โดยไม่กระทบ host
kubectl apply -f my-custom-crd.yaml

# Disconnect กลับไป host cluster
vcluster disconnect

# vcluster.yaml — configuration
apiVersion: v1
kind: ConfigMap
metadata:
  name: vcluster-config
data:
  config.yaml: |
    sync:
      toHost:
        pods:
          enabled: true
        services:
          enabled: true
        ingresses:
          enabled: true
        persistentvolumeclaims:
          enabled: true
      fromHost:
        nodes:
          enabled: true
        storageClasses:
          enabled: true
    policies:
      resourceQuota:
        enabled: true
        quota:
          requests.cpu: "8"
          requests.memory: "16Gi"
          limits.cpu: "16"
          limits.memory: "32Gi"
pods: "100"Capsule — Multi-Tenancy Operator
Capsule เป็น Kubernetes operator ที่สร้างขึ้นมาเฉพาะสำหรับ multi-tenancy โดยใช้แนวคิด "Tenant" เป็น first-class resource ที่ครอบ namespace หลายตัวเข้าด้วยกัน
# ติดตั้ง Capsule
helm install capsule projectcapsule/capsule -n capsule-system --create-namespace

# สร้าง Tenant
apiVersion: capsule.clastix.io/v1beta2
kind: Tenant
metadata:
  name: team-frontend
spec:
  owners:
  - name: somchai@company.com
    kind: User
  - name: frontend-team
    kind: Group
  namespaceOptions:
    quota: 5                          # สร้างได้สูงสุด 5 namespaces
    additionalMetadata:
      labels:
        team: frontend
        cost-center: CC-001
  networkPolicies:
    items:
    - policyTypes:
      - Ingress
      - Egress
      ingress:
      - from:
        - namespaceSelector:
            matchLabels:
              capsule.clastix.io/tenant: team-frontend
      egress:
      - to:
        - namespaceSelector:
            matchLabels:
              capsule.clastix.io/tenant: team-frontend
      - to: []                        # Allow external traffic
        ports:
        - port: 443
          protocol: TCP
  limitRanges:
    items:
    - limits:
      - type: Container
        default:
          cpu: "500m"
          memory: "512Mi"
        defaultRequest:
          cpu: "100m"
          memory: "128Mi"
  resourceQuota:
    items:
    - hard:
        pods: "100"
        services: "30"
        requests.cpu: "20"
        requests.memory: "40Gi"
  storageClasses:
    allowed:
    - standard
    - ssd-premium
  ingressOptions:
    hostnameCollisionScope: Tenant    # ป้องกัน hostname ชนกัน
    allowedHostnames:
      allowedRegex: "^.*\.frontend\.company\.com$"
  containerRegistries:
    allowed:
    - "gcr.io/company-project"
    - "docker.io/company"

---
# Tenant owner สามารถสร้าง namespace ภายใต้ tenant ได้เอง
# (ไม่ต้องขอ cluster-admin)
kubectl create namespace frontend-production
kubectl create namespace frontend-staging
kubectl create namespace frontend-dev
Capsule แตกต่างจากการใช้ namespace ธรรมดาตรงที่ tenant owner สามารถจัดการ namespaces ของตัวเองได้ สร้าง namespace ใหม่ กำหนดสิทธิ์ภายใน tenant deploy แอป ได้โดยไม่ต้องขอ cluster admin ทุกครั้ง platform team แค่กำหนด boundary ของ tenant ไว้ แล้ว tenant owner จัดการภายในเอง
Loft — Virtual Clusters Platform
Loft เป็น platform เชิงพาณิชย์ที่สร้างบน vCluster ให้ UI, self-service portal, sleep mode สำหรับ idle clusters และ integration กับ CI/CD เหมาะสำหรับองค์กรที่ต้องการ managed solution
# ติดตั้ง Loft
helm install loft loft/loft -n loft --create-namespace

# Loft features:
# 1. Self-service — developer สร้าง virtual cluster ได้เอง
# 2. Sleep mode — virtual cluster ที่ idle จะถูก suspend อัตโนมัติ
# 3. Templates — กำหนด template สำหรับ virtual clusters
# 4. Cost tracking — ดูค่าใช้จ่ายต่อ tenant
# 5. SSO integration — OIDC, SAML, LDAP
# 6. Audit logging — ดูว่าใครทำอะไร เมื่อไหร่

# Virtual Cluster Template
apiVersion: management.loft.sh/v1
kind: VirtualClusterTemplate
metadata:
  name: dev-environment
spec:
  displayName: "Development Environment"
  template:
    metadata: {}
    instanceTemplate:
      metadata:
        labels:
          env: development
    pro:
      enabled: true
    helmRelease:
      chart:
        version: 0.20.0
      values: |
        sync:
          toHost:
            pods:
              enabled: true
            services:
              enabled: true
    accessPoint:
      ingress: {}
  versions:
  - version: "1.0.0"
Loft เหมาะสำหรับองค์กรที่มี developer จำนวนมากที่ต้องการ self-service development environments โดย platform team ไม่ต้อง provision ให้ทีละคน ทำให้ลด workload ของ platform team ได้อย่างมาก
Cost Allocation per Tenant — Kubecost
เมื่อหลาย tenant แชร์ cluster เดียวกัน การ track ค่าใช้จ่ายต่อ tenant เป็นเรื่องสำคัญ Kubecost ช่วย breakdown cost ตาม namespace, label, team ทำให้แต่ละทีมรู้ว่าใช้ทรัพยากรเท่าไหร่ และช่วย chargeback ได้
# ติดตั้ง Kubecost
helm install kubecost kubecost/cost-analyzer \
  --namespace kubecost --create-namespace \
  --set kubecostToken="YOUR_TOKEN"

# Kubecost ให้ข้อมูล:
# - CPU/Memory/Storage cost per namespace
# - Cost per label (team, project, environment)
# - Idle resources (จ่ายเงินแต่ไม่ได้ใช้)
# - Right-sizing recommendations
# - Cost trend over time

# API query ดู cost per namespace
curl http://kubecost.company.com/model/allocation \
  -d '{
    "window": "7d",
    "aggregate": "namespace",
    "accumulate": true
  }'

# ตัวอย่าง output:
# team-frontend: $245.30/week (CPU: $120, Memory: $85, Storage: $40)
# team-backend:  $380.50/week (CPU: $200, Memory: $130, Storage: $50)
# team-data:     $520.00/week (CPU: $180, Memory: $240, Storage: $100)

# ตั้ง budget alerts
# Kubecost สามารถแจ้งเตือนเมื่อ namespace ใช้เงินเกิน budget
# และแนะนำ right-sizing สำหรับ workloads ที่ request ทรัพยากรเกินจริง
Shared Services — Ingress, Monitoring, Logging
ใน multi-tenant cluster มี services บางอย่างที่ทุก tenant ใช้ร่วมกัน เช่น ingress controller, monitoring stack, centralized logging ซึ่งต้องจัดการให้ดีเพื่อไม่ให้เกิดปัญหาข้าม tenant
# Shared Ingress — แยก IngressClass per tenant หรือใช้ร่วมกัน
apiVersion: networking.k8s.io/v1
kind: Ingress
metadata:
  name: frontend-app
  namespace: team-frontend
  annotations:
    nginx.ingress.kubernetes.io/ssl-redirect: "true"
spec:
  ingressClassName: nginx-shared
  rules:
  - host: frontend.company.com      # แต่ละ tenant มี hostname เฉพาะ
    http:
      paths:
      - path: /
        pathType: Prefix
        backend:
          service:
            name: frontend-app
            port:
              number: 80

---
# Shared Monitoring — Prometheus + Grafana
# แต่ละ tenant เห็นเฉพาะ metrics ของ namespace ตัวเอง
# ใช้ Grafana multi-tenancy (org per tenant)
# หรือ Thanos/Mimir สำหรับ multi-tenant metrics

# ServiceMonitor สำหรับ tenant
apiVersion: monitoring.coreos.com/v1
kind: ServiceMonitor
metadata:
  name: frontend-app-monitor
  namespace: team-frontend
spec:
  selector:
    matchLabels:
      app: frontend-app
  endpoints:
  - port: metrics
    interval: 30s

---
# Shared Logging — Loki + Grafana หรือ ELK
# ใช้ namespace label เป็น tenant ID ใน log pipeline
# Loki multi-tenancy: แต่ละ tenant มี tenant ID ของตัวเอง
# ป้องกัน tenant A ดู logs ของ tenant B
Tenant Onboarding Automation
เมื่อมีทีมใหม่เข้ามาใช้ cluster การ onboard ด้วยมือทำให้ช้าและผิดพลาดง่าย ควรสร้าง automation ที่สร้าง namespace, RBAC, quota, network policy ให้อัตโนมัติ
# ใช้ Helm chart สำหรับ tenant onboarding
# charts/tenant/values.yaml
tenantName: team-frontend
owner: somchai@company.com
ownerGroup: frontend-team
environment: production
quotas:
  cpu: "10"
  memory: "20Gi"
  pods: "50"
  storage: "100Gi"
networkPolicy:
  allowSharedServices: true
  allowExternalEgress: true

# charts/tenant/templates/ จะมี:
# - namespace.yaml
# - resourcequota.yaml
# - limitrange.yaml
# - networkpolicy.yaml
# - rbac-role.yaml
# - rbac-rolebinding.yaml
# - image-pull-secret.yaml

# Onboard tenant ใหม่
helm install tenant-frontend ./charts/tenant \
  -f values-team-frontend.yaml \
  --namespace team-frontend --create-namespace

# หรือใช้ GitOps (ArgoCD / Flux)
# เก็บ tenant config ใน Git repository
# platform-config/
#   ├── tenants/
#   │   ├── team-frontend/
#   │   │   ├── kustomization.yaml
#   │   │   ├── namespace.yaml
#   │   │   ├── quota.yaml
#   │   │   ├── networkpolicy.yaml
#   │   │   └── rbac.yaml
#   │   ├── team-backend/
#   │   └── team-data/
#   └── shared-services/
#       ├── ingress-nginx/
#       ├── monitoring/
# └── logging/Security Considerations — PSA และ Runtime Security
ความปลอดภัยเป็นเรื่องสำคัญที่สุดใน multi-tenant environment Pod Security Admission (PSA) ช่วยป้องกัน pods ที่มี security risk สูง ส่วน runtime security ช่วยตรวจจับพฤติกรรมผิดปกติ
# Pod Security Admission (PSA) — มาแทน PodSecurityPolicy
# กำหนด security level ต่อ namespace
apiVersion: v1
kind: Namespace
metadata:
  name: team-frontend
  labels:
    pod-security.kubernetes.io/enforce: restricted
    pod-security.kubernetes.io/audit: restricted
    pod-security.kubernetes.io/warn: restricted

# PSA levels:
# privileged — ไม่จำกัด (เหมาะสำหรับ system namespaces)
# baseline — ป้องกัน known privilege escalations
# restricted — เข้มงวดที่สุด best practice สำหรับ tenant namespaces

# ตัวอย่าง pod ที่ผ่าน restricted level
apiVersion: v1
kind: Pod
metadata:
  name: secure-app
  namespace: team-frontend
spec:
  securityContext:
    runAsNonRoot: true
    seccompProfile:
      type: RuntimeDefault
  containers:
  - name: app
    image: gcr.io/company/app:v1
    securityContext:
      allowPrivilegeEscalation: false
      readOnlyRootFilesystem: true
      runAsNonRoot: true
      capabilities:
        drop: ["ALL"]
    resources:
      limits:
        cpu: "500m"
        memory: "512Mi"
      requests:
        cpu: "100m"
        memory: "128Mi"

# Runtime Security — Falco
# ตรวจจับ: container shell access, file tampering,
# network anomalies, privilege escalation attempts
# helm install falco falcosecurity/falco -n falco-system

# OPA Gatekeeper — Policy enforcement
# ป้องกัน: ใช้ image จาก registry ที่ไม่อนุญาต,
# ไม่ตั้ง resource limits, ใช้ latest tag
Noisy Neighbor Prevention — ป้องกันการรบกวนข้าม Tenant
Noisy neighbor คือปัญหาที่ tenant หนึ่งใช้ทรัพยากรมากจนกระทบ performance ของ tenant อื่น แม้จะมี ResourceQuota แล้ว ก็ยังมีทรัพยากรบางอย่างที่ต้องจัดการเพิ่มเติม
# 1. Priority Classes — กำหนดลำดับความสำคัญ
apiVersion: scheduling.k8s.io/v1
kind: PriorityClass
metadata:
  name: tenant-critical
value: 1000
description: "สำหรับ production workloads ที่สำคัญ"
---
apiVersion: scheduling.k8s.io/v1
kind: PriorityClass
metadata:
  name: tenant-normal
value: 500
description: "สำหรับ workloads ทั่วไป"
---
apiVersion: scheduling.k8s.io/v1
kind: PriorityClass
metadata:
  name: tenant-batch
value: 100
preemptionPolicy: Never
description: "สำหรับ batch jobs ที่ไม่เร่งด่วน"

# 2. Pod Disruption Budget — ป้องกัน downtime ตอน maintenance
apiVersion: policy/v1
kind: PodDisruptionBudget
metadata:
  name: frontend-app-pdb
  namespace: team-frontend
spec:
  minAvailable: 2              # ต้องมี pod ทำงานอย่างน้อย 2 ตัวเสมอ
  selector:
    matchLabels:
      app: frontend-app

# 3. Topology Spread Constraints — กระจาย pods ไม่ให้กระจุกตัว
spec:
  topologySpreadConstraints:
  - maxSkew: 1
    topologyKey: kubernetes.io/hostname
    whenUnsatisfiable: DoNotSchedule
    labelSelector:
      matchLabels:
        app: frontend-app

# 4. Node Affinity — แยก nodes สำหรับ tenant ที่ต้องการ isolation สูง
spec:
  affinity:
    nodeAffinity:
      requiredDuringSchedulingIgnoredDuringExecution:
        nodeSelectorTerms:
        - matchExpressions:
          - key: dedicated-tenant
            operator: In
            values: ["team-data"]
Multi-Tenancy vs Multi-Cluster
คำถามที่พบบ่อยคือ ควรใช้ multi-tenancy ใน cluster เดียว หรือสร้างหลาย cluster ดีกว่า คำตอบขึ้นอยู่กับหลายปัจจัย
| ปัจจัย | Multi-Tenancy (1 Cluster) | Multi-Cluster |
|---|---|---|
| ค่าใช้จ่าย | ประหยัด (แชร์ control plane) | แพง (control plane ต่อ cluster) |
| Isolation | ปานกลาง-สูง (ขึ้นอยู่กับ tools) | สูงสุด (แยก complete) |
| Management | ง่าย (จัดการ cluster เดียว) | ซับซ้อน (หลาย clusters) |
| Blast radius | ใหญ่ (cluster ล่มกระทบทุกคน) | เล็ก (cluster หนึ่งล่มไม่กระทบอีกอัน) |
| Compliance | อาจไม่ผ่าน (แชร์ infra) | ผ่าน (แยก complete) |
| Upgrades | ง่าย (upgrade ครั้งเดียว) | ซับซ้อน (upgrade ทีละ cluster) |
| Networking | ง่าย (อยู่ใน cluster เดียว) | ต้อง mesh (service mesh) |
โดยทั่วไป สำหรับทีมภายในองค์กรเดียวกัน multi-tenancy ใน cluster เดียวเพียงพอ และ cost-effective กว่ามาก แต่สำหรับ compliance requirements ที่เข้มงวด (เช่น PCI-DSS, HIPAA) หรือ untrusted tenants อาจต้องใช้ multi-cluster ร่วมกับ fleet management tools อย่าง Rancher หรือ Anthos
Compliance และ Data Isolation — PDPA
สำหรับองค์กรในประเทศไทย การปฏิบัติตาม PDPA (พ.ร.บ. คุ้มครองข้อมูลส่วนบุคคล) เป็นเรื่องสำคัญเมื่อใช้ multi-tenant cluster เพราะข้อมูลส่วนบุคคลของลูกค้าแต่ละรายต้องถูกเก็บและจัดการอย่างปลอดภัย
# 1. Data isolation — แยก database/storage per tenant
# อย่าใช้ shared database ที่แค่แยก row ด้วย tenant_id
# สำหรับ PDPA compliance ควรแยก database instance per tenant

# 2. Encryption at rest — เข้ารหัสข้อมูลที่เก็บใน etcd
apiVersion: apiserver.config.k8s.io/v1
kind: EncryptionConfiguration
resources:
  - resources:
    - secrets
    providers:
    - aescbc:
        keys:
        - name: key1
          secret: <base64-encoded-key>

# 3. Audit logging — บันทึกทุกการเข้าถึง
apiVersion: audit.k8s.io/v1
kind: Policy
rules:
- level: Metadata
  resources:
  - group: ""
    resources: ["secrets", "configmaps"]
- level: RequestResponse
  resources:
  - group: ""
    resources: ["pods/exec", "pods/attach"]

# 4. Network encryption — mTLS ระหว่าง services
# ใช้ service mesh (Istio, Linkerd) สำหรับ mTLS
# ป้องกัน data sniffing ระหว่าง pods

# 5. Secret management — ใช้ external secrets
# อย่าเก็บ secrets ใน etcd โดยตรง
# ใช้ External Secrets Operator + AWS Secrets Manager / HashiCorp Vault
apiVersion: external-secrets.io/v1beta1
kind: ExternalSecret
metadata:
  name: db-credentials
  namespace: team-frontend
spec:
  refreshInterval: 1h
  secretStoreRef:
    name: vault-backend
    kind: ClusterSecretStore
  target:
    name: db-credentials
  data:
  - secretKey: password
    remoteRef:
      key: "tenants/team-frontend/db-password"
การปฏิบัติตาม PDPA ในบริบท multi-tenant Kubernetes ต้องดูแลทั้งเรื่อง data isolation, access control, audit logging, encryption และ data retention policy หากมีข้อมูลส่วนบุคคลจำนวนมากและ compliance ที่เข้มงวด ควรพิจารณาแยก cluster หรือใช้ hard multi-tenancy ด้วย vCluster แทน namespace-based isolation
Best Practices สำหรับ Shared Clusters
หลังจากเรียนรู้เครื่องมือและเทคนิคต่างๆ แล้ว มาสรุป best practices สำหรับการทำ multi-tenancy ที่ดีในปี 2026
# Checklist สำหรับ Multi-Tenant Cluster

# 1. Namespace Strategy
# - 1 namespace per service per environment
# - ตั้งชื่อ: {team}-{service}-{env}
# - ใส่ labels: team, cost-center, environment, owner

# 2. Resource Management
# - ResourceQuota ทุก tenant namespace
# - LimitRange ทุก namespace (ป้องกัน unbounded resources)
# - ใช้ Vertical Pod Autoscaler (VPA) + Horizontal Pod Autoscaler (HPA)

# 3. Network
# - Default deny NetworkPolicy ทุก namespace
# - Whitelist เฉพาะ traffic ที่จำเป็น
# - ใช้ service mesh สำหรับ mTLS

# 4. Security
# - PSA level: restricted สำหรับ tenant namespaces
# - RBAC: namespace-scoped roles only
# - OPA Gatekeeper สำหรับ policy enforcement
# - Image scanning + allowed registries

# 5. Observability
# - Centralized logging ด้วย tenant separation
# - Monitoring ด้วย namespace-based dashboards
# - Alerting per tenant

# 6. Cost
# - Kubecost สำหรับ cost allocation
# - Right-sizing recommendations
# - Idle resource detection

# 7. Automation
# - GitOps สำหรับ tenant onboarding
# - Helm charts / Kustomize สำหรับ standardized configs
# - CI/CD pipeline per tenant

# 8. Documentation
# - Tenant onboarding guide
# - Resource request guidelines
# - Escalation proceduresสรุป
Kubernetes multi-tenancy เป็นเรื่องที่ทุกองค์กรที่ใช้ Kubernetes ต้องเจอเมื่อเริ่มมีหลายทีมใช้งาน จากบทความนี้คุณได้เรียนรู้ตั้งแต่แนวคิดพื้นฐานของ soft vs hard multi-tenancy ไปจนถึงเครื่องมือขั้นสูงอย่าง vCluster และ Capsule
สิ่งสำคัญที่สุดคือการเริ่มต้นจากพื้นฐานที่แข็งแรง ได้แก่ namespace isolation ที่ชัดเจน RBAC ที่ตั้งตาม principle of least privilege ResourceQuota ที่ป้องกัน noisy neighbor และ NetworkPolicy ที่ป้องกัน cross-tenant traffic เมื่อพื้นฐานเหล่านี้แข็งแรงแล้ว ค่อยพิจารณาเครื่องมือขั้นสูงตามความต้องการจริง
ในปี 2026 ecosystem ของ Kubernetes multi-tenancy เติบโตขึ้นมาก มีทั้ง open source tools และ commercial platforms ให้เลือกใช้ตามขนาดองค์กรและ compliance requirements สิ่งที่ต้องจำไว้คือ multi-tenancy ไม่ใช่แค่เรื่องเทคนิค แต่ยังเกี่ยวกับ process, documentation และ culture ของทีมด้วย