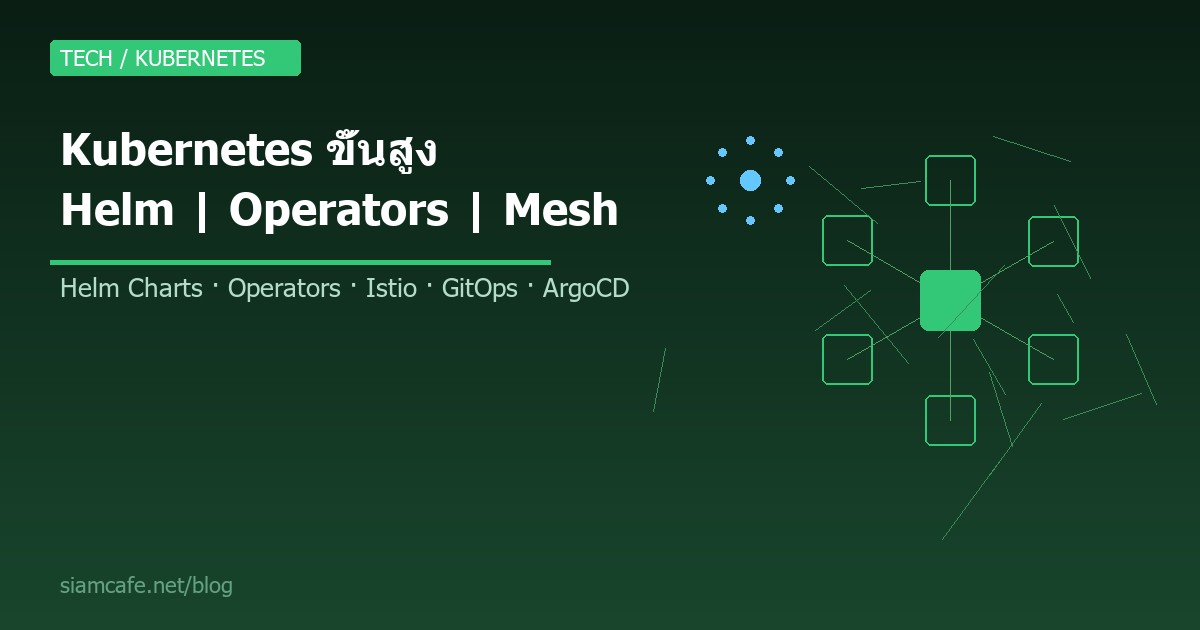
Kubernetes ขั้นสูง สอน Helm Charts, Operators, Service Mesh และ GitOps 2026

Kubernetes (K8s) ไม่ใช่แค่การ deploy container อีกต่อไป ในปี 2026 Kubernetes กลายเป็น Platform สำหรับสร้าง Platform อีกทีหนึ่ง องค์กรขนาดใหญ่ใช้ Kubernetes เป็นโครงสร้างพื้นฐานหลักในการรัน Microservices หลายร้อยตัว ทำให้การจัดการทุกอย่างด้วยมือด้วย kubectl apply ไม่เพียงพออีกต่อไป จำเป็นต้องใช้เครื่องมือขั้นสูงอย่าง Helm Charts, Operators, Service Mesh และ GitOps เพื่อจัดการ Cluster ได้อย่างมีประสิทธิภาพ ปลอดภัย และ Scale ได้
บทความนี้เป็นคู่มือขั้นสูงที่ครอบคลุมทุกหัวข้อสำคัญสำหรับ Kubernetes Engineer ในปี 2026 ตั้งแต่ Helm package manager, Custom Operators, Istio Service Mesh, GitOps ด้วย ArgoCD จนถึง Security Best Practices และ Cost Optimization เหมาะสำหรับผู้ที่มีพื้นฐาน Kubernetes แล้วและต้องการก้าวสู่ระดับ Advanced
อ่านเพิ่ม: Kubernetes Security คืออะไร? Best Practices รักษาความปลอดภัย · อ่านเพิ่ม: Kubernetes Operators และ CRD คืออะไร? สอนสร้าง Custom Contro · อ่านเพิ่ม: CI/CD ขั้นสูง Multi-Environment, Canary Deploy, GitOps สำหรั
Helm — Package Manager สำหรับ Kubernetes

Helm คือ Package Manager ของ Kubernetes เปรียบเสมือน apt ของ Ubuntu หรือ npm ของ Node.js ช่วยให้การ deploy แอปพลิเคชันบน Kubernetes ง่ายขึ้นมาก แทนที่จะเขียน YAML หลายสิบไฟล์สำหรับ Deployment, Service, ConfigMap, Ingress ฯลฯ เราสามารถรวมทุกอย่างเป็น Helm Chart เดียวแล้ว deploy ด้วยคำสั่งเดียว
แนวคิดหลักของ Helm
Chart คือ Package ที่รวม template ทั้งหมดของ Kubernetes resources ไว้ด้วยกัน ประกอบด้วยโครงสร้างไดเรกทอรีดังนี้:
my-chart/
  Chart.yaml          # ข้อมูล Chart (ชื่อ, เวอร์ชัน, description)
  values.yaml         # ค่า default ที่ปรับแต่งได้
  templates/          # Kubernetes YAML templates
    deployment.yaml
    service.yaml
    ingress.yaml
    configmap.yaml
    _helpers.tpl      # Template functions
  charts/             # Dependencies (sub-charts)
  .helmignore         # ไฟล์ที่ไม่ต้องรวม
Repository คือที่เก็บ Charts เหมือน Docker Registry สำหรับ Container Images โดย Helm รองรับทั้ง HTTP repository และ OCI registry ใน Helm 3
เนื้อหาเกี่ยวข้อง — บทความที่เกี่ยวข้อง: ethical hacking book for beginners — คู่มือฉบับสมบูรณ์ 2026
Release คือ Instance ของ Chart ที่ deploy ไปบน Cluster แล้ว สามารถ deploy Chart เดียวกันหลายครั้งด้วยชื่อ Release ต่างกัน
คำสั่ง Helm พื้นฐาน
# ติดตั้ง Helm 3
curl https://raw.githubusercontent.com/helm/helm/main/scripts/get-helm-3 | bash

# เพิ่ม Repository
helm repo add bitnami https://charts.bitnami.com/bitnami
helm repo add prometheus https://prometheus-community.github.io/helm-charts
helm repo update

# ค้นหา Chart
helm search repo nginx
helm search hub wordpress      # ค้นหาจาก Artifact Hub

# ดู Chart info
helm show chart bitnami/nginx
helm show values bitnami/nginx  # ดูค่า default ทั้งหมด

# ติดตั้ง Chart
helm install my-nginx bitnami/nginx
helm install my-nginx bitnami/nginx -f custom-values.yaml
helm install my-nginx bitnami/nginx --set replicaCount=3

# ดู Release ที่ติดตั้งแล้ว
helm list
helm list -A                    # ทุก namespace

# Upgrade Release
helm upgrade my-nginx bitnami/nginx --set replicaCount=5

# Rollback
helm rollback my-nginx 1        # กลับไป revision 1
helm history my-nginx            # ดูประวัติ

# ลบ Release
helm uninstall my-nginx
สร้าง Helm Chart ของตัวเอง
# สร้างโครงสร้าง Chart
helm create my-webapp

# แก้ไข values.yaml
# values.yaml
replicaCount: 2
image:
  repository: my-registry/my-app
  tag: "1.0.0"
  pullPolicy: IfNotPresent
service:
  type: ClusterIP
  port: 80
ingress:
  enabled: true
  className: nginx
  hosts:
    - host: app.example.com
      paths:
        - path: /
          pathType: Prefix
resources:
  limits:
    cpu: 500m
    memory: 256Mi
  requests:
    cpu: 100m
    memory: 128Mi
autoscaling:
  enabled: true
  minReplicas: 2
  maxReplicas: 10
  targetCPUUtilizationPercentage: 80
ใน template เราใช้ Go template syntax เพื่อ reference ค่าจาก values.yaml:
# templates/deployment.yaml
apiVersion: apps/v1
kind: Deployment
metadata:
  name: {{ include "my-webapp.fullname" . }}
  labels:
    {{- include "my-webapp.labels" . | nindent 4 }}
spec:
  replicas: {{ .Values.replicaCount }}
  selector:
    matchLabels:
      {{- include "my-webapp.selectorLabels" . | nindent 6 }}
  template:
    metadata:
      labels:
        {{- include "my-webapp.selectorLabels" . | nindent 8 }}
    spec:
      containers:
        - name: {{ .Chart.Name }}
          image: "{{ .Values.image.repository }}:{{ .Values.image.tag }}"
          ports:
            - containerPort: {{ .Values.service.port }}
          resources:
            {{- toYaml .Values.resources | nindent 12 }}
Helm Hooks
Helm Hooks ช่วยให้ทำงานบางอย่างในจังหวะต่างๆ ของ lifecycle เช่น pre-install, post-install, pre-upgrade, post-upgrade, pre-delete เหมาะสำหรับ database migration, backup ก่อน upgrade หรือส่ง notification:
แนะนำเพิ่มเติม — อ่านเพิ่มเติมที่ SiamCafeBook
# templates/post-install-job.yaml
apiVersion: batch/v1
kind: Job
metadata:
  name: {{ include "my-webapp.fullname" . }}-db-migrate
  annotations:
    "helm.sh/hook": post-install,post-upgrade
    "helm.sh/hook-weight": "0"
    "helm.sh/hook-delete-policy": hook-succeeded
spec:
  template:
    spec:
      containers:
        - name: migrate
          image: "{{ .Values.image.repository }}:{{ .Values.image.tag }}"
          command: ["python", "manage.py", "migrate"]
restartPolicy: Neverhelm template เพื่อ preview YAML ก่อน deploy, และอย่าใส่ secret ใน values.yaml ใช้ External Secrets Operator แทน
Kustomize vs Helm — เลือกใช้อย่างไร
Kustomize เป็นอีกทางเลือกหนึ่งในการจัดการ Kubernetes manifests โดยใช้หลักการ overlay แทน template ข้อดีคือไม่ต้องเรียนรู้ Go template syntax และ YAML ที่เห็นคือ YAML จริงๆ ไม่ใช่ template
# kustomization.yaml (base)
apiVersion: kustomize.config.k8s.io/v1beta1
kind: Kustomization
resources:
  - deployment.yaml
  - service.yaml
  - ingress.yaml
commonLabels:
  app: my-webapp

# overlays/production/kustomization.yaml
apiVersion: kustomize.config.k8s.io/v1beta1
kind: Kustomization
bases:
  - ../../base
namespace: production
patches:
  - path: increase-replicas.yaml
images:
  - name: my-app
    newTag: v2.0.0

# ใช้งาน
kubectl apply -k overlays/production/| คุณสมบัติ | Helm | Kustomize |
|---|---|---|
| แนวคิด | Templating + Package Manager | Overlay/Patch แบบ native |
| เรียนรู้ | ปานกลาง (Go templates) | ง่าย (pure YAML) |
| Package sharing | Helm Repository/OCI | Git repository |
| Lifecycle hooks | มี | ไม่มี |
| Rollback | มี built-in | ต้องใช้ Git |
| ความซับซ้อน | เหมาะกับ app ซับซ้อน | เหมาะกับ config variations |
ในทีมส่วนใหญ่ปี 2026 มักใช้ทั้ง Helm และ Kustomize ร่วมกัน โดยใช้ Helm สำหรับ third-party charts และ Kustomize สำหรับ in-house applications ที่ต้องการ environment-specific overlays
Kubernetes Operators — Automate Everything
Operator คือ extension ของ Kubernetes ที่ทำให้เราสามารถจัดการ complex stateful applications ได้อัตโนมัติ แนวคิดหลักคือ "Human operator knowledge encoded in software" โดยใช้ Custom Resource Definition (CRD) ร่วมกับ Custom Controller
เนื้อหาเกี่ยวข้อง — บทความที่เกี่ยวข้อง: Stable Diffusion ComfyUI Citizen Developer
CRD — Custom Resource Definition
CRD ช่วยให้เราสร้าง resource type ใหม่ใน Kubernetes ได้ ตัวอย่างเช่น แทนที่จะ deploy PostgreSQL ด้วย Deployment + Service + PVC + ConfigMap หลายไฟล์ เราสามารถสร้าง CRD ชื่อ PostgresCluster แล้วเขียน YAML สั้นๆ:
# CRD Definition
apiVersion: apiextensions.k8s.io/v1
kind: CustomResourceDefinition
metadata:
  name: postgresclusters.db.example.com
spec:
  group: db.example.com
  versions:
    - name: v1
      served: true
      storage: true
      schema:
        openAPIV3Schema:
          type: object
          properties:
            spec:
              type: object
              properties:
                replicas:
                  type: integer
                version:
                  type: string
                storage:
                  type: string
  scope: Namespaced
  names:
    plural: postgresclusters
    singular: postgrescluster
    kind: PostgresCluster
    shortNames:
      - pgc

# ใช้งาน CRD
apiVersion: db.example.com/v1
kind: PostgresCluster
metadata:
  name: my-db
spec:
  replicas: 3
  version: "16"
  storage: 100Gi
Custom Controller
Controller เป็น program ที่ watch CRD แล้วทำการ reconcile ให้ actual state ตรงกับ desired state อัตโนมัติ เขียนได้ด้วย Operator SDK (Go, Ansible, Helm) หรือ Kubebuilder:
# สร้าง Operator ด้วย Operator SDK (Go)
operator-sdk init --domain example.com --repo github.com/example/pg-operator
operator-sdk create api --group db --version v1 --kind PostgresCluster --resource --controller

# Logic ใน Reconcile function (Go)
func (r *PostgresClusterReconciler) Reconcile(ctx context.Context, req ctrl.Request) (ctrl.Result, error) {
    pgCluster := &dbv1.PostgresCluster{}
    if err := r.Get(ctx, req.NamespacedName, pgCluster); err != nil {
        return ctrl.Result{}, client.IgnoreNotFound(err)
    }

    // 1. สร้าง/อัปเดต StatefulSet
    // 2. สร้าง/อัปเดต Service
    // 3. ตั้งค่า Replication
    // 4. จัดการ Backup schedule
    // 5. Monitor health

    return ctrl.Result{RequeueAfter: time.Minute}, nil
}
Operators ที่ใช้บ่อยในปี 2026
| Operator | หน้าที่ | หมายเหตุ |
|---|---|---|
| Prometheus Operator | จัดการ Prometheus, Alertmanager, ServiceMonitor | มาตรฐานสำหรับ monitoring |
| cert-manager | จัดการ TLS certificates อัตโนมัติ (Let's Encrypt) | ต้องมีทุก Cluster |
| ArgoCD | GitOps continuous delivery | deploy จาก Git repo |
| External Secrets | sync secrets จาก Vault, AWS SSM, GCP SM | แทนการเก็บ secret ใน Git |
| Strimzi | Apache Kafka บน Kubernetes | จัดการ Kafka cluster |
| CloudNativePG | PostgreSQL Operator | backup, replication, failover |
| Crossplane | จัดการ cloud resources ผ่าน K8s API | Infrastructure as Code แบบ K8s native |
Service Mesh — ควบคุม Traffic ระหว่าง Services
Service Mesh เป็น infrastructure layer ที่จัดการ communication ระหว่าง services ทั้งหมดใน cluster โดยไม่ต้องแก้ไข code ของแอปพลิเคชัน ทำหน้าที่หลักๆ คือ traffic management, security (mTLS), และ observability
ทำไมต้องใช้ Service Mesh
เมื่อระบบมี Microservices หลายสิบหรือหลายร้อยตัว การจัดการ cross-cutting concerns เช่น retry logic, circuit breaking, mTLS, distributed tracing ในแต่ละ service เป็นเรื่องยากมาก Service Mesh แก้ปัญหานี้โดยใส่ sidecar proxy (เช่น Envoy) เข้าไปใน Pod ทุกตัว ทำให้ทุก traffic ผ่าน proxy ก่อน
แนะนำเพิ่มเติม — ติดตาม XM Signal
Istio — Service Mesh ยอดนิยม
# ติดตั้ง Istio
curl -L https://istio.io/downloadIstio | sh -
cd istio-*
export PATH=$PWD/bin:$PATH
istioctl install --set profile=demo -y

# เปิด sidecar injection สำหรับ namespace
kubectl label namespace default istio-injection=enabled

# ทุก Pod ที่สร้างใน namespace นี้จะมี Envoy sidecar อัตโนมัติ
Traffic Management ด้วย Istio
# VirtualService — กำหนดเส้นทาง traffic
apiVersion: networking.istio.io/v1beta1
kind: VirtualService
metadata:
  name: my-app
spec:
  hosts:
    - my-app
  http:
    - match:
        - headers:
            x-version:
              exact: canary
      route:
        - destination:
            host: my-app
            subset: v2
    - route:
        - destination:
            host: my-app
            subset: v1
          weight: 90
        - destination:
            host: my-app
            subset: v2
          weight: 10

# DestinationRule — กำหนด subsets และ load balancing
apiVersion: networking.istio.io/v1beta1
kind: DestinationRule
metadata:
  name: my-app
spec:
  host: my-app
  trafficPolicy:
    connectionPool:
      tcp:
        maxConnections: 100
      http:
        h2UpgradePolicy: DEFAULT
        http1MaxPendingRequests: 100
    outlierDetection:
      consecutive5xxErrors: 5
      interval: 30s
      baseEjectionTime: 30s
  subsets:
    - name: v1
      labels:
        version: v1
    - name: v2
      labels:
        version: v2
Istio Security — mTLS
# PeerAuthentication — บังคับ mTLS ทั้ง namespace
apiVersion: security.istio.io/v1beta1
kind: PeerAuthentication
metadata:
  name: default
  namespace: production
spec:
  mtls:
    mode: STRICT

# AuthorizationPolicy — Access control
apiVersion: security.istio.io/v1beta1
kind: AuthorizationPolicy
metadata:
  name: allow-frontend-to-api
  namespace: production
spec:
  selector:
    matchLabels:
      app: api-server
  action: ALLOW
  rules:
    - from:
        - source:
            principals: ["cluster.local/ns/production/sa/frontend"]
      to:
        - operation:
            methods: ["GET", "POST"]
            paths: ["/api/*"]
Istio Observability
Istio ให้ observability ฟรีโดยไม่ต้องแก้ code: distributed tracing (Jaeger/Zipkin), metrics (Prometheus), dashboards (Grafana), service graph (Kiali) ทุกอย่างมาจากข้อมูลที่ Envoy sidecar เก็บได้อัตโนมัติ
# ดู dashboard
istioctl dashboard kiali
istioctl dashboard grafana
istioctl dashboard jaeger

# ดู proxy status
istioctl proxy-status
istioctl analyze            # วิเคราะห์ configuration
Linkerd — ทางเลือกที่เบากว่า

Linkerd เป็น Service Mesh ที่เน้นความง่ายและ performance สูง ใช้ Rust-based proxy แทน Envoy ทำให้ใช้ memory และ CPU น้อยกว่า Istio มาก เหมาะสำหรับทีมที่ต้องการ mTLS และ observability พื้นฐานโดยไม่ต้อง configure มาก
เนื้อหาเกี่ยวข้อง — อ่านต่อ: Great Expectations Infrastructure as Code
# ติดตั้ง Linkerd
curl --proto '=https' --tlsv1.2 -sSfL https://run.linkerd.io/install | sh
linkerd install --crds | kubectl apply -f -
linkerd install | kubectl apply -f -
linkerd check

# Inject sidecar
kubectl get deploy -o yaml | linkerd inject - | kubectl apply -f -

# Dashboard
linkerd viz install | kubectl apply -f -
linkerd viz dashboard
GitOps — Deploy จาก Git Repository
GitOps เป็นแนวทางการจัดการ infrastructure และ application deployment โดยใช้ Git repository เป็น single source of truth ทุกการเปลี่ยนแปลงต้องผ่าน Git (commit, PR, review) แล้ว GitOps tool จะ sync สิ่งที่อยู่ใน Git ไปยัง Cluster อัตโนมัติ
ArgoCD — GitOps Engine
# ติดตั้ง ArgoCD
kubectl create namespace argocd
kubectl apply -n argocd -f https://raw.githubusercontent.com/argoproj/argo-cd/stable/manifests/install.yaml

# ดึง Admin password
argocd admin initial-password -n argocd

# Login
argocd login localhost:8080

# สร้าง Application
apiVersion: argoproj.io/v1alpha1
kind: Application
metadata:
  name: my-webapp
  namespace: argocd
spec:
  project: default
  source:
    repoURL: https://github.com/myorg/my-webapp-k8s.git
    targetRevision: main
    path: overlays/production
  destination:
    server: https://kubernetes.default.svc
    namespace: production
  syncPolicy:
    automated:
      prune: true           # ลบ resources ที่ไม่มีใน Git
      selfHeal: true         # แก้ไข drift อัตโนมัติ
    syncOptions:
      - CreateNamespace=true
    retry:
      limit: 5
      backoff:
        duration: 5s
        factor: 2
        maxDuration: 3m
Flux — ทางเลือก GitOps
Flux v2 เป็น GitOps toolkit จาก Weaveworks ที่ทำงานแบบ controller-based ข้อดีคือ integrate กับ Kustomize ได้ดีมาก และรองรับ multi-tenancy ได้ดีกว่า ArgoCD ในบาง use case
# ติดตั้ง Flux
flux install

# สร้าง GitRepository source
flux create source git my-app   --url=https://github.com/myorg/my-webapp-k8s   --branch=main   --interval=1m

# สร้าง Kustomization
flux create kustomization my-app   --source=GitRepository/my-app   --path=overlays/production   --prune=true   --interval=5m   --health-check-timeout=3m
Progressive Delivery — Canary และ Blue-Green
Progressive Delivery คือการ deploy แบบค่อยๆ ปล่อย traffic ไปยัง version ใหม่ ถ้ามีปัญหาจะ rollback อัตโนมัติ ทำให้ deploy ได้ปลอดภัยกว่า big bang deployment
Argo Rollouts
# ติดตั้ง Argo Rollouts
kubectl create namespace argo-rollouts
kubectl apply -n argo-rollouts -f https://github.com/argoproj/argo-rollouts/releases/latest/download/install.yaml

# Canary Rollout
apiVersion: argoproj.io/v1alpha1
kind: Rollout
metadata:
  name: my-webapp
spec:
  replicas: 10
  strategy:
    canary:
      canaryService: my-webapp-canary
      stableService: my-webapp-stable
      trafficRouting:
        istio:
          virtualServices:
            - name: my-webapp
              routes:
                - primary
      steps:
        - setWeight: 10
        - pause: {duration: 5m}
        - setWeight: 30
        - pause: {duration: 5m}
        - setWeight: 60
        - pause: {duration: 5m}
      analysis:
        templates:
          - templateName: success-rate
        startingStep: 1
        args:
          - name: service-name
            value: my-webapp-canary
  selector:
    matchLabels:
      app: my-webapp
  template:
    metadata:
      labels:
        app: my-webapp
    spec:
      containers:
        - name: app
          image: my-registry/my-app:v2.0.0

# AnalysisTemplate — ตรวจสอบ metrics อัตโนมัติ
apiVersion: argoproj.io/v1alpha1
kind: AnalysisTemplate
metadata:
  name: success-rate
spec:
  args:
    - name: service-name
  metrics:
    - name: success-rate
      interval: 60s
      successCondition: result[0] >= 0.95
      failureLimit: 3
      provider:
        prometheus:
          address: http://prometheus.monitoring:9090
          query: |
            sum(rate(istio_requests_total{
              destination_service_name="{{args.service-name}}",
              response_code!~"5.*"
            }[5m])) /
            sum(rate(istio_requests_total{
              destination_service_name="{{args.service-name}}"
}[5m]))Kubernetes Security Best Practices
RBAC — Role-Based Access Control
# สร้าง Role สำหรับ developer
apiVersion: rbac.authorization.k8s.io/v1
kind: Role
metadata:
  namespace: development
  name: developer-role
rules:
  - apiGroups: [""]
    resources: ["pods", "services", "configmaps"]
    verbs: ["get", "list", "watch", "create", "update", "delete"]
  - apiGroups: ["apps"]
    resources: ["deployments", "replicasets"]
    verbs: ["get", "list", "watch", "create", "update"]
  - apiGroups: [""]
    resources: ["secrets"]
    verbs: ["get", "list"]          # อ่านได้แต่สร้าง/แก้ไขไม่ได้

# Bind Role กับ User
apiVersion: rbac.authorization.k8s.io/v1
kind: RoleBinding
metadata:
  name: developer-binding
  namespace: development
subjects:
  - kind: User
    name: dev-user@example.com
    apiGroup: rbac.authorization.k8s.io
roleRef:
  kind: Role
  name: developer-role
  apiGroup: rbac.authorization.k8s.io

# ClusterRole สำหรับ read-only ทั้ง cluster
apiVersion: rbac.authorization.k8s.io/v1
kind: ClusterRole
metadata:
  name: cluster-viewer
rules:
  - apiGroups: ["*"]
    resources: ["*"]
    verbs: ["get", "list", "watch"]
NetworkPolicies — Firewall ระดับ Pod
# อนุญาตเฉพาะ frontend เข้าถึง api
apiVersion: networking.k8s.io/v1
kind: NetworkPolicy
metadata:
  name: api-network-policy
  namespace: production
spec:
  podSelector:
    matchLabels:
      app: api-server
  policyTypes:
    - Ingress
    - Egress
  ingress:
    - from:
        - podSelector:
            matchLabels:
              app: frontend
        - podSelector:
            matchLabels:
              app: admin-panel
      ports:
        - protocol: TCP
          port: 8080
  egress:
    - to:
        - podSelector:
            matchLabels:
              app: database
      ports:
        - protocol: TCP
          port: 5432
    - to:                           # อนุญาต DNS
        - namespaceSelector: {}
      ports:
        - protocol: UDP
          port: 53
Pod Security Standards
# Enforce restricted security standard ใน namespace
apiVersion: v1
kind: Namespace
metadata:
  name: production
  labels:
    pod-security.kubernetes.io/enforce: restricted
    pod-security.kubernetes.io/audit: restricted
    pod-security.kubernetes.io/warn: restricted

# SecurityContext ใน Pod
apiVersion: v1
kind: Pod
metadata:
  name: secure-pod
spec:
  securityContext:
    runAsNonRoot: true
    runAsUser: 1000
    fsGroup: 2000
    seccompProfile:
      type: RuntimeDefault
  containers:
    - name: app
      image: my-app:latest
      securityContext:
        allowPrivilegeEscalation: false
        readOnlyRootFilesystem: true
        capabilities:
          drop:
            - ALL
OPA Gatekeeper — Policy Enforcement
Open Policy Agent (OPA) Gatekeeper ช่วยบังคับ policy ใน Kubernetes เช่น ห้าม deploy image ที่ไม่ได้มาจาก approved registry, ต้องมี resource limits, ต้องมี label ที่กำหนด:
# ติดตั้ง Gatekeeper
kubectl apply -f https://raw.githubusercontent.com/open-policy-agent/gatekeeper/release-3.15/deploy/gatekeeper.yaml

# ConstraintTemplate — กำหนดกฎ
apiVersion: templates.gatekeeper.sh/v1
kind: ConstraintTemplate
metadata:
  name: k8sallowedrepos
spec:
  crd:
    spec:
      names:
        kind: K8sAllowedRepos
      validation:
        openAPIV3Schema:
          type: object
          properties:
            repos:
              type: array
              items:
                type: string
  targets:
    - target: admission.k8s.gatekeeper.sh
      rego: |
        package k8sallowedrepos
        violation[{"msg": msg}] {
          container := input.review.object.spec.containers[_]
          satisfied := [good | repo = input.parameters.repos[_]; good = startswith(container.image, repo)]
          not any(satisfied)
          msg := sprintf("container <%v> has image <%v> not from allowed repos %v", [container.name, container.image, input.parameters.repos])
        }

# Constraint — ใช้กฎ
apiVersion: constraints.gatekeeper.sh/v1beta1
kind: K8sAllowedRepos
metadata:
  name: allowed-repos
spec:
  match:
    kinds:
      - apiGroups: [""]
        kinds: ["Pod"]
    namespaces: ["production"]
  parameters:
    repos:
      - "gcr.io/my-project/"
      - "my-registry.example.com/"
Multi-Cluster Management
เมื่อองค์กรมี Kubernetes cluster หลายตัว (dev, staging, production, multi-region) การจัดการแต่ละ cluster แยกกันไม่เพียงพอ ต้องใช้เครื่องมือสำหรับ multi-cluster management:
| เครื่องมือ | แนวคิด | เหมาะกับ |
|---|---|---|
| ArgoCD ApplicationSet | Deploy app เดียวกันไปหลาย cluster | GitOps multi-cluster |
| Rancher | UI สำหรับจัดการหลาย cluster | Enterprise ที่ต้องการ UI |
| Crossplane | จัดการ cloud resources ผ่าน K8s | Infrastructure as Code |
| Submariner | เชื่อม network ระหว่าง cluster | Cross-cluster communication |
| Loft vCluster | Virtual clusters ภายใน cluster เดียว | Multi-tenant development |
# ArgoCD ApplicationSet — deploy ไปทุก cluster
apiVersion: argoproj.io/v1alpha1
kind: ApplicationSet
metadata:
  name: my-webapp-all-clusters
  namespace: argocd
spec:
  generators:
    - clusters:
        selector:
          matchLabels:
            environment: production
  template:
    metadata:
      name: '{{name}}-my-webapp'
    spec:
      project: default
      source:
        repoURL: https://github.com/myorg/my-webapp-k8s.git
        targetRevision: main
        path: overlays/production
      destination:
        server: '{{server}}'
        namespace: production
Cost Optimization — ลดค่าใช้จ่าย Kubernetes
Kubernetes ที่ไม่ได้ optimize ค่าใช้จ่ายอาจแพงกว่าที่ควรจะเป็น 3 ถึง 5 เท่า เทคนิคสำคัญสำหรับลดค่าใช้จ่ายมีดังนี้:
เนื้อหาเกี่ยวข้อง — ทำความเข้าใจ penetration testing with shellcode pdf
Resource Requests และ Limits
ตั้ง resource requests ให้ตรงกับการใช้จริง ถ้าตั้งสูงเกินไป node จะ schedule Pod ได้น้อย ถ้าตั้งต่ำเกินไป Pod อาจถูก OOMKill ใช้ tools อย่าง Goldilocks หรือ VPA recommender เพื่อวิเคราะห์การใช้ resources จริง
# Vertical Pod Autoscaler (VPA) — แนะนำ resource ที่เหมาะสม
apiVersion: autoscaling.k8s.io/v1
kind: VerticalPodAutoscaler
metadata:
  name: my-app-vpa
spec:
  targetRef:
    apiVersion: apps/v1
    kind: Deployment
    name: my-app
  updatePolicy:
    updateMode: "Off"           # แค่แนะนำ ไม่ auto-update
  resourcePolicy:
    containerPolicies:
      - containerName: app
        minAllowed:
          cpu: 50m
          memory: 64Mi
        maxAllowed:
          cpu: 2
          memory: 2Gi

# LimitRange — กำหนด default resources ใน namespace
apiVersion: v1
kind: LimitRange
metadata:
  name: default-limits
  namespace: production
spec:
  limits:
    - default:
        cpu: 500m
        memory: 256Mi
      defaultRequest:
        cpu: 100m
        memory: 128Mi
      type: Container
Cluster Autoscaler และ Spot/Preemptible Nodes
ใช้ Cluster Autoscaler เพื่อเพิ่มลด node อัตโนมัติตาม workload และใช้ Spot Instances (AWS) หรือ Preemptible VMs (GCP) สำหรับ workload ที่ทนต่อ interruption ได้ ประหยัดค่า compute ได้ถึง 60 ถึง 90 เปอร์เซ็นต์
เครื่องมือวิเคราะห์ค่าใช้จ่าย
- Kubecost — วิเคราะห์ค่าใช้จ่ายแบบ real-time ต่อ namespace, deployment, label
- OpenCost — Open source version ของ Kubecost เป็น CNCF project
- Goldilocks — แนะนำ resource requests/limits ที่เหมาะสม
- Karpenter — Node provisioner ที่ฉลาดกว่า Cluster Autoscaler (AWS)
สรุป Kubernetes Advanced Workflow 2026
ในปี 2026 Kubernetes ecosystem มีความสมบูรณ์มากขึ้น โดย stack ที่แนะนำสำหรับ production-grade Kubernetes คือ:
- Package Management: Helm 3 + Kustomize สำหรับ environment overlays
- GitOps: ArgoCD หรือ Flux สำหรับ automated deployment จาก Git
- Progressive Delivery: Argo Rollouts สำหรับ canary/blue-green deployments
- Service Mesh: Istio สำหรับองค์กรใหญ่ หรือ Linkerd สำหรับทีมเล็ก
- Security: RBAC + NetworkPolicies + Pod Security Standards + OPA Gatekeeper
- Operators: cert-manager, External Secrets, Prometheus Operator
- Cost: Kubecost/OpenCost + VPA + Spot Instances + Karpenter
การเรียนรู้ Kubernetes ขั้นสูงเหล่านี้จะทำให้คุณสามารถจัดการ production cluster ได้อย่างมั่นใจ ปลอดภัย และคุ้มค่า ไม่ว่าจะเป็น cluster เล็กๆ หรือ multi-cluster ระดับ enterprise ก็ตาม เริ่มต้นจากการทดลองใช้ Helm สำหรับ deploy แอปพลิเคชัน จากนั้นเพิ่ม ArgoCD สำหรับ GitOps แล้วค่อยขยายไปสู่ Service Mesh และ security policies ตามความจำเป็นของระบบ