Ceph Storage Cluster Capacity Planning — วางแผน Storage ด้วย Ceph
Ceph Storage Cluster คืออะไร

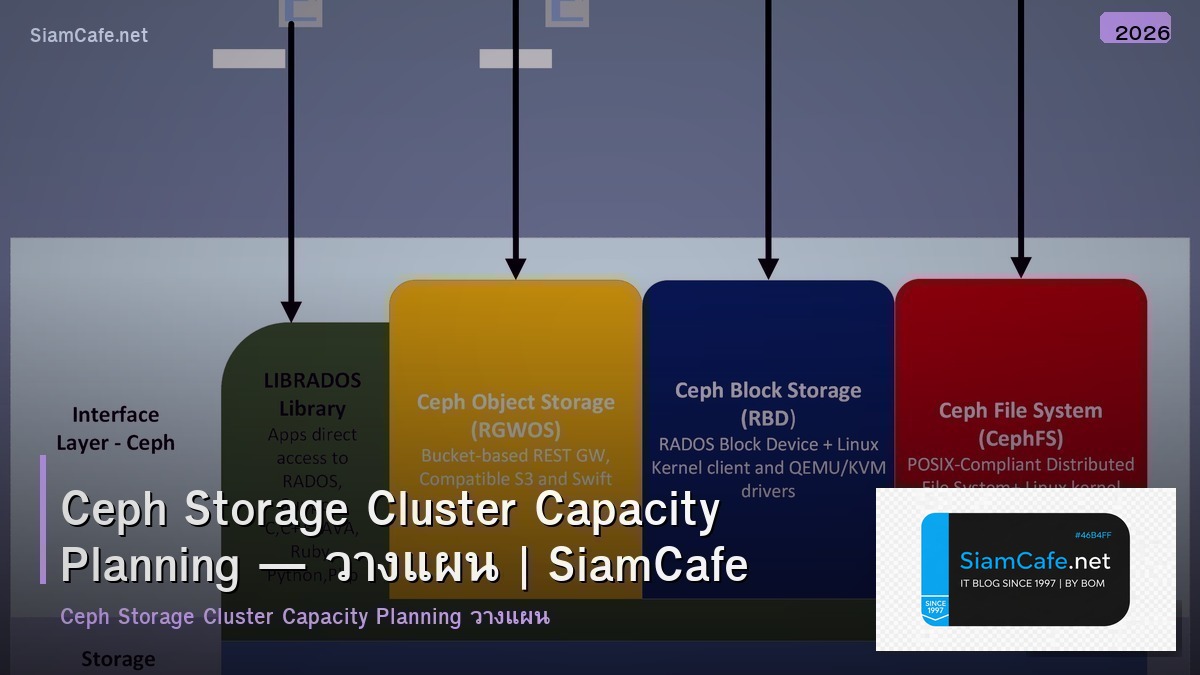
Ceph เป็น open source distributed storage system ที่ให้บริการ object storage, block storage และ file storage บน single unified platform ออกแบบมาเพื่อ high availability, scalability และ self-healing ใช้ CRUSH algorithm สำหรับ data placement ไม่มี single point of failure
Components หลักของ Ceph ได้แก่ MON (Monitor) จัดการ cluster map และ consensus ต้องมีอย่างน้อย 3 nodes, OSD (Object Storage Daemon) เก็บข้อมูลจริง แต่ละ OSD ดูแล disk หนึ่งลูก, MDS (Metadata Server) จัดการ metadata สำหรับ CephFS, MGR (Manager) จัดการ monitoring, dashboard และ orchestration, RGW (RADOS Gateway) ให้บริการ S3/Swift compatible object storage
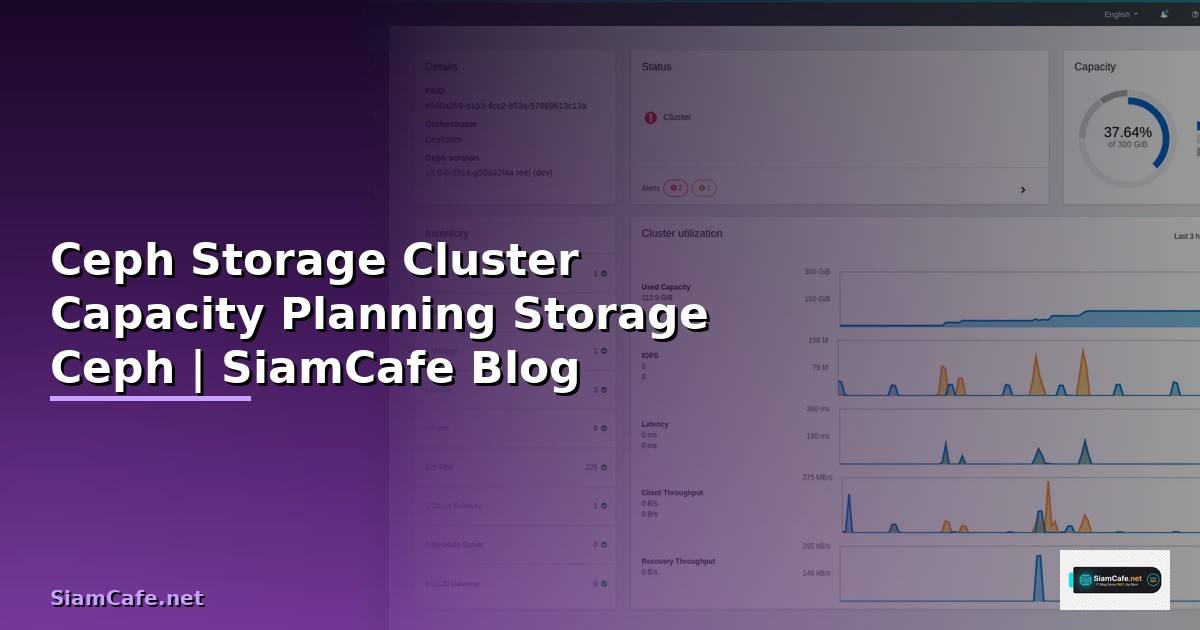
Capacity Planning สำหรับ Ceph สำคัญมากเพราะ replication factor กระทบ usable capacity โดยตรง (3x replication ใช้ raw space 3 เท่า), OSD placement groups ต้อง size ถูกต้องเพื่อ performance ที่ดี, network bandwidth ต้องเพียงพอสำหรับ replication traffic, recovery จาก disk failure ต้องมี spare capacity และ growth projection ต้องวางแผนล่วงหน้า 6-12 เดือน
ติดตั้ง Ceph Cluster
วิธีติดตั้ง Ceph ด้วย cephadm
# === ติดตั้ง Ceph Cluster ด้วย cephadm ===


# Prerequisites:


# - 3+ nodes with Ubuntu 22.04 or Rocky Linux 9


# - Each node: 4+ CPU cores, 8+ GB RAM, 1+ SSD/NVMe for OSD


# - Network: 10GbE recommended (minimum 1GbE)


# - Separate public and cluster networks recommended


# 1. Install cephadm on first node


curl --silent --remote-name --location https://download.ceph.com/rpm-reef/el9/noarch/cephadm


chmod +x cephadm


./cephadm add-repo --release reef


./cephadm install


# 2. Bootstrap cluster


cephadm bootstrap \


 --mon-ip 10.0.1.10 \


 --cluster-network 10.0.2.0/24 \


 --dashboard-password-noupdate \


 --initial-dashboard-password MyDashP@ss


# Dashboard: https://10.0.1.10:8443


# Default user: admin


# 3. Add hosts


# Copy SSH key to other nodes first


ssh-copy-id root@ceph-node2


ssh-copy-id root@ceph-node3


ceph orch host add ceph-node2 10.0.1.11


ceph orch host add ceph-node3 10.0.1.12


# 4. Add OSDs (auto-detect available disks)


ceph orch apply osd --all-available-devices


# Or specific devices


ceph orch daemon add osd ceph-node1:/dev/sdb


ceph orch daemon add osd ceph-node2:/dev/sdb


ceph orch daemon add osd ceph-node3:/dev/sdb


# 5. Set MON count


ceph orch apply mon --placement="3 ceph-node1 ceph-node2 ceph-node3"


# 6. Enable features


ceph mgr module enable dashboard


ceph mgr module enable prometheus


ceph mgr module enable pg_autoscaler


# 7. Create pools


ceph osd pool create rbd-pool 128


ceph osd pool set rbd-pool size 3


ceph osd pool set rbd-pool min_size 2


ceph osd pool application enable rbd-pool rbd


# Create CephFS


ceph fs volume create cephfs


# Create RGW (S3)


ceph orch apply rgw myrgw --placement="2 ceph-node1 ceph-node2" --port=7480


# 8. Verify cluster


ceph -s


# cluster:


# id: abc123


# health: HEALTH_OK


# services:


# mon: 3 daemons


# mgr: 2 active


# osd: 9 osds: 9 up, 9 in


# rgw: 2 daemons active


ceph osd tree


ceph df


echo "Ceph cluster installed"
Capacity Planning และ Sizing
เครื่องมือคำนวณ capacity
Monitoring Cluster Health
Monitor Ceph cluster health และ performance
Performance Tuning และ Optimization

ปรับแต่ง Ceph performance
=== Ceph Performance Tuning ===
1. BlueStore Tuning
Dedicated WAL/DB on NVMe for HDD OSDs
ceph osd set-full-ratio 0.90
ceph osd set-nearfull-ratio 0.80
ceph osd set-backfillfull-ratio 0.85
Per-OSD settings in ceph.conf
[osd]
bluestore_cache_size = 4294967296 # 4GB cache per OSD
bluestore_cache_autotune = true
bluestore_cache_meta_ratio = 0.4
bluestore_cache_kv_ratio = 0.4
bluestore_cache_data_ratio = 0.2
# Async IO
bdev_async_discard = true
bdev_enable_discard = true
# Recovery tuning (balance between recovery speed and client IO)
osd_recovery_max_active = 3
osd_recovery_max_active_hdd = 1
osd_recovery_max_active_ssd = 10
osd_max_backfills = 1
osd_recovery_sleep = 0
osd_recovery_priority = 5
2. Network Tuning
Separate public and cluster networks
[global]
public_network = 10.0.1.0/24
cluster_network = 10.0.2.0/24
ms_type = async+posix
ms_async_op_threads = 5
System network tuning
sudo sysctl -w net.core.rmem_max=67108864
sudo sysctl -w net.core.wmem_max=67108864
sudo sysctl -w net.core.rmem_default=33554432
sudo sysctl -w net.core.wmem_default=33554432
sudo sysctl -w net.ipv4.tcp_rmem="4096 87380 33554432"
sudo sysctl -w net.ipv4.tcp_wmem="4096 65536 33554432"3. PG Autoscaler
ceph mgr module enable pg_autoscaler
ceph osd pool set rbd-pool pg_autoscale_mode on
Check PG status
ceph osd pool autoscale-status
4. Pool Optimization
Set compression for suitable pools
ceph osd pool set archive-pool compression_algorithm snappy
ceph osd pool set archive-pool compression_mode aggressive
ceph osd pool set archive-pool compression_required_ratio 0.875
5. Benchmark
RADOS bench (sequential write)
rados bench -p rbd-pool 60 write --no-cleanup
RADOS bench (sequential read)
rados bench -p rbd-pool 60 seq
RADOS bench (random read)
rados bench -p rbd-pool 60 rand
RBD bench
rbd create test-image --size 10G --pool rbd-pool
rbd bench test-image --io-type write --io-size 4K --io-threads 16 --pool rbd-pool
rbd bench test-image --io-type read --io-size 4K --io-threads 16 --pool rbd-pool
fio with RBD
[global]
ioengine=rbd
clientname=admin
pool=rbd-pool
rbdname=test-image
rw=randread
bs=4k
numjobs=4
iodepth=32
runtime=60
echo "Ceph tuning complete"
Scaling และ Maintenance
ขยาย cluster และ maintenance
=== Ceph Cluster Scaling ===
1. Add New OSD Host
Add host to cluster
ceph orch host add ceph-node4 10.0.1.13
Add OSDs on new host
ceph orch daemon add osd ceph-node4:/dev/sdb
ceph orch daemon add osd ceph-node4:/dev/sdc
ceph orch daemon add osd ceph-node4:/dev/sdd
Monitor rebalancing
ceph -w
Watch PG states: active+remapped, backfilling, recovering
Wait until all PGs are active+clean
2. Remove OSD (Graceful)
Mark OSD out (starts rebalancing)
ceph osd out osd.5
Wait for rebalancing
while ! ceph osd safe-to-destroy osd.5; do
echo "Waiting for safe-to-destroy..."
sleep 30
done
Stop and remove
ceph orch daemon rm osd.5
ceph osd purge osd.5 --yes-i-really-mean-it
3. Replace Failed Disk
Identify failed OSD
ceph osd tree | grep down
ceph health detail
Remove failed OSD
ceph osd out osd.3
ceph osd purge osd.3 --yes-i-really-mean-it
Replace disk physically, then add new OSD
ceph orch daemon add osd ceph-node2:/dev/sdc
4. Maintenance Window
Set noout flag (prevent rebalancing during maintenance)
ceph osd set noout
Perform maintenance...
Restart services, update firmware, etc.
sudo systemctl restart ceph-osd@3Unset flag after maintenance
ceph osd unset noout
5. Upgrade Ceph
Check current version
ceph versions
Set container image for upgrade
ceph orch upgrade start --image quay.io/ceph/ceph:v18.2.2
Monitor upgrade progress
ceph orch upgrade status
6. Backup Strategies
RBD snapshots
rbd snap create rbd-pool/myimage@snap1
rbd snap ls rbd-pool/myimage
Export snapshotrbd export rbd-pool/myimage@snap1 /backup/myimage-snap1.img
Incremental export
rbd export-diff rbd-pool/myimage@snap1 --from-snap snap0 /backup/myimage-diff.img
CephFS snapshots
mkdir /mnt/cephfs/.snap/daily-$(date +%Y%m%d)7. Monitoring Alerts
Prometheus alerting rules for Ceph
groups:
- name: ceph
rules:
- alert: CephHealthWarning
expr: ceph_health_status == 1
for: 5m
- alert: CephHealthError
expr: ceph_health_status == 2
for: 1m
- alert: CephOSDDown
expr: count(ceph_osd_up == 0) > 0
for: 5m
- alert: CephStorageFull
expr: ceph_cluster_total_used_bytes / ceph_cluster_total_bytes > 0.80
for: 10m
echo "Ceph scaling and maintenance documented"
FAQ คำถามที่พบบ่อย
Q: Ceph ต้องการ hardware อะไรบ้าง?
A: ขั้นต่ำสำหรับ production 3 nodes แต่ละ node ต้องมี CPU 4+ cores (แนะนำ 1 core ต่อ OSD), RAM 4GB base + 5GB ต่อ OSD (เช่น 6 OSDs ต้อง 34GB), 1 SSD/NVMe ต่อ OSD สำหรับ data (หรือ HDD กับ NVMe WAL/DB), network 10GbE ขั้นต่ำ (25GbE สำหรับ NVMe clusters) SSD สำหรับ MON และ MGR (ไม่ต้องใหญ่ 50-100GB พอ) สำหรับ production จริงจัง แยก public network และ cluster network
Q: Replication 3 กับ Erasure Coding ต่างกันอย่างไร?
A: Replication 3 เก็บ data 3 copies ใช้ raw space 3 เท่า แต่ recovery เร็ว read performance ดี (อ่านจาก copy ไหนก็ได้) เหมาะสำหรับ hot data ที่ต้องการ low latency Erasure Coding (เช่น k=4, m=2) ใช้ raw space 1.5 เท่า ประหยัดกว่ามาก แต่ write latency สูงกว่า, recovery ช้ากว่า, ใช้ CPU มากกว่า เหมาะสำหรับ cold/archive data ที่ต้องการ capacity efficiency
Q: PG count ตั้งเท่าไหรดี?
A: ใช้สูตร (target_pgs_per_osd * total_osds * pool_pct) / replication_factor แล้ว round up เป็น power of 2 เช่น 18 OSDs, replication 3, pool ใช้ 80% ของ data = (100 * 18 * 0.8) / 3 = 480 ปัดเป็น 512 PGs ต่ำกว่า 100 PGs per OSD จะเสีย performance สูงกว่า 200 PGs per OSD จะใช้ memory มาก Ceph Reef+ มี pg_autoscaler ที่ adjust อัตโนมัติ แนะนำเปิดใช้
Q: Ceph เหมาะกับ workload ประเภทไหน?
A: เหมาะมากสำหรับ object storage (S3 compatible) ใช้แทน MinIO สำหรับ large scale, block storage สำหรับ VMs (Proxmox, OpenStack), Kubernetes persistent volumes (Rook-Ceph), backup storage และ data lake ไม่เหมาะสำหรับ workloads ที่ต้องการ ultra-low latency (ใช้ local NVMe แทน), small clusters น้อยกว่า 3 nodes, single-tenant database ที่ต้องการ consistent latency